Embarking on the journey of herb gardening can be one of the most rewarding experiences for both novices and seasoned garden enthusiasts. The beauty of cultivating your own herbs lies not only in the aromatic scents and fresh flavors they bring to your kitchen but also in the satisfaction of nurturing life from soil to sprout. In “10 Budget-Friendly Herb Garden Ideas,” we invite you to explore creative and cost-effective ways to transform even the smallest spaces into lush, green sanctuaries.
Whether you’re just starting out or have been tending to gardens for years, this guide is brimming with insights designed to inspire and empower. With each idea, you’ll discover practical tips that cater to all skill levels, ensuring that your herb garden thrives without putting a strain on your wallet. Imagine the joy of snipping fresh basil for your pasta or mint for your tea, knowing that you grew it yourself through savvy, sustainable practices.
Dive into these budget-friendly ideas and watch your confidence blossom alongside your plants. Equipped with this knowledge, you’ll soon be enjoying the vibrant flavors and therapeutic benefits of your very own herb garden. Let’s dig in and cultivate a space that reflects both your creativity and your commitment to gardening!
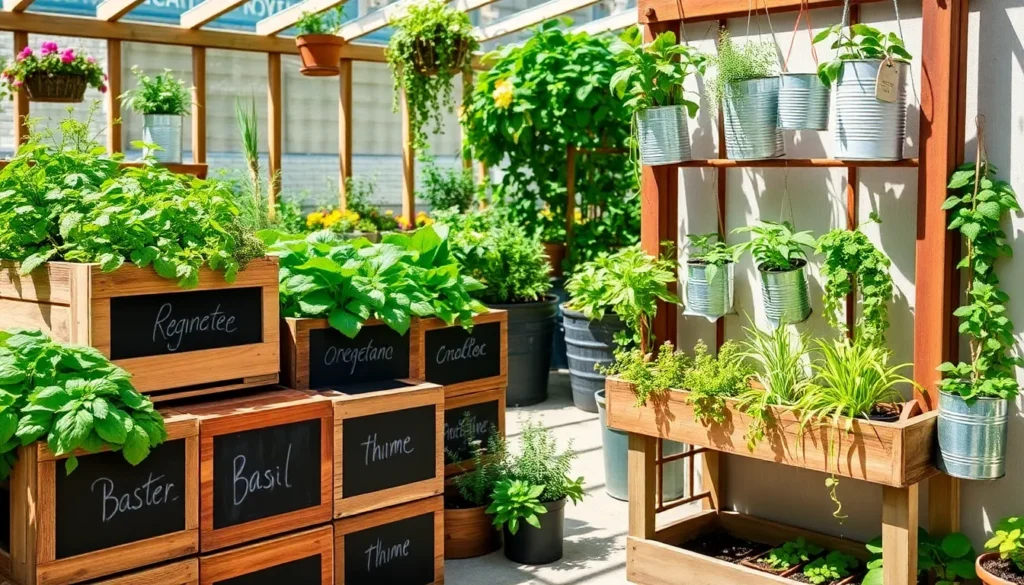
Reuse Containers for Planting
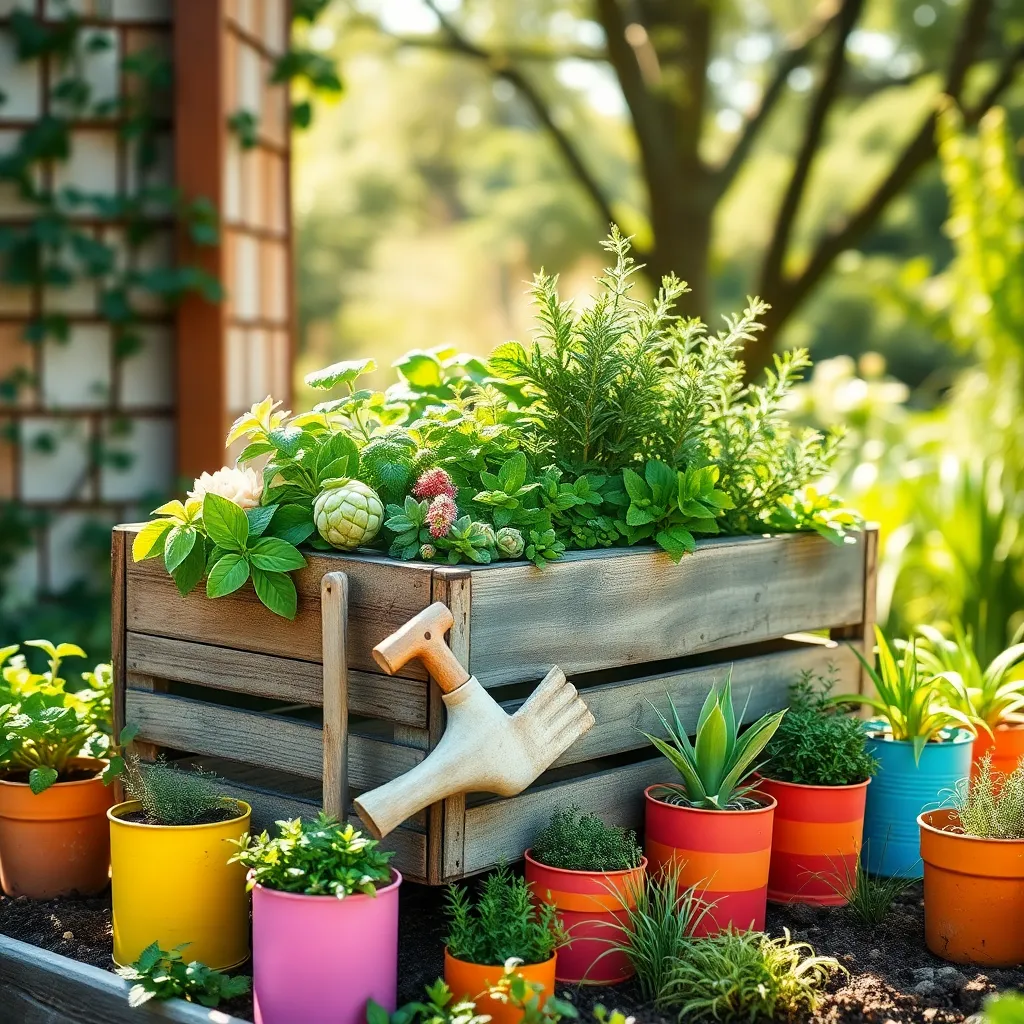
Consider reusing containers you already have at home to create a budget-friendly herb garden. Items like old teapots, wooden crates, or even tin cans can be given a second life as charming herb planters.
When selecting containers, ensure they have proper drainage to prevent waterlogging, which can harm herb roots. Drill a few holes in the bottom of containers if necessary, or layer the base with small stones to aid drainage.
Choose a high-quality potting mix to fill your containers, as herbs thrive in well-draining soil rich in nutrients. Most herbs prefer a soil pH between 6.0 and 7.0, so look for a potting mix that supports this range.
For those with more experience, consider creating a self-watering system by using double-walled containers or adding a water reservoir at the bottom. This can help maintain consistent moisture levels, particularly beneficial for herbs like basil and mint that prefer evenly moist soil.
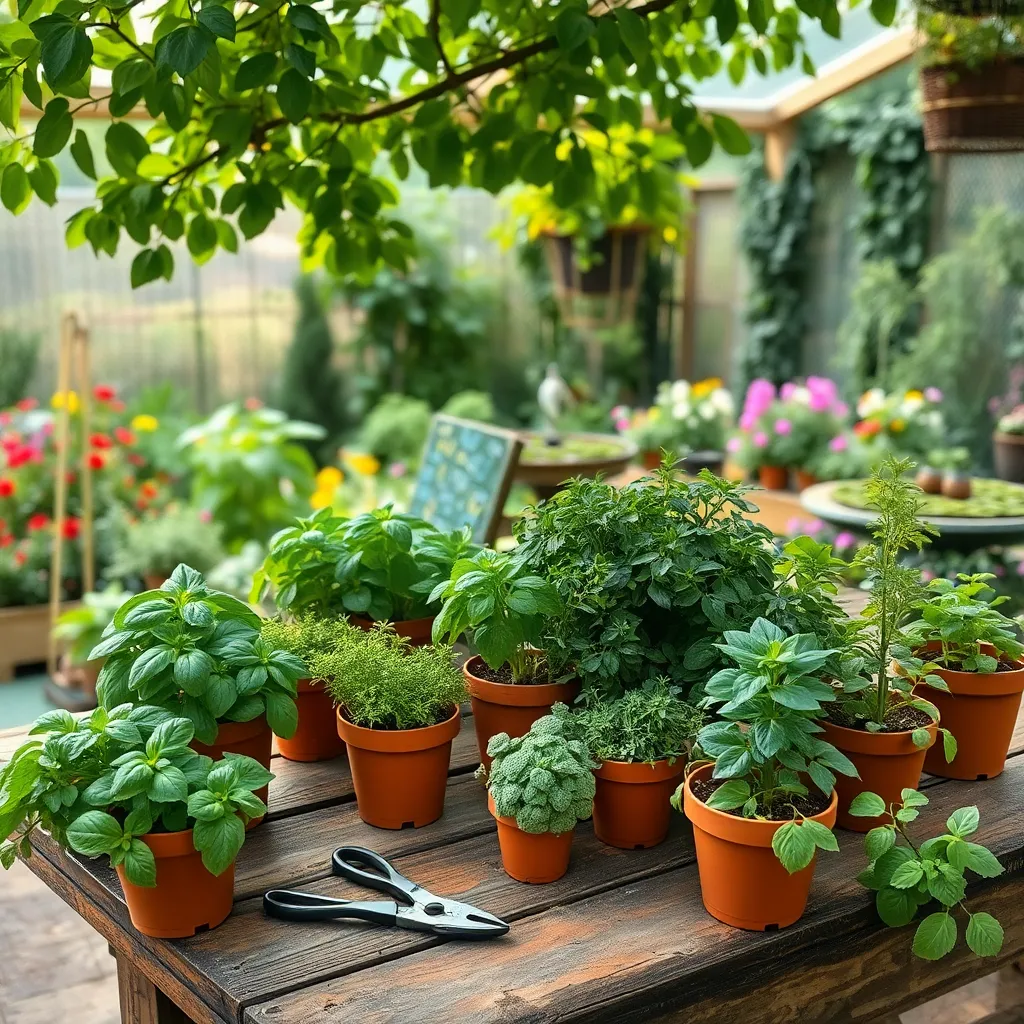
Start Herbs from Seed
Starting herbs from seed is an economical and rewarding way to cultivate your own garden. To begin, choose a good-quality seed starting mix, which is lighter and provides better drainage than regular potting soil.
Selecting the right containers is crucial for success; repurpose small pots or trays with drainage holes to prevent overwatering. Sow the seeds according to the instructions on the packet, as different herbs have varying depth requirements.
Herbs like basil and cilantro are excellent choices for beginners due to their rapid growth and ease of care. Place your containers in a sunny spot or under grow lights, ensuring they receive at least 6-8 hours of light daily.
Watering is another key aspect to consider; keep the soil consistently moist but not waterlogged. Once seedlings have developed their first set of true leaves, consider thinning them out to give the remaining plants enough space to grow strong and healthy.
For gardeners looking for a challenge, try starting herbs like rosemary or thyme from seed, which require patience. These herbs prefer well-drained soil and slightly drier conditions, so be careful not to overwater.
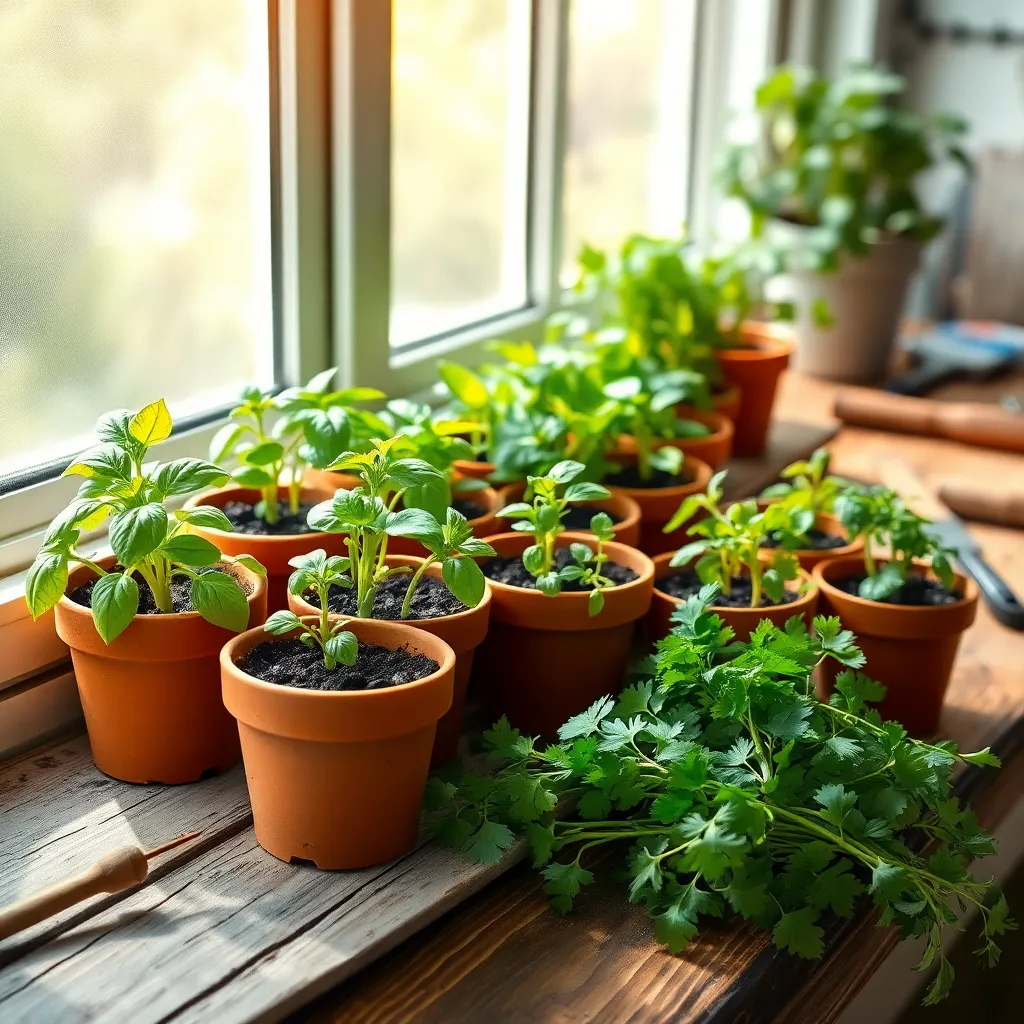
Create a Windowsill Herb Garden
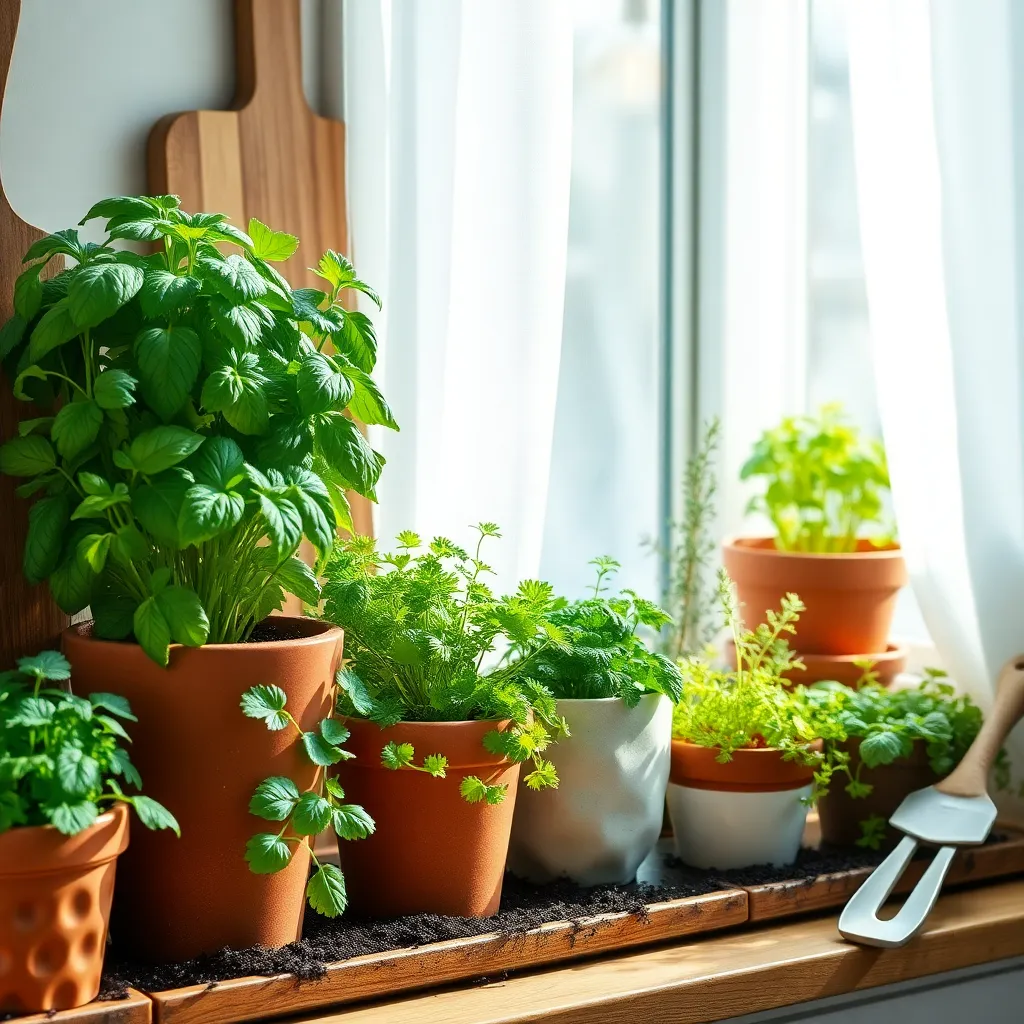
Transforming your windowsill into a thriving herb garden is an excellent way to enjoy fresh herbs year-round. Start by selecting herbs that thrive indoors, such as basil, parsley, and mint, which are forgiving and beginner-friendly.
Choose small pots with drainage holes to prevent waterlogging, and fill them with a high-quality potting mix. A mix specifically designed for herbs is ideal as it provides the necessary nutrients and drainage needed for healthy growth.
Position your herb pots on a windowsill that receives at least six hours of sunlight daily. If natural light is limited, consider using a small grow light to supplement and ensure the herbs receive enough light for optimal growth.
Water your herbs when the top inch of soil feels dry, being cautious not to overwater. For more advanced gardeners, try rotating your herbs every few days to encourage even growth and prevent them from leaning towards the light source.
Use Kitchen Scraps for Compost
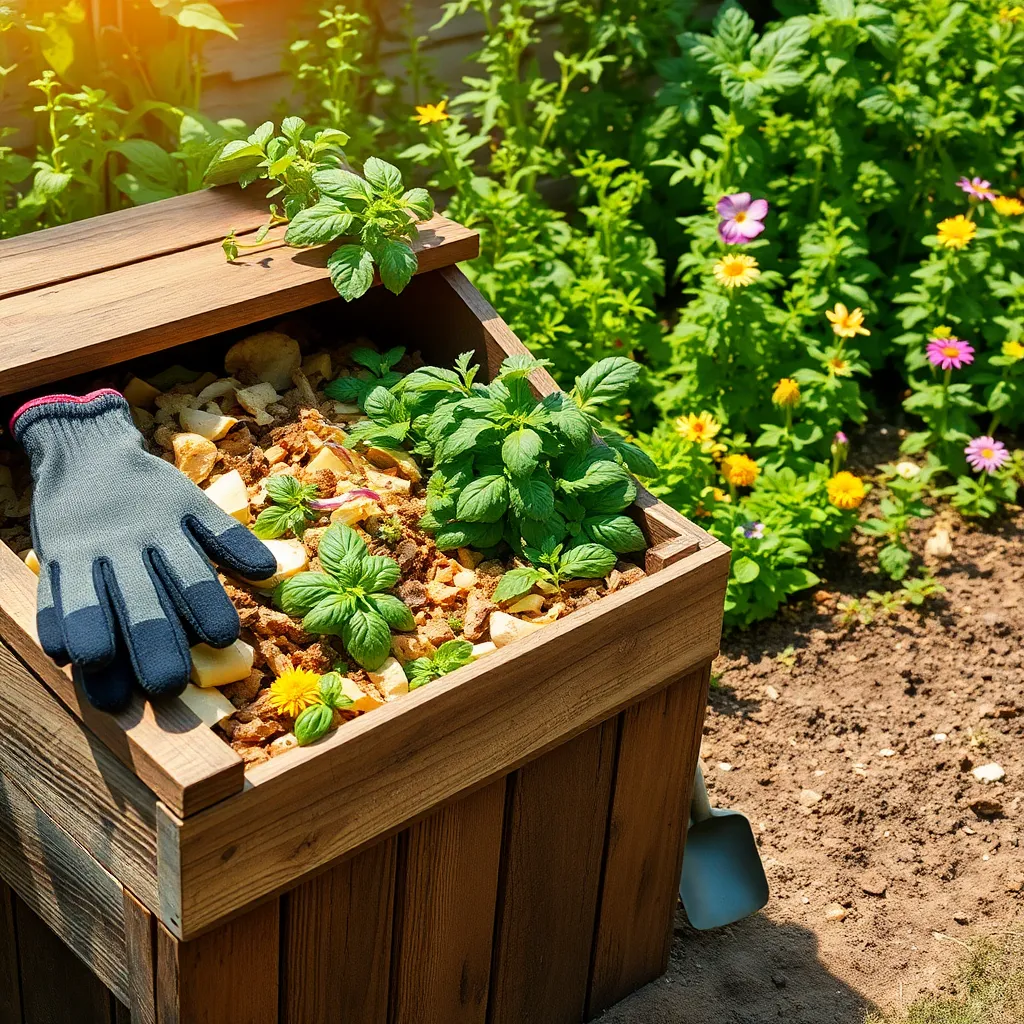
Transforming your kitchen scraps into compost is an excellent way to enrich your herb garden soil without spending a dime. Begin by collecting vegetable peels, fruit scraps, coffee grounds, and eggshells in a dedicated compost bin.
Layer these scraps with brown materials like dried leaves or shredded paper to balance the carbon-to-nitrogen ratio. Turn the compost pile regularly to enhance aeration and speed up the decomposition process, which usually takes a few months.
Once your compost has turned into a dark, crumbly material, it’s ready to enrich your herb garden. Apply a thin layer of compost to the top of your soil, ensuring it’s mixed in well to provide your herbs with essential nutrients.
For beginner gardeners, using compost can significantly improve soil structure, aiding in better water retention and root growth. Experienced gardeners can also use compost tea, a liquid extract made from compost, to give their herbs an additional nutrient boost during the growing season.
Harvest Regularly to Promote Growth
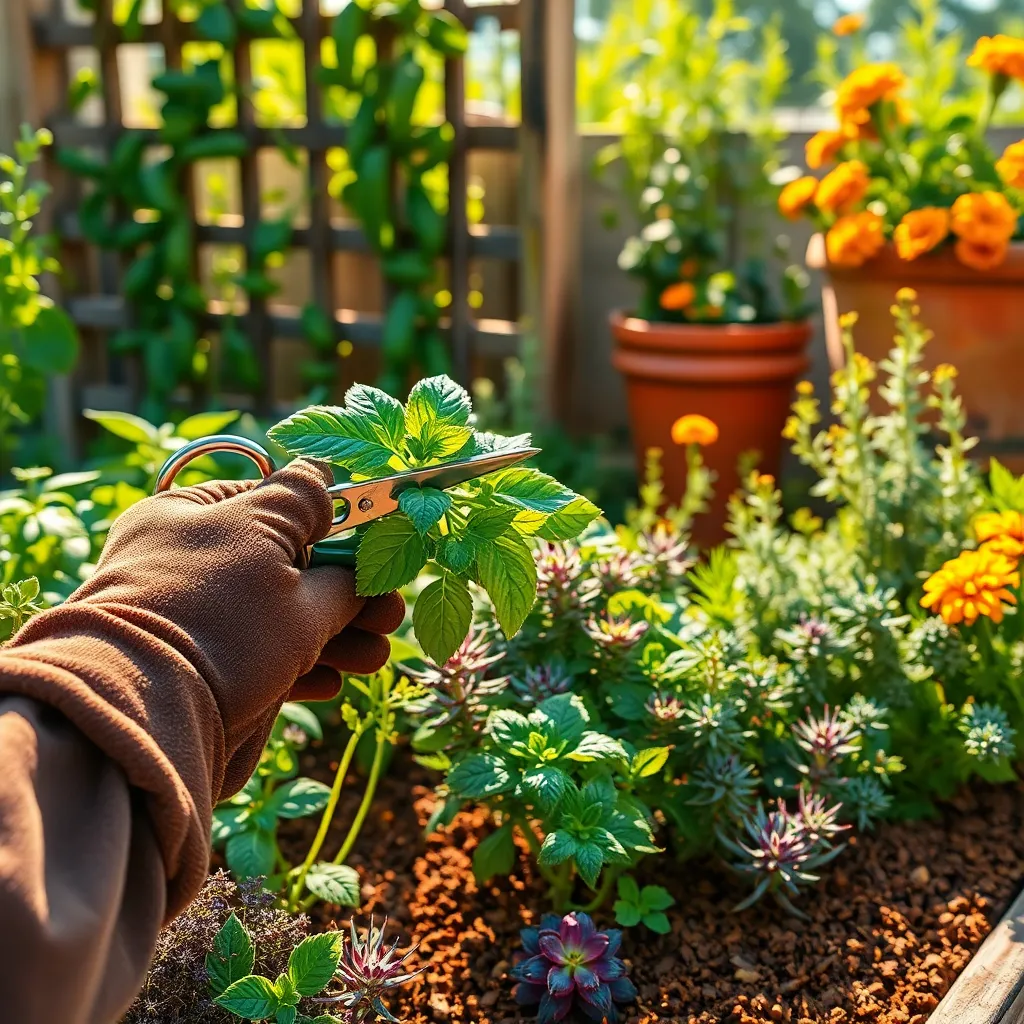
Harvesting herbs regularly is a key technique to encourage vigorous growth and maintain plant health. By cutting back your herbs, you prevent them from becoming leggy and promote a bushier appearance, which is especially beneficial for plants like basil, mint, and oregano.
To maximize growth, use sharp scissors or pruning shears to make clean cuts above a leaf node. This practice encourages the plant to branch out just below the cut, resulting in a fuller, more productive herb plant.
For best results, aim to harvest in the morning after the dew has dried, as this is when the herbs are most flavorful. Take care not to harvest more than one-third of the plant at any time, ensuring that it can continue to photosynthesize and stay healthy.
In addition to promoting growth, regular harvesting can help prevent flowering, which often causes herbs to develop a bitter taste. If your herbs do start to flower, simply pinch off the flower buds to redirect the plant’s energy back into foliage production.
Group Herbs with Similar Needs
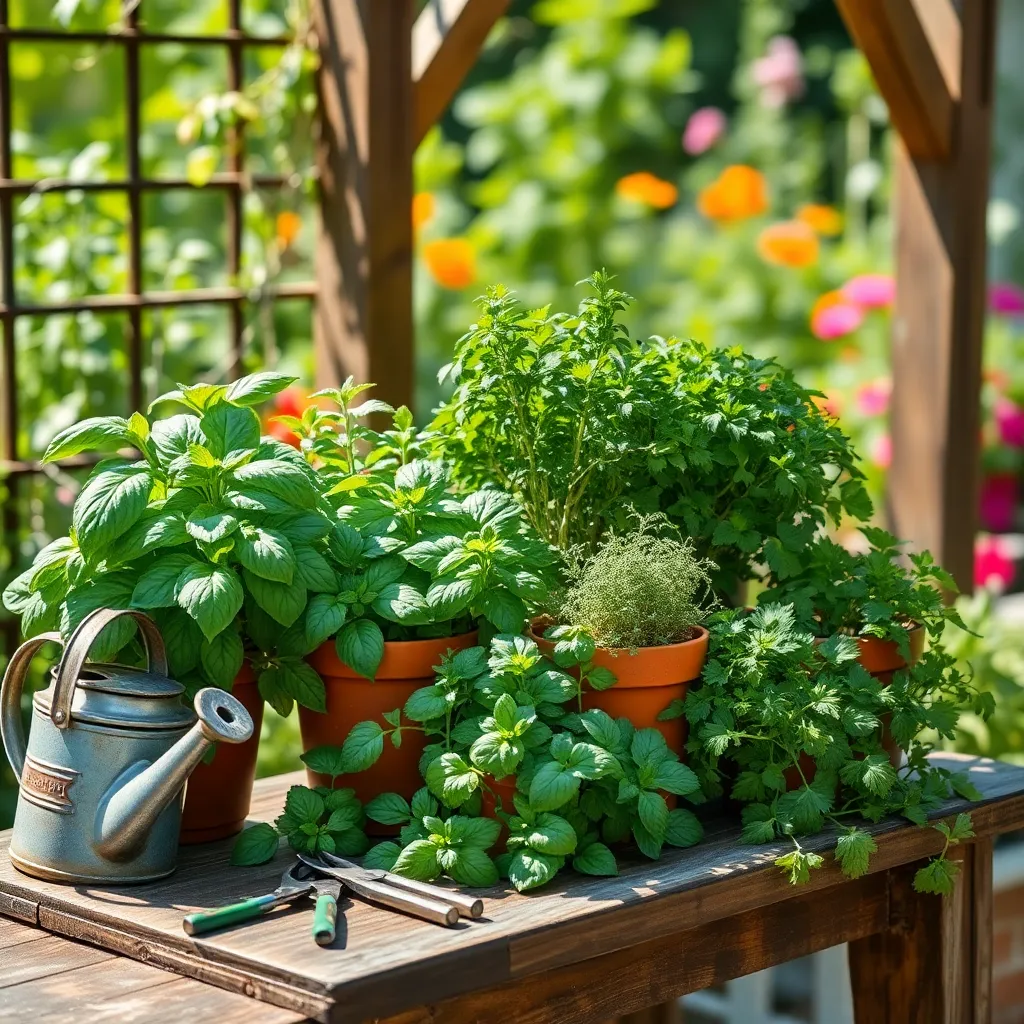
Grouping herbs with similar needs can simplify your gardening routine and ensure healthier plants. For instance, many Mediterranean herbs like rosemary, thyme, and oregano thrive in well-drained soil and require minimal watering.
Begin by assessing the sunlight requirements of your herbs, as this is crucial for their growth. Most herbs prefer full sun, but plants like mint and cilantro can tolerate partial shade, making them versatile options for less sunny spots.
Soil type is another key consideration when grouping herbs. Use a sandy or loamy soil mix for herbs that prefer drier conditions, while a richer, more moisture-retentive soil is ideal for basil and parsley.
For advanced gardeners, consider creating microclimates within your herb garden by strategically placing taller plants to provide shade for those that need it. This technique not only maximizes space but also allows you to grow a diverse range of herbs effectively.
Make DIY Herb Markers
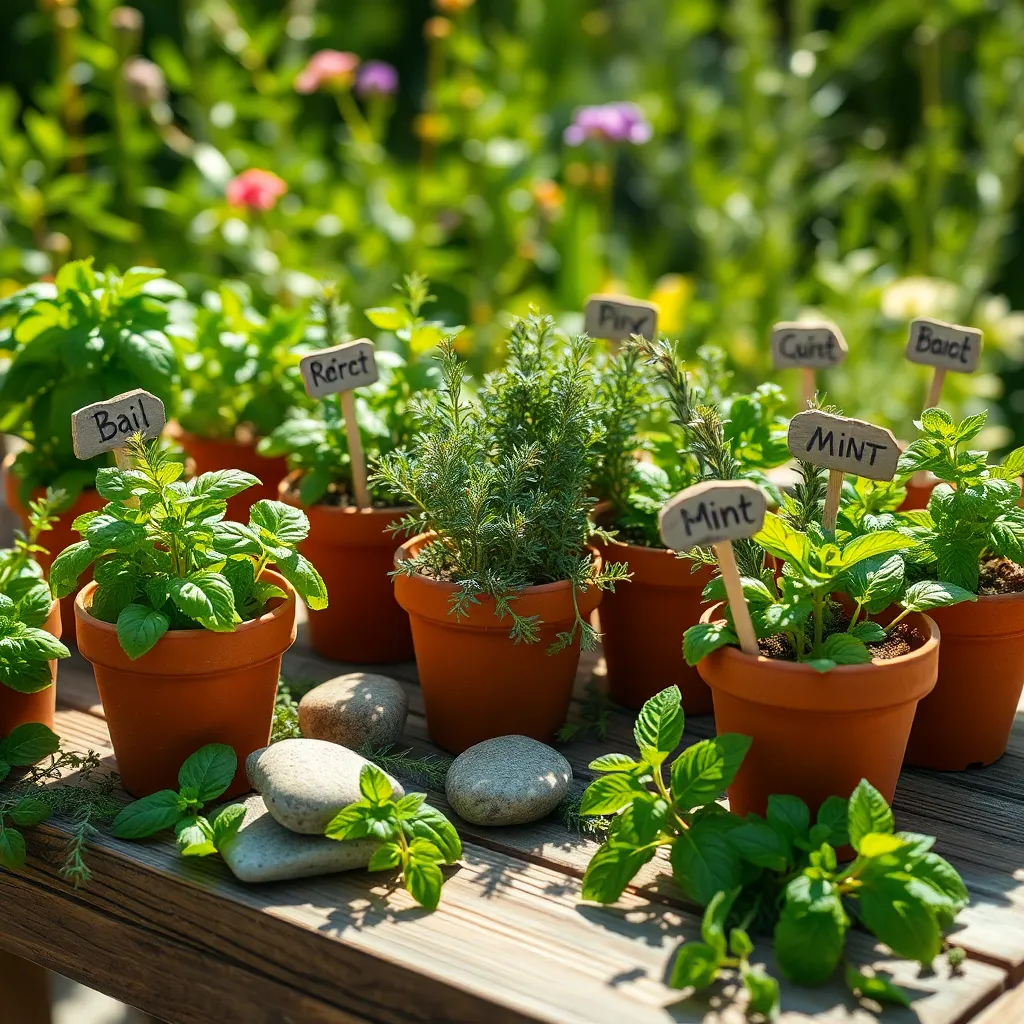
Creating DIY herb markers is not only a fun project but also a practical way to keep your herb garden organized. Using materials such as stones, wooden spoons, or popsicle sticks, you can craft markers that are both functional and charming.
Begin by gathering smooth stones or flat rocks from your garden or a local park. Use a waterproof marker or paint to write the name of each herb on the stones, ensuring the labels are easily visible even from a distance.
Wooden spoons make excellent herb markers, especially for a rustic touch. Simply paint the handle with outdoor paint, write the herb name on the spoon head, and seal it with a waterproof varnish to protect it from the elements.
For a more creative approach, consider using upcycled materials like old tiles or broken terra cotta pots. These can be painted and labeled, providing a unique and eco-friendly option for your garden.
Install a Vertical Herb Planter
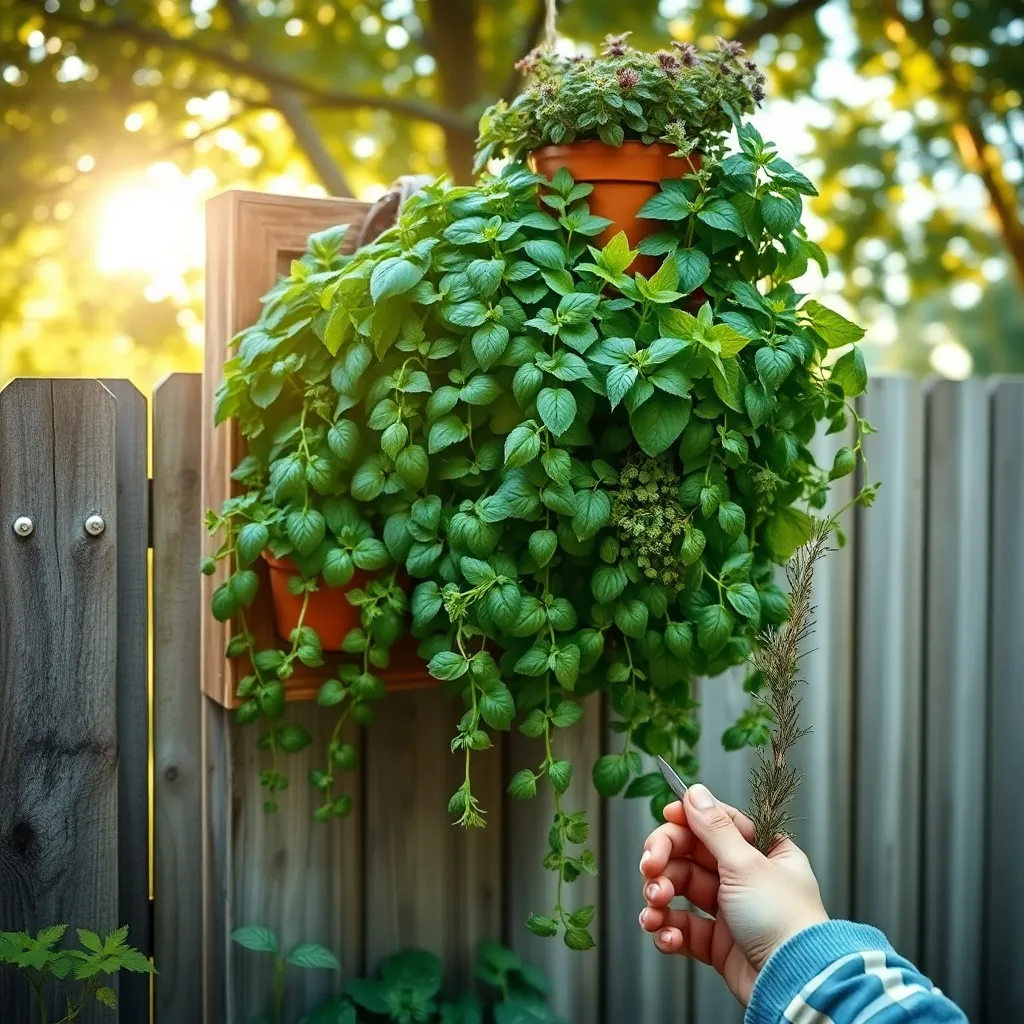
Transform any small space into a lush oasis by installing a vertical herb planter. This method maximizes your growing area and adds a decorative element to your garden or kitchen.
Begin by selecting a sturdy wall or fence that receives at least six hours of sunlight daily. Herbs like basil, rosemary, and thyme thrive in sunny conditions, making them excellent choices for vertical gardens.
Choose a vertical planter with individual pockets or shelves to allow each herb its own space. Ensure the planter has good drainage to prevent root rot, which can be a common issue in vertical setups.
Fill each pocket with a lightweight potting mix that retains moisture but drains well. Watering should be done regularly, keeping the soil consistently moist but not soggy, especially in the hotter months.
For a more advanced approach, consider integrating a drip irrigation system to automate watering. This not only saves time but ensures even moisture distribution across all plants.
Regularly prune your herbs to encourage bushier growth and prevent them from becoming leggy. Harvesting frequently will also stimulate new growth, keeping your vertical garden lush and productive.
Repurpose Old Furniture as Planters
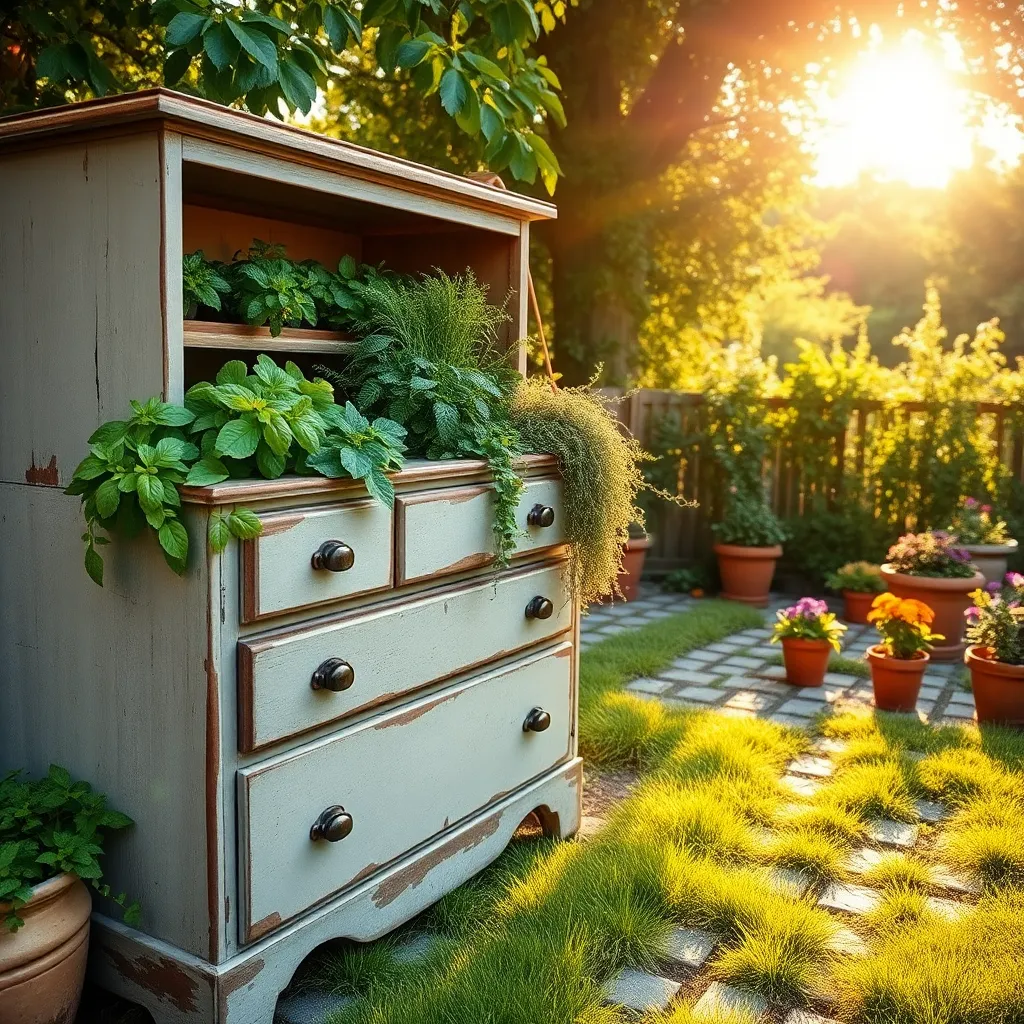
Repurposing old furniture as planters is a creative and sustainable way to expand your herb garden without breaking the bank. Begin by selecting sturdy pieces like dressers, drawers, or even chairs that can hold soil and plants securely.
Before converting furniture into planters, ensure it can withstand outdoor conditions. Consider applying a weather-resistant sealant to protect the wood or metal from moisture and prevent rot.
Drill drainage holes in the bottom of your furniture pieces to prevent waterlogging, which can harm herbs. Position a layer of small stones or broken pottery at the base before adding soil, which aids drainage.
For soil, use a high-quality potting mix blended with compost to provide your herbs with essential nutrients. Most herbs thrive in well-draining soil, so avoid using garden soil, which can compact and hinder root growth.
Place your furniture planters in a location that receives adequate sunlight, as most herbs like basil, rosemary, and thyme require at least 6-8 hours of direct sunlight daily. Water your herbs regularly, but ensure the soil dries out slightly between waterings to prevent root rot.
Advanced gardeners might consider incorporating a self-watering system by adding a water reservoir at the bottom of drawers or cabinets. This can help maintain consistent moisture levels, especially during hot summer months when herbs can dry out quickly.
Swap Cuttings with Friends
Engaging in a cutting swap with friends can significantly expand your herb garden without spending a dime. By exchanging cuttings, you’ll gain access to a wider variety of plants and share your own treasured herbs with others, enhancing community bonds and biodiversity.
To start, identify which herbs you have that are ready for propagation. Good candidates for cuttings often include rosemary, mint, and thyme, which root easily in water or soil.
When taking cuttings, use sharp, clean scissors to cut a 4-6 inch piece from a healthy, non-flowering stem. Remove the leaves from the bottom half and dip the cut end in rooting hormone to increase the chances of successful growth.
Place your cuttings in a glass of water or a pot with moist potting mix, ensuring they receive indirect sunlight. Change the water every few days if you’re opting for water propagation, or keep the soil consistently moist but not soggy if rooting directly in soil.
Once roots have developed, usually after a few weeks, your new plants are ready to be transferred to their permanent homes. Choose a well-draining potting mix and pots with drainage holes to prevent waterlogging, which is crucial for healthy root development.
For a more advanced technique, consider trying air layering on woody herbs like rosemary. This method involves wounding the stem and wrapping it in moist sphagnum moss until roots form, allowing you to create a new plant directly from the parent without detaching it initially.
Conclusion: Growing Success with These Plants
In exploring the “10 Budget-Friendly Herb Garden Ideas,” we uncovered a treasure trove of concepts that extend beyond gardening and enrich our relationships. From nurturing patience as herbs grow, to fostering collaboration in shared gardening projects, these ideas invite us to cultivate more than just plants. We delved into the importance of communication—sharing tasks and celebrating small wins, along with creativity, adaptability, and the joy of shared experiences. Each concept encourages mindfulness, allowing us to savor the process and strengthen our bonds.
To start your journey, pick one herb to plant together today, creating a shared goal that roots your relationship in growth and mutual achievement. As you embark on this green adventure, remember to save or bookmark this article as your go-to guide for nurturing both your garden and your connection.
Looking ahead, these small but impactful steps can blossom into a thriving relationship garden, rich with understanding, love, and resilience. By embracing these ideas, you’re planting the seeds for a successful and enduring partnership. Let’s grow together!


