Author: John

  • 10 Easy Winter Gardening Essentials

    10 Easy Winter Gardening Essentials

    Winter may seem like a dormant season for gardens, but it offers unique opportunities for growth and maintenance. Whether you’re a novice gardener or a seasoned green thumb, understanding the essentials of winter gardening can transform your outdoor space into a flourishing haven, defying the cold and bare season. In this article, we’ll unravel the secrets to maintaining a vibrant garden throughout winter, ensuring your precious plants not only survive but thrive.

    As the chill sets in, it’s crucial to adapt your gardening practices to protect your plants from frost and icy winds. You’ll discover ten easy yet effective winter gardening essentials that will empower you to tackle the season’s challenges with confidence. From choosing the right mulch to understanding the benefits of winter pruning, we’ll guide you through each step with practical advice and heartening encouragement.

    In the coming sections, we’ll explore simple techniques and tools that can make winter gardening not just a task, but a joy. Prepare to uncover tips that cater to all skill levels, ensuring everyone finds something valuable to enhance their gardening journey. By the end of this article, you’ll be equipped with the knowledge and inspiration needed to keep your garden lively and resilient, even in the depth of winter.

    Choosing Winter-Resilient Plants

    Choosing Winter-Resilient Plants

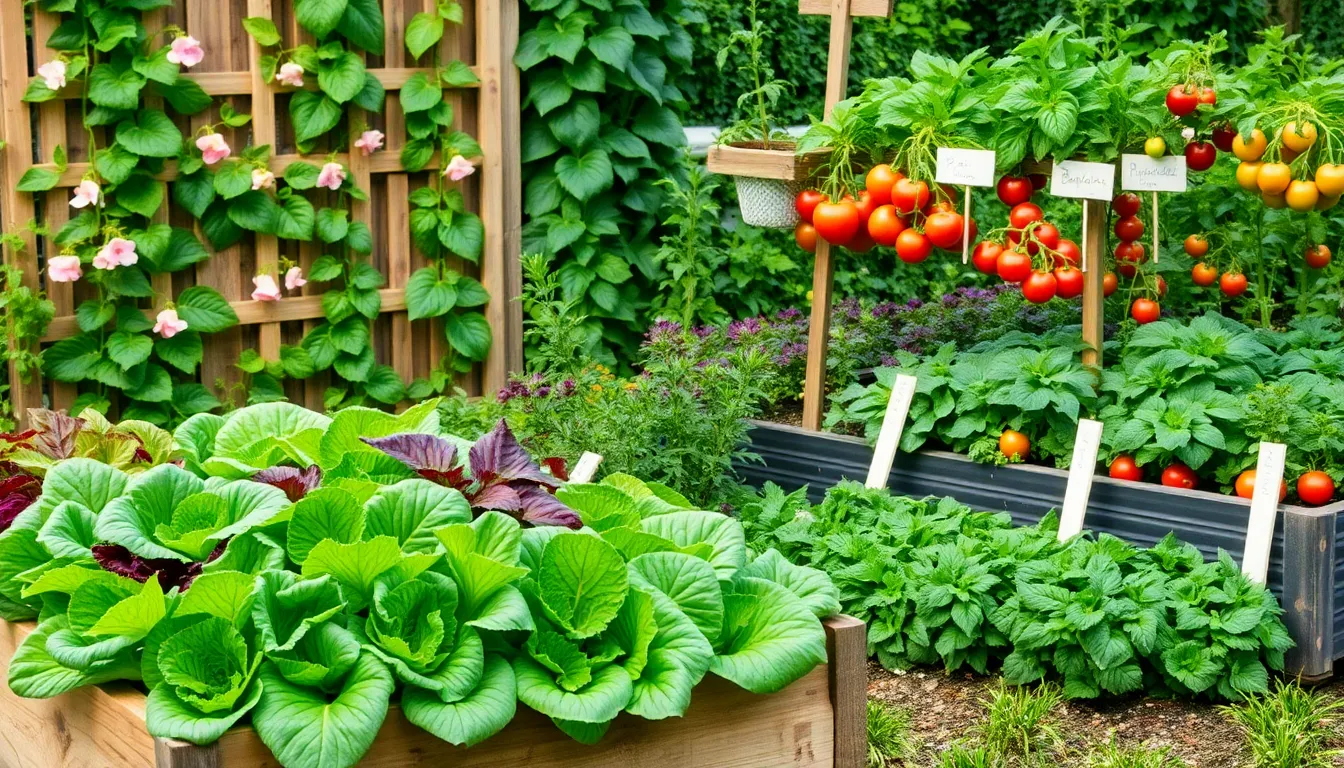
    Winter gardening can be rewarding when you choose plants that thrive in colder temperatures. Perennials like hellebores and evergreen shrubs are excellent choices for adding color and texture to your winter garden.

    Consider mixing in some winter vegetables such as kale and Brussels sprouts, which are hardy and thrive in cold conditions. These plants not only withstand frost but also improve in flavor after a light freeze.

    Before planting, check your USDA Hardiness Zone to ensure your selections will survive the local winter climate. It’s also wise to improve soil drainage by adding organic matter, which helps prevent root rot during wet winter months.

    For gardeners looking to experiment, try incorporating winter-blooming bulbs like snowdrops and crocuses. These bulbs should be planted in well-drained soil during the fall, ensuring a beautiful burst of color early in the year.

    Frost Protection Techniques

    Frost Protection Techniques

    Frost can be a formidable adversary in the winter garden, but with the right techniques, you can minimize its impact. Covering plants with lightweight fabrics, such as frost cloth or old sheets, provides a protective layer that traps heat from the ground overnight. This simple step can be crucial for tender plants, especially in regions where unexpected frosts occur.

    To further protect your plants, consider using mulch as an insulating barrier. Applying a thick layer of straw, leaves, or wood chips around the base of your plants helps to moderate soil temperature and retain moisture. This method is particularly effective for root vegetables and perennials that are susceptible to freezing.

    For those with tender or young plants, cloches can offer additional protection. These small, portable greenhouses made of glass or plastic can be placed over individual plants, creating a warm microenvironment. Cloches are especially useful for extending the growing season of cold-sensitive herbs and greens.

    Advanced gardeners may opt for creating windbreaks to shield plants from harsh winter winds, which can exacerbate frost damage. Strategically placing tall structures, such as fences or hedges, around your garden can reduce wind exposure and help maintain a more stable temperature for your plants. This technique also aids in preventing soil erosion and drying of the plant leaves.

    Soil Preparation for Cold Months

    Soil Preparation for Cold Months

    As winter approaches, preparing your soil is crucial to ensure your garden thrives when temperatures drop. Start by clearing away dead plants and debris to prevent pests and diseases from overwintering in your garden beds.

    Next, consider adding a layer of organic matter such as compost or well-rotted manure. This enriches the soil with nutrients and improves its structure, making it more resilient during the cold months.

    Mulching is another essential step in soil preparation for winter. Apply a thick layer of mulch, such as straw or shredded leaves, to insulate the soil and protect plant roots from freezing temperatures.

    For those looking to take an advanced step, consider planting cover crops like clover or winter rye. These plants will fix nitrogen in the soil while preventing erosion, offering a head start for your spring planting.

    Mulching for Winter Warmth

    Mulching for Winter Warmth

    Mulching is an essential winter gardening practice that helps insulate your plants against the cold. By applying a generous layer of mulch, you can protect plant roots from freezing temperatures and prevent soil erosion.

    Choose organic materials like straw, shredded leaves, or wood chips for your mulch, as these will decompose over time and enrich the soil. Apply a layer approximately 2 to 4 inches thick around the base of your plants, taking care not to cover the crown to prevent rot.

    For beginner gardeners, it’s important to understand that the timing of mulching is crucial. Wait until the ground has slightly frozen before applying mulch to ensure that pests seeking warmth won’t burrow into your garden.

    Advanced gardeners might consider using a heavier mulch layer for plants that are particularly sensitive to cold, such as tender perennials. Additionally, using a mix of mulch types can provide both immediate insulation and long-term soil improvement.

    Efficient Winter Watering Tips

    Efficient Winter Watering Tips

    Winter watering is crucial for keeping your garden thriving during colder months. It’s essential to water your plants on warmer days when the soil isn’t frozen to allow absorption.

    Consider the specific needs of your plants to determine optimal watering frequency. Drought-tolerant species will require less water, while evergreen plants may need more attention to prevent dehydration.

    Watering in the morning is ideal as it gives plants time to absorb moisture before temperatures drop at night. Avoid watering late in the day to prevent water from freezing on plant surfaces, which can cause damage.

    It’s important to check the moisture level of the soil regularly. You can do this by inserting your finger about an inch into the soil; if it feels dry, it’s time to water.

    For advanced gardeners, using a soil moisture meter can provide more precise data on when to water. This tool helps ensure that you are not overwatering, which can lead to root rot, especially in clay soils that retain moisture longer.

    For container plants, ensure drainage is adequate to prevent water from pooling and freezing. Elevating pots off the ground slightly can help with drainage and prevent pots from cracking in freezing conditions.

    Pruning Practices for Dormant Plants

    Pruning Practices for Dormant Plants

    Winter is the perfect time to focus on pruning your dormant plants, as this encourages healthy growth in the spring. Pruning during dormancy minimizes stress on the plant and reduces the risk of disease. Start by identifying which branches need cutting; look for dead, diseased, or crossing branches. This is a crucial step to maintain the plant’s shape and ensure air circulation.

    When pruning, use clean, sharp tools to make precise cuts, which helps prevent damage to the plant. It’s important to cut at a slight angle, about a quarter-inch above a bud, to promote water runoff and prevent rot. For beginners, focus on simple tasks like removing dead wood and shaping the plant. Experienced gardeners can explore more advanced techniques such as espalier or coppicing for certain species.

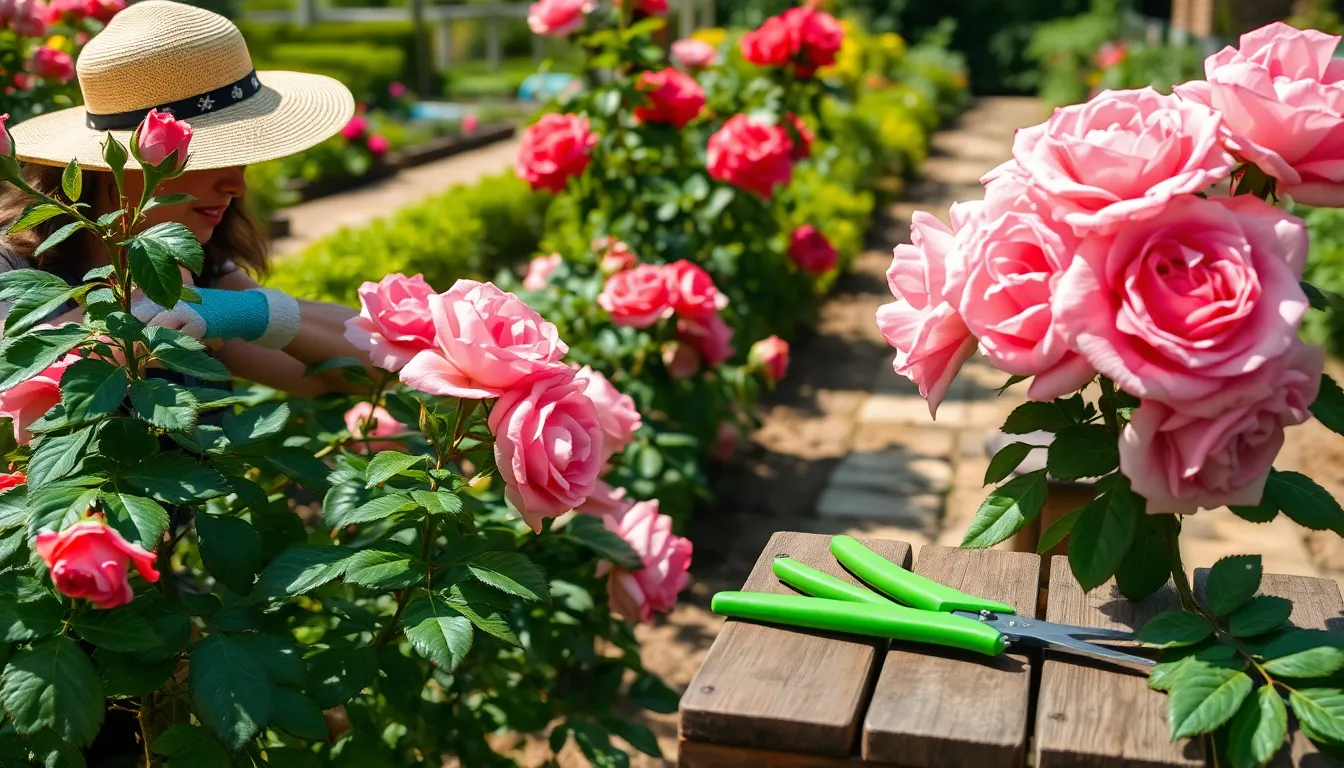
    Different plants have varying pruning needs, so research your specific species beforehand. For example, fruit trees like apple and pear benefit from dormant pruning to enhance fruit production. Roses also respond well to winter pruning, encouraging vibrant blooms in the growing season. Always follow the specific pruning schedule and technique recommended for each plant to ensure the best results.

    Indoor Gardening for Winter Greens

    Indoor Gardening for Winter Greens

    Winter doesn’t have to mean the end of fresh greens; you can successfully grow them indoors with the right setup. Start by selecting easy-to-grow varieties like lettuce, spinach, and kale, which thrive well in the controlled environment of your home.

    Choose containers with good drainage and fill them with a light, well-draining potting mix to prevent root rot. Position your containers near a south-facing window or provide supplemental lighting with grow lights for at least 12-14 hours a day.

    Water your indoor greens consistently, keeping the soil moist but not waterlogged, and ensure proper humidity levels to mimic outdoor conditions. Misting your plants occasionally can help maintain humidity, especially in homes with dry winter air.

    For those looking to enhance their indoor garden, consider using a hydroponic system to grow your winter greens. This advanced technique allows for faster growth and higher yields by providing nutrients directly to the roots in a water-based solution.

    Utilizing Cold Frames and Cloches

    Utilizing Cold Frames and Cloches

    Cold frames and cloches are fantastic tools for extending your gardening season into the colder months. They provide a microclimate that protects plants from harsh winter conditions, enabling you to grow a wider variety of crops.

    Using a cold frame is a straightforward way to start seedlings earlier in the spring or keep vegetables like lettuce and spinach growing through the winter. Ensure your cold frame is positioned in a sunny spot with well-drained soil to maximize sunlight and prevent waterlogging.

    A cloche, which can be made from glass or plastic, offers individual plant protection and is perfect for shielding tender plants from frost. When placing a cloche, be sure to ventilate it on sunny days to prevent overheating and encourage healthy air circulation.

    For those looking to optimize their cold frame, consider adding a layer of straw or leaves around the base for additional insulation. Advanced gardeners might also experiment with using a heat-absorbing material like bricks or stones inside the frame to retain warmth overnight.

    Composting in Cold Weather

    Composting in Cold Weather

    As temperatures drop, composting may seem challenging, but it’s entirely possible with a few adjustments. Insulating your compost pile with straw bales or a tarp can help maintain warmth and keep the microbial activity ongoing.

    Another approach is to increase the size of your compost pile, as larger piles retain heat better. By adding carbon-rich materials such as fallen leaves, you provide the necessary fuel to keep the composting process active even in colder months.

    It’s crucial to maintain a proper balance of green and brown materials to ensure decomposition continues smoothly. Green materials like kitchen scraps add nitrogen, while brown materials like dry leaves supply carbon.

    For those already familiar with composting, consider turning your pile regularly, even in winter. This aeration helps combat compaction and maintain oxygen levels, which are vital for microbial survival and activity.

    Planning for Spring Success

    Planning for Spring Success

    As winter settles in, it’s the perfect time to start planning for a successful spring garden. Begin by considering the types of plants you wish to grow and the specific conditions each requires, such as sunlight, soil type, and water needs.

    To ensure a thriving garden, test your soil to determine its pH and nutrient levels. This will guide you in selecting the right amendments, such as lime to raise pH or sulfur to lower it, ensuring your soil is optimal for the plants you plan to cultivate.

    Creating a detailed layout of your garden can help maximize space and sunlight exposure. Place taller plants, like tomatoes or sunflowers, on the north side of your garden bed to avoid shading smaller plants, ensuring each receives adequate sunlight.

    Consider starting seeds indoors during the latter part of winter to get a head start on the growing season. Using a seed-starting mix and maintaining a consistent temperature of around 70°F (21°C) will promote healthy germination.

    For those with more experience, try experimenting with succession planting to extend your harvest. By staggering planting times or choosing varieties with different maturity rates, you can enjoy a continuous supply of fresh produce throughout spring and into summer.

    Conclusion: Growing Success with These Plants

    As winter’s chill embraces us, nurturing your garden of relationships becomes essential. We’ve explored ten key concepts to keep your connections thriving even in the coldest months: cultivating patience, embracing empathy, prioritizing communication, setting healthy boundaries, sharing warmth, fostering gratitude, nurturing mutual respect, practicing forgiveness, investing time, and celebrating small victories. Each concept acts as a vital tool in your relationship toolkit, ensuring that your bonds remain strong and resilient.

    To take immediate action, choose one concept that resonates with you and incorporate it into your daily interactions. Whether it’s a heartfelt conversation or a small gesture of appreciation, these actions can sow seeds of warmth and understanding in your relationships.

    Remember, meaningful relationships are like a well-tended garden—they require consistent care and attention. Save this article as your go-to guide for nurturing your connections throughout the winter and beyond. By bookmarking this resource, you’ll have a ready reference to revisit and reinforce these valuable insights.

    As you embrace these concepts, envision a future where your relationships flourish with trust, joy, and mutual support. The effort you invest today will pave the way for enduring relationship success tomorrow. Let this winter be the season of growth and connection.

  • 6 Common Water-Saving Garden Ideas

    6 Common Water-Saving Garden Ideas

    Gardening is a joyful dance with nature, where every drop of water counts, especially in our ever-changing climate. Whether you’re a green-thumbed guru or planting your first seed, our guide to “6 Common Water-Saving Garden Ideas” is your ticket to creating a lush, thriving oasis without breaking the water bank. With these innovative and practical techniques, you’ll not only conserve water but also enhance the health and beauty of your garden, making every bloom a testament to your success.

    Imagine the satisfaction of nurturing a flourishing garden that thrives even during dry spells. This collection of tried-and-tested methods promises to equip you with the confidence and tools you need to transform your gardening practices. Dive in with enthusiasm and watch as your garden becomes not just a source of pride, but a model of sustainability and efficiency.

    Implement Drip Irrigation Systems

    Implement Drip Irrigation Systems

    Drip irrigation systems are an effective way to conserve water while ensuring your plants receive the hydration they need. By delivering water directly to the plant roots, these systems minimize evaporation and reduce water wastage.

    To start, you’ll need to select the right components, such as tubing and emitters, tailored to your garden’s layout. It’s crucial to plan the system so that water is evenly distributed to all plants, ensuring each one receives adequate moisture.

    Installation can be simple or complex, depending on your garden’s size and your experience level. For beginners, a basic kit that includes all necessary components can be a good starting point, while more experienced gardeners might prefer to customize their systems for efficiency.

    Once installed, you’ll need to monitor and adjust the system to match seasonal changes and plant growth. Check regularly for clogs or leaks in the tubing to maintain optimal water delivery and prevent system failure.

    • Ensure emitters are spaced appropriately for each plant’s watering needs.
    • Adjust watering schedules according to your climate and soil type—sandy soils may require more frequent watering than clay soils.
    • Test soil moisture levels periodically to avoid overwatering, which can lead to root rot.

    Mulch to Retain Soil Moisture

    Mulch to Retain Soil Moisture

    Mulching is a simple yet effective method to conserve soil moisture in your garden, providing both beginners and experienced gardeners with a practical water-saving solution. By applying a layer of mulch, such as shredded bark, straw, or compost, you can significantly reduce evaporation and keep your soil consistently moist.

    Choosing the right type of mulch is essential for optimal results. Organic mulches, like wood chips or leaf mold, not only retain moisture but also enrich the soil as they decompose, offering additional nutrients to your plants.

    For a straightforward application, spread mulch evenly across your garden beds, ensuring a depth of about 2 to 4 inches. This depth is crucial as it helps regulate soil temperature and suppresses weed growth, which competes with your plants for water.

    If you’re dealing with particularly dry climates or sandy soil, consider using a heavier mulch such as straw or bark chips, which can provide added insulation. Advanced gardeners might experiment with layering different types of mulch, combining textures to maximize moisture retention and soil health.

    Regularly check your mulch layer to ensure it hasn’t compacted, which can impede water penetration. Fluffing the mulch every few months can help maintain its effectiveness, allowing water to seep through to the roots more efficiently.

    Choose Drought-Resistant Plants

    Choose Drought-Resistant Plants

    After applying mulch to retain soil moisture, selecting drought-resistant plants is a smart strategy to conserve water. These plants are adapted to thrive in low-water conditions, making them ideal for water-conscious gardeners.

    Consider choosing native plants that are naturally equipped to handle dry spells. Native species often require less water and maintenance because they are well-suited to the local climate and soil conditions.

    For a vibrant garden, incorporate a mix of drought-tolerant perennials such as lavender, yarrow, and sedum. These plants not only withstand dry conditions but also add color and texture to your landscape.

    Advanced gardeners might explore xeriscaping, a landscaping technique that emphasizes water efficiency. This method involves grouping plants with similar water needs and using efficient irrigation systems, like drip irrigation, to target the roots directly.

    To ensure success, plant your drought-resistant varieties in well-draining soil, such as sandy or loamy soil types. Water new plants deeply but infrequently, allowing the soil to dry out between waterings to encourage deep root growth.

    Water Early to Reduce Evaporation

    Water Early to Reduce Evaporation

    Watering your garden in the early morning can significantly reduce water loss due to evaporation. This practice not only conserves water but also ensures that your plants receive the moisture they need when the sun’s rays are less intense.

    During the early hours, the cooler temperatures allow the soil to absorb water more effectively. This means that your plants will have access to the moisture throughout the day, promoting healthier growth and reducing stress on the plants.

    For beginners, setting a routine to water between 5 a.m. and 9 a.m. can make a noticeable difference. Consider using a timer on your irrigation system to automate this process, ensuring consistency and saving you time.

    Advanced gardeners might explore drip irrigation systems, which can be set to water at specific times to maximize efficiency. These systems deliver water directly to the roots, further minimizing evaporation and ensuring that every drop is used effectively.

    Harvest Rainwater for Garden Use

    Harvest Rainwater for Garden Use

    Harvesting rainwater is an excellent way to conserve water and ensure your garden thrives even during dry spells. Begin by setting up a simple rain barrel system to collect runoff from your roof, which can be used to water your garden during periods of low rainfall.

    Position your rain barrel under a downspout to maximize water collection, ensuring it has a secure lid to prevent debris and mosquitoes from contaminating the water. Install a spigot near the bottom of the barrel for easy access to the water, allowing you to attach a hose or fill a watering can directly.

    Regularly check your rain barrel for leaks and clean it out at least once a season to maintain water quality. In colder climates, consider disconnecting and storing the barrel during winter to prevent damage from freezing temperatures.

    For more advanced gardeners, consider connecting multiple barrels using a linking kit to increase your water storage capacity. This setup can be particularly beneficial if you have a large garden or if your area experiences long periods without rain.

    Group Plants with Similar Needs

    Group Plants with Similar Needs

    Grouping plants with similar needs is an effective strategy to conserve water in your garden. By doing so, you ensure that each plant receives the optimal amount of water, reducing waste and promoting healthy growth.

    Consider grouping plants based on their water requirements, such as drought-tolerant species together. This allows you to create distinct watering zones, making it easier to manage and maintain your garden efficiently.

    For instance, succulents and Mediterranean herbs like rosemary and lavender thrive with minimal watering. Plant them in well-drained soil to prevent root rot and enhance their drought resistance.

    To further optimize water use, ensure that sun-loving plants are grouped together and shaded plants are in another location. This ensures each group gets the right amount of sunlight and water, preventing overwatering in shaded areas.

    Advanced gardeners can employ a technique called “hydrozoning,” where plants with similar moisture needs are placed on the same irrigation line. This can significantly reduce water usage and ensure that each plant receives the precise amount of water it needs.

    Remember to regularly mulch around plant bases to retain soil moisture and suppress weeds. Organic mulches such as straw or wood chips can also improve soil conditions over time, benefiting your grouped plants.

    Conclusion: Growing Success with These Plants

    In nurturing a thriving relationship, just as in cultivating a water-saving garden, mindful strategies can yield abundant rewards. This article covered six essential concepts that parallel both endeavors: establishing open communication channels akin to drip irrigation, setting boundaries like strategic mulching, nurturing emotional intimacy as you would with companion planting, managing conflict akin to efficient watering, maintaining trust similar to soil conservation, and fostering shared goals like sustainable landscaping.

    As an immediate next step, consider identifying one area in your relationship that could benefit from these principles. Perhaps initiate a heartfelt conversation or set a new, shared goal to strengthen your bond.

    Remember, nurturing a relationship, like tending to a garden, requires consistent care and attention. Bookmark this article for future reference, ensuring you have these invaluable tips at your fingertips whenever you need them. By integrating these strategies, you pave the way for a flourishing relationship that stands the test of time.

    Embrace this journey with optimism; your relationship’s success is an ever-growing garden, promising beauty and fulfillment in the days to come. Let this be the beginning of a deeper, more connected partnership.

  • 13 Effective Organic Gardening Hacks

    13 Effective Organic Gardening Hacks

    Welcome to a delightful journey into the world of organic gardening, where nature’s brilliance meets human ingenuity. Whether you’re just planting your first seeds or have years of dirt under your nails, tapping into these organic gardening hacks will transform your green space into a flourishing paradise. In a world ever more conscious of ecological footprints, adopting organic methods is not just a trend, but a vital step towards a healthier planet. By embracing these techniques, you’ll not only nurture a more vibrant garden but also contribute to a sustainable future.

    In this article, we’ll reveal 13 smart and effective hacks that will empower your green thumb and elevate your gardening game. From natural pest repellents to soil-enhancing secrets, each hack is designed to harmonize with the environment while maximizing your garden’s potential. Expect to discover simple, affordable solutions that make organic gardening not only rewarding but also remarkably easy. Let’s dig deep into these insightful tips and watch your garden thrive with nature’s own touch.

    Compost Kitchen Scraps Regularly

    Compost Kitchen Scraps Regularly

    Composting kitchen scraps regularly is an excellent way to enrich your garden soil while reducing waste. By transforming vegetable peels, coffee grounds, and eggshells into compost, you create a nutrient-rich medium that promotes healthy plant growth.

    Begin by setting up a compost bin in a shaded area of your yard to maintain moisture. Ensure the bin has good ventilation to promote the breakdown of organic matter and prevent unpleasant odors.

    Layer your compost materials by alternating between green materials, like fruit scraps and grass clippings, and brown materials, such as dried leaves and small twigs. This balance of nitrogen and carbon accelerates decomposition and produces high-quality compost.

    Turn your compost pile every two to three weeks with a pitchfork to aerate it, which helps speed up the composting process. In a few months, you will have a dark, crumbly compost ready to be mixed into your garden soil for improved fertility and structure.

    Plant Companion Crops Strategically

    Plant Companion Crops Strategically

    Strategically planting companion crops can enhance your garden’s productivity and resilience. Companion planting involves growing different plants together to benefit each other by improving nutrient uptake, pest control, and pollination.

    One great example is the classic trio of corn, beans, and squash, often referred to as the “Three Sisters.” Corn provides a structure for beans to climb, beans fix nitrogen in the soil, and squash spreads along the ground, reducing weeds and maintaining soil moisture.

    To maximize the benefits of companion planting, consider the specific needs of each plant. For instance, tomatoes benefit from being planted near basil, which can help repel pests like aphids and hornworms, while enhancing the flavor of the tomatoes.

    Advanced gardeners might experiment with interplanting flowers such as marigolds, which are known to deter nematodes and other harmful insects. Ensure your soil is well-drained and rich in organic matter to support these diverse plantings, and water regularly according to the specific needs of each plant species.

    Use Coffee Grounds as Fertilizer

    Use Coffee Grounds as Fertilizer

    Coffee grounds are an excellent organic addition to your garden soil, providing a boost of nutrients. They are rich in nitrogen, which is essential for plant growth, making them ideal for nitrogen-loving plants like tomatoes and roses.

    To use coffee grounds effectively, sprinkle them directly onto the soil or mix them into your compost pile. This not only enriches the soil but also improves its structure, helping to retain moisture and improve drainage.

    When applying coffee grounds, use them sparingly to avoid over-acidifying the soil. Mixing them with other organic matter like grass clippings or leaves can help mitigate this effect and create a balanced soil amendment.

    Aside from enriching the soil, coffee grounds can also deter pests such as slugs and snails. Their rough texture and slight acidity can act as a natural barrier, protecting your plants without the use of chemicals.

    Create Natural Pest Deterrents

    Create Natural Pest Deterrents

    To naturally deter pests in your garden, consider planting herbs like basil, mint, and rosemary around your vegetables. These herbs not only act as a natural barrier, but they also enhance the flavor of your produce when companion planted.

    Incorporating marigolds into your garden beds can effectively repel nematodes and other harmful insects. Their pungent scent is disliked by many garden pests, making them a colorful and functional addition to your planting scheme.

    Another effective method is to create a garlic spray by blending garlic cloves with water and a small amount of dish soap. This mixture can be sprayed directly onto plant leaves, providing protection without harmful chemicals.

    For a more advanced approach, attract beneficial insects like ladybugs and lacewings by planting dill, fennel, or yarrow. These insects will help control aphid populations naturally, reducing your need for chemical interventions.

    Rotate Crops Each Season

    Rotate Crops Each Season

    Rotating crops each season is a fundamental practice in organic gardening that helps maintain soil fertility and prevent the buildup of pests and diseases. By changing the location of your plants, you disrupt the life cycles of pests and promote healthier growth.

    Begin by grouping your plants into families, such as nightshades (tomatoes, peppers) or legumes (beans, peas), and rotate these families to different areas of your garden each year. This method ensures that specific nutrients aren’t depleted, as different plant families have varying nutrient needs.

    For beginners, try a simple three-year rotation plan: plant leafy greens one year, followed by fruiting vegetables, and then root vegetables. More experienced gardeners might explore a four-year rotation plan, adding cover crops like clover to rejuvenate the soil.

    Ensure your soil is well-prepared by adding compost or aged manure before planting each new crop. This not only enriches the soil but also supports the plants’ nutritional needs throughout the growing season.

    Mulch with Organic Materials

    Mulch with Organic Materials

    Mulching with organic materials is a highly effective way to enhance soil health and suppress weeds in your garden. By using materials like straw, grass clippings, or shredded leaves, you provide a natural barrier that retains moisture and improves soil structure.

    When applying mulch, it’s important to aim for a layer about 2 to 4 inches thick to ensure optimal benefits. This thickness provides sufficient coverage to prevent weed growth while allowing water to permeate the soil efficiently.

    For beginner gardeners, using readily available materials like grass clippings from your lawn can be a cost-effective and sustainable choice. Make sure the clippings are dry to avoid creating a mat that could hinder water infiltration.

    Experienced gardeners might consider composted bark or wood chips as an advanced mulching option. These materials decompose slowly, enriching the soil with nutrients over time and fostering beneficial microbial activity.

    Harvest Rainwater for Irrigation

    Harvest Rainwater for Irrigation

    Harvesting rainwater is an excellent way to provide your garden with a sustainable water source. This method not only reduces your water bill but also ensures that your plants receive chemical-free hydration, which is crucial for organic gardens.

    To start, consider installing a rain barrel under a downspout to collect rainwater efficiently. Ensure the barrel has a tight-fitting lid to keep debris and insects out, and attach a spigot near the bottom for easy access to water.

    Regularly check your rainwater collection system for maintenance needs. Clean the gutters and the barrel filter to prevent clogging and ensure a steady flow of water.

    For gardeners looking to maximize this resource, connect multiple barrels for increased capacity. This can be done using a simple linking kit, allowing you to store more water during heavy rains.

    Introduce Beneficial Insects

    Introduce Beneficial Insects

    Introducing beneficial insects to your garden can naturally boost plant health and reduce pest issues. These insects act as natural predators, targeting common garden pests such as aphids, caterpillars, and mites.

    One effective way to attract these helpful bugs is by planting a diverse range of flowering plants. Marigolds, dill, and yarrow are excellent choices, as they provide nectar and pollen that beneficial insects thrive on.

    For beginners, consider starting with easy-to-grow plants like fennel, which attracts ladybugs and lacewings. These insects are known for consuming large numbers of aphids, making them invaluable in maintaining a healthy garden ecosystem.

    Advanced gardeners can experiment with creating insect habitats by incorporating elements like small rocks or a shallow water source. These additions can support a diverse insect population by offering shelter and hydration, particularly during hot or dry spells.

    Prune Plants to Encourage Growth

    Prune Plants to Encourage Growth

    Pruning is a crucial technique to encourage plants to grow more robustly. By removing dead or overcrowded branches, you allow light and air to reach the inner parts of the plant, promoting healthier growth.

    To get started, use sharp, clean pruning shears to make precise cuts, reducing the risk of disease. Regular pruning helps direct the plant’s energy to produce more flowers and fruits, making it a vital practice for productive gardens.

    Timing is key when it comes to pruning; generally, prune in late winter or early spring before new growth begins. For flowering plants, prune immediately after their blooming period to avoid cutting off future buds.

    When pruning, focus on removing any crossing branches as well as those that grow inward, as these can hinder growth. If you’re growing fruit trees, thinning the branches also helps improve fruit quality by allowing more sunlight to penetrate.

    Use Epsom Salt for Magnesium

    Use Epsom Salt for Magnesium

    Epsom salt is a natural source of magnesium, an essential nutrient that supports plant health. It can help improve seed germination, nutrient uptake, and overall plant growth.

    For gardeners looking to boost magnesium levels in their soil, Epsom salt is an effective and easy solution. Simply dissolve one tablespoon of Epsom salt in a gallon of water and use it to water your plants monthly.

    When applying Epsom salt, it’s important to focus on plants that are known to benefit from extra magnesium. Tomatoes, peppers, and roses are particularly responsive to Epsom salt treatments, resulting in more vibrant blooms and fruit production.

    Experienced gardeners might also consider using Epsom salt as a foliar spray. Mix two tablespoons of Epsom salt in a gallon of water, and mist the leaves of your plants every two weeks for maximum absorption.

    Implement Raised Bed Gardens

    Implement Raised Bed Gardens

    Implementing raised bed gardens can revolutionize your gardening approach, providing improved soil conditions and drainage. Raised beds also allow for better control over weeds and pests, making them an excellent choice for both beginners and seasoned gardeners.

    Start by selecting a sunny location as most vegetables and flowers thrive in full sun. Ensure your raised bed is at least 6 to 12 inches deep to accommodate root growth and maximize plant health.

    Fill your raised beds with a high-quality soil mix, ideally a combination of topsoil, compost, and well-rotted manure. This nutrient-rich blend supports healthy plant development and minimizes the need for synthetic fertilizers.

    For watering, monitor your plants closely and aim to keep the soil consistently moist but not waterlogged. Consider installing a drip irrigation system to maintain optimal moisture levels and reduce water waste, especially in dry climates.

    Apply Neem Oil for Pest Control

    Apply Neem Oil for Pest Control

    Neem oil is a powerful tool in the organic gardener’s arsenal for controlling pests naturally. Derived from the seeds of the neem tree, this oil disrupts the hormones of insects, effectively reducing their ability to feed and reproduce.

    To apply neem oil effectively, mix it with water and a mild liquid soap to help it adhere to plant surfaces. Use a spray bottle to apply the solution to affected plants, ensuring thorough coverage on both the tops and undersides of leaves.

    For beginners, it’s important to note that neem oil should be applied in the early morning or late afternoon to avoid leaf burn from the sun. Regular applications every 7 to 14 days can help maintain control over pest populations.

    Advanced gardeners might try combining neem oil with other organic methods, such as introducing beneficial insects like ladybugs, to create a robust pest management system. Neem oil is most effective when integrated into a comprehensive pest control strategy, which can help maintain a healthy, thriving garden.

    Start Seeds Indoors Early

    Start Seeds Indoors Early

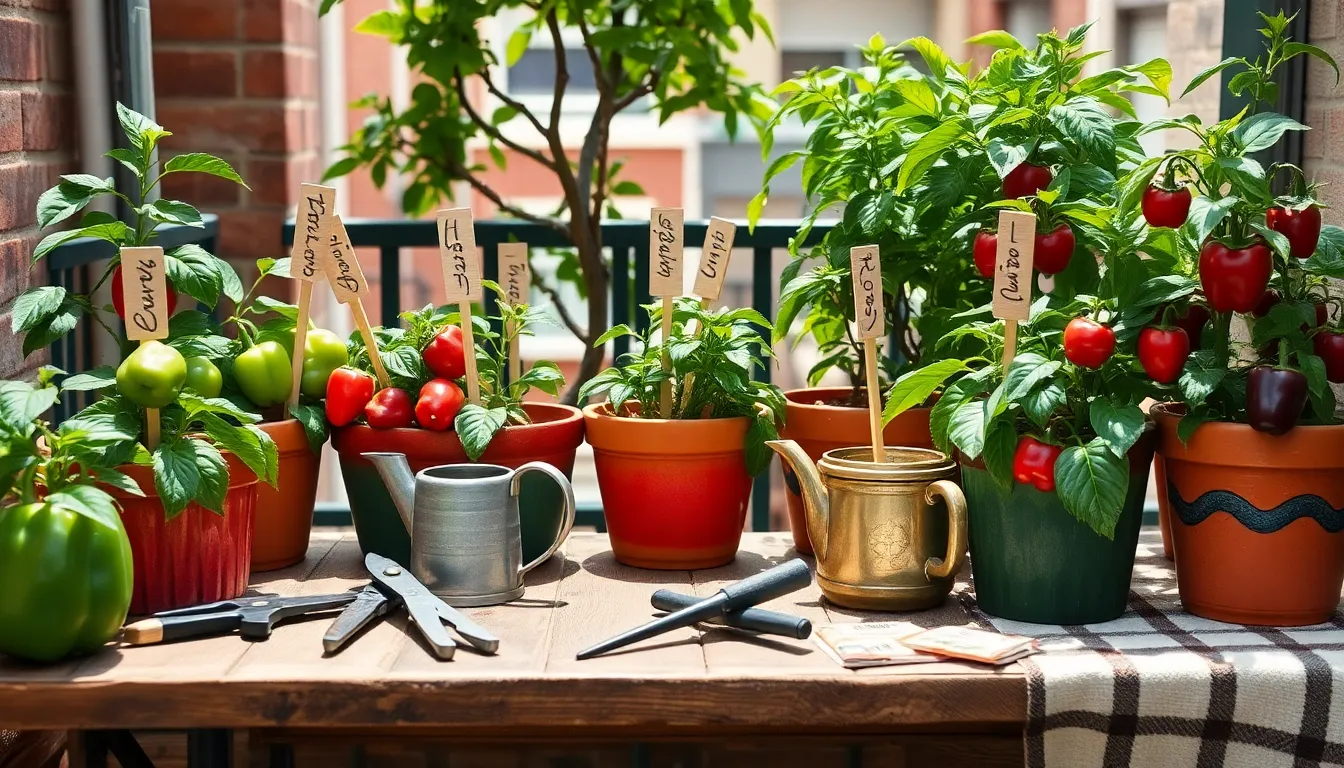
    Starting seeds indoors early gives your plants a head start on the growing season. This technique is particularly beneficial for plants with longer growing seasons, such as tomatoes and peppers.

    To begin, select a quality potting mix that is light and well-draining, such as one specifically designed for seed starting. Avoid using garden soil as it is often too heavy and may harbor diseases that can harm young seedlings.

    For the containers, you can use seed trays, peat pots, or even recycled containers like yogurt cups with drainage holes. Place your containers in a warm area, ideally between 65-75°F (18-24°C), to ensure optimum germination conditions.

    Once the seeds are planted, keep the soil consistently moist but not waterlogged. A spray bottle can be a handy tool to gently mist the surface without displacing the seeds.

    As your seedlings grow, ensure they receive plenty of light, ideally 12-16 hours a day. If natural sunlight is insufficient, supplement with grow lights placed a few inches above the seedlings to prevent them from becoming leggy.

    Conclusion: Growing Success with These Plants

    As we wrap up our exploration of the 13 effective organic gardening hacks, each tip serves as a metaphor for nurturing and enriching your relationships. From understanding the importance of communication as the “soil” of any bond, to using small gestures like “companion planting” to enhance connection, and practicing active listening as the “mulch” that retains the moisture of understanding, these hacks offer a holistic approach to growing love and partnership. Other concepts like setting boundaries, fostering trust, and embracing change echo the principles of organic gardening, ensuring that your relationship blossoms naturally and sustainably.

    Now, take the next step: choose one relationship hack that resonates with you and implement it today. Whether it’s setting aside quality time or practicing gratitude, action is the seed of transformation.

    Remember, nurturing a thriving relationship is a journey, not a destination. Bookmark this article for easy access to these insights whenever you need a gentle reminder or inspiration. As you apply these principles, envision the success of a relationship that grows stronger with each passing season, and let this guide be your companion in cultivating enduring love and happiness.

  • 9 Proven Winter Gardening Essentials

    9 Proven Winter Gardening Essentials

    As the crisp air begins to bite and the landscape transforms under a frosty blanket, many gardeners retreat indoors, leaving their green spaces to rest until spring. However, winter offers a unique opportunity to nurture and prepare your garden, ensuring it thrives when the warmer months return. This season is not just a time of dormancy but also a chance to lay a strong foundation for future growth, and with the right tools and techniques, your garden can remain a vibrant oasis even during the chilliest days.

    Whether you’re a seasoned gardener or just beginning your horticultural journey, understanding the essentials of winter gardening can enrich your experience and elevate your garden’s resilience. In this article, we will share nine proven winter gardening essentials that will help safeguard your plants, improve soil health, and maintain a flourishing garden all year round. From choosing the right protective coverings to optimizing your soil’s condition, these insights are designed to empower you with confidence and knowledge, encouraging you to embrace the winter season with enthusiasm and anticipation.

    Choosing Hardy Winter Plants

    Choosing Hardy Winter Plants

    When selecting hardy winter plants, it’s essential to choose varieties that thrive in cooler temperatures. Evergreens like juniper and boxwood are excellent choices as they maintain their foliage year-round, providing color and structure to your garden even in the depths of winter.

    Consider incorporating winter-blooming flowers such as hellebores and winter jasmine to add bursts of color. These plants are not only beautiful but also resilient, capable of withstanding frost and thriving in well-drained soil.

    For those looking to experiment with edibles, hardy vegetables like kale and Brussels sprouts can be a rewarding option. These plants not only tolerate cold weather but actually improve in flavor after a frost, making them a delicious and nutritious winter crop.

    Advanced gardeners can experiment with winter cover crops such as clover or vetch. These plants enrich the soil with nutrients, suppress weeds, and can be tilled into the soil in spring to improve soil structure and fertility.

    Optimizing Soil for Cold Months

    Optimizing Soil for Cold Months

    As temperatures drop, preparing your soil is crucial to ensure your garden thrives during the cold months. Begin by adding a layer of organic mulch, such as straw or shredded leaves, to insulate the soil and retain moisture.

    Applying a layer of compost or well-rotted manure can enrich the soil and improve its structure. This not only provides essential nutrients but also enhances the soil’s ability to support plant roots during colder weather.

    Consider testing your soil’s pH and nutrient levels before winter sets in. Adjusting the pH with lime or sulfur, as needed, helps maintain optimal growing conditions for your winter plants.

    For those in areas with harsh winters, utilizing cover crops can be an advanced technique to protect and rejuvenate soil. Legumes, such as clover or vetch, can fix nitrogen in the soil, improving fertility and preventing erosion.

    Implementing Effective Frost Protection

    Implementing Effective Frost Protection

    As winter approaches, protecting your plants from frost is crucial to ensure they thrive when spring returns. One effective method is using frost cloths or horticultural fleece, which can be draped over plants to create a barrier against the cold.

    Alternatively, consider using mulch to insulate the soil and retain heat. Apply a layer of mulch, such as straw or wood chips, around the base of your plants, ensuring it is a few inches thick to provide adequate protection.

    Watering your plants adequately before a frost can also help, as moist soil retains heat better than dry soil. However, avoid watering during freezing temperatures to prevent ice formation that can damage plant roots.

    For advanced gardeners, creating a microclimate can offer significant advantages. Utilize structures like cold frames or cloches to trap heat and shelter plants, especially those that are more sensitive to cold.

    Efficient Winter Watering Strategies

    Efficient Winter Watering Strategies

    Winter watering is crucial for maintaining plant health during colder months, as plants still require moisture even when growth slows down. Make sure to water your garden early in the day, allowing the soil to absorb the moisture before temperatures drop at night.

    Adjust your watering schedule based on the type of soil in your garden, as clay soils retain moisture longer than sandy soils. For clay soils, water less frequently, while sandy soils may require more regular watering to prevent drying out.

    Mulching can be an excellent strategy to help retain soil moisture during winter. Apply a 2-3 inch layer of organic mulch, such as straw or shredded leaves, around the base of plants to insulate roots and reduce water loss.

    For advanced gardeners, consider using a moisture meter to ensure your plants receive the right amount of water. These devices can provide accurate readings, helping you avoid over or under-watering, which is crucial in maintaining a healthy garden through winter.

    Utilizing Greenhouses and Cold Frames

    Utilizing Greenhouses and Cold Frames

    Greenhouses and cold frames are invaluable tools for extending your growing season and protecting plants from harsh winter conditions. By providing a controlled environment, these structures allow you to cultivate a variety of plants even when the outside temperatures dip below freezing.

    In greenhouses, maintaining an optimal temperature is crucial; consider using a combination of thermal mass materials like water barrels and proper ventilation to stabilize the internal climate. Insulating the north side of your greenhouse with bubble wrap or horticultural fleece can also help retain heat.

    Cold frames offer similar benefits on a smaller scale, perfect for gardeners with limited space. Position your cold frame where it will capture the most winter sunlight, typically facing south or southwest, to maximize warmth and light for your plants.

    Use a mix of well-draining soil and organic compost in your cold frame to ensure plants don’t become waterlogged, which is a common issue during the winter months. Regularly monitor moisture levels, adjusting your watering schedule based on the ambient temperature and plant needs.

    For more advanced gardeners, incorporating a temperature-sensitive ventilation system in your greenhouse can help maintain the ideal growing conditions without manual intervention. Whether using a greenhouse or cold frame, remember to rotate crops to prevent soil depletion and encourage robust plant growth throughout the winter.

    Essential Winter Mulching Techniques

    Essential Winter Mulching Techniques

    Winter mulching is a crucial technique to protect plants from harsh cold weather by providing an insulating layer. This practice helps regulate soil temperature and retains moisture, reducing the risk of frost heaving that can damage plant roots.

    To begin with, choose organic materials like straw, shredded leaves, or bark mulch, which decompose over time, enriching the soil. Apply a layer about 2-4 inches thick around the base of your plants, ensuring you leave some space around the stems to prevent rot.

    It’s important to mulch after the first hard frost when the ground is cold but not frozen solid. This timing helps protect the soil from rapid temperature fluctuations and keeps it consistently insulated throughout the winter months.

    For more experienced gardeners, consider using a combination of mulching materials for added benefits, such as adding a layer of pine needles for acidic-loving plants. Experimenting with different materials can enhance soil structure and benefit specific plant types, such as blueberries or azaleas.

    Pruning for Winter Growth

    Pruning for Winter Growth

    Winter is an ideal time to prune many trees and shrubs, as they are in a dormant state, making them less vulnerable to disease. Pruning during this period helps to shape plants, remove dead or diseased branches, and encourage healthy growth when spring arrives.

    Before you begin, ensure your tools are sharp and clean to prevent the spread of pathogens. Using a pair of bypass pruners, cut branches at a 45-degree angle just above a bud facing outward to promote outward growth.

    For beginners, it’s important to understand which plants benefit from winter pruning; most deciduous trees and shrubs, such as maples and roses, are ideal candidates. Advanced gardeners may consider a more strategic approach by focusing on crossing branches and thinning dense growth to improve air circulation.

    When dealing with fruit trees, such as apple or pear, focus on removing any suckers or water sprouts to direct energy towards productive branches. This targeted pruning not only improves fruit yield but also strengthens the tree’s structure against winter winds.

    Protecting Plants from Pests

    Protecting Plants from Pests

    To protect your plants from pests during winter, start by ensuring that your garden remains clean and tidy. Remove fallen leaves, dead plants, and debris, as these can harbor pests and diseases that thrive in colder months.

    Natural barriers can be highly effective in keeping pests at bay. Consider using physical barriers like floating row covers or fine mesh to shield vulnerable plants from insects.

    Companion planting is another excellent strategy for pest control. Planting herbs such as garlic and chives near your vegetables can deter pests due to their strong scents.

    For a more advanced approach, introduce beneficial insects to your garden. Ladybugs and lacewings can help manage aphid populations, providing a natural pest control method that’s both sustainable and efficient.

    Monitoring Winter Garden Health

    Monitoring Winter Garden Health

    Winter can be challenging for garden plants, but regular monitoring is key to maintaining their health. Begin by checking soil moisture levels weekly, as many winter problems stem from incorrect watering.

    For beginners, an easy way to ensure proper moisture is the finger test; simply insert your finger into the soil to check for dampness. If the soil feels dry more than an inch deep, it’s time to water, but avoid overwatering to prevent root rot.

    Experienced gardeners might consider using a moisture meter for more precise readings, especially in larger gardens. This tool can help determine which areas of your garden need more attention, allowing you to tailor your watering strategy.

    Beyond watering, keep an eye out for any signs of disease or pest activity, as these can thrive even in colder months. Pay attention to any discolored or wilting leaves, which might indicate an underlying issue that needs addressing.

    Inspecting plant stems and leaves regularly will help you catch problems early. If you notice any changes, consider removing affected foliage and applying a mild, organic fungicide to protect the rest of the plant.

    Finally, remember to check the condition of any mulch or protective coverings you’ve used. These can shift or degrade over time, so ensure they are effectively insulating your plants from the cold.

    Conclusion: Growing Success with These Plants

    In navigating the frosty season of winter gardening, we’ve explored nine essential relationship concepts that mirror the nurturing required for a thriving garden. From fostering open communication to cultivating patience, building resilience, and embracing change, each concept is a crucial tool in your relationship toolkit. We’ve also touched on the importance of shared goals, emotional support, and the delicate balance of giving and receiving love, all of which contribute to a flourishing partnership.

    As your next actionable step, select one concept that resonates most with you and your partner. Dedicate time this week to discuss how you can incorporate it more fully into your relationship. This small yet significant action can plant the seed for deeper connection and understanding.

    Remember, relationships, like gardens, require ongoing care and attention. By bookmarking this article, you’ll have a handy reference to revisit these valuable insights whenever you need a reminder. With consistent effort and a positive outlook, your relationship is poised to not just survive, but thrive, no matter the season. Embrace these proven practices, and watch your connection grow stronger and more resilient every day.

  • Top 10 Fruit Trees For Small Spaces

    Top 10 Fruit Trees For Small Spaces

    Imagine stepping into your backyard and plucking a sun-ripened apple or a juicy plum from your very own tree. Whether you’re a budding gardener or a seasoned green thumb, cultivating fruit trees in small spaces is not only possible but can be delightfully rewarding. In “Top 10 Fruit Trees For Small Spaces,” we uncover the secrets to turning even the tiniest patch of earth into a bountiful orchard that bursts with flavor and freshness.

    This guide is your key to unlocking the potential of compact gardening, ensuring that you can enjoy home-grown fruit no matter the size of your garden. We’ve carefully curated a selection of fruit trees that thrive in limited spaces, offering you the chance to savor the sweet taste of success. With practical tips and insights, you’ll feel empowered and inspired to transform your space into a fruitful paradise, reaping the delicious rewards of your labor.

    Dwarf Meyer Lemon (Compact and Versatile)

    Dwarf Meyer Lemon (Compact and Versatile)

    The Dwarf Meyer Lemon tree is a superb choice for small spaces, combining beauty and productivity in one compact package. Known for its versatility, this tree can thrive both indoors and outdoors, making it perfect for a variety of gardening scenarios.

    For optimal growth, ensure your Dwarf Meyer Lemon tree receives at least six hours of sunlight daily. If growing indoors, place it near a south-facing window or supplement with grow lights to maintain its light requirements.

    When it comes to soil, use a well-draining potting mix rich in organic matter to keep the roots healthy. Add some perlite or sand to the mix to further improve drainage and avoid root rot, especially in containers.

    Watering is crucial; aim to keep the soil consistently moist but not soggy. A good rule of thumb is to water when the top inch of soil feels dry, adjusting frequency based on the climate and season.

    Fertilize your Dwarf Meyer Lemon tree every few months with a citrus-specific fertilizer to encourage vigorous growth and fruit production. Pruning can also help maintain its shape and size, and it’s best done in early spring before new growth starts.

    Columnar Apple Trees (Vertical Growth, Full Flavor)

    Columnar Apple Trees (Vertical Growth, Full Flavor)

    Columnar apple trees are an excellent choice for gardeners with limited space, as they grow vertically and require minimal ground area. These trees are engineered to produce abundant fruit while maintaining a slim, upright structure, making them ideal for urban gardens or patios.

    For optimal growth, plant your columnar apple tree in a location that receives at least six hours of direct sunlight daily. Ensure the soil is well-draining and rich in organic matter, as this encourages strong root development and fruit production.

    Water the tree regularly, especially during the first few years, to help establish a robust root system; aim for once a week during dry spells. Fertilize in early spring with a balanced, slow-release fertilizer, providing the nutrients needed for vigorous growth and fruiting.

    While these trees require little pruning, remove any dead or damaged branches to maintain their shape and health. For those with more experience, consider thinning the fruit in early summer to improve fruit size and quality, ensuring a delectable harvest.

    Espaliered Pear Trees (Space-Saving and Decorative)

    Espaliered Pear Trees (Space-Saving and Decorative)

    Espaliered pear trees offer a unique way to grow fruit in limited spaces while also serving as a decorative element. This technique involves training trees to grow flat against a surface, such as a wall or a fence, making it ideal for small gardens and urban environments.

    To start an espaliered pear tree, select a variety known for its adaptability to this form, such as ‘Bartlett’ or ‘Conference’. Plant the tree in fertile, well-draining soil, ensuring it receives at least six hours of sunlight daily.

    Regular pruning is essential to maintain the desired shape and encourage fruit production. Begin training the tree in its first year by gently bending and tying branches to a support structure, using soft ties to avoid damaging the bark.

    Water the espaliered pear tree consistently, especially during dry periods, to keep the soil moist but not waterlogged. Mulching around the base can help retain moisture and suppress weeds, enhancing the tree’s health and productivity.

    Miniature Cherry Trees (Abundant Blooms in Small Spaces)

    Miniature Cherry Trees (Abundant Blooms in Small Spaces)

    Miniature cherry trees are a perfect choice for gardeners who crave abundant blooms in limited spaces. These compact trees not only produce a profusion of delicate blossoms in spring but also reward you with delicious, juicy cherries.

    To ensure your miniature cherry tree thrives, plant it in a spot with full sun exposure for at least six to eight hours a day. Use well-draining soil enriched with organic matter to promote healthy root development and prevent waterlogging.

    Regular watering is essential, especially during dry spells, so aim to keep the soil consistently moist without overwatering. A layer of mulch around the base of the tree can help retain moisture and suppress weeds, enhancing overall growth.

    For those looking to maximize yield, consider implementing a pruning regimen to maintain shape and encourage fruiting. Prune in late winter or early spring before new growth begins, focusing on removing any dead or crossing branches to improve air circulation.

    Patio Peach Trees (Self-Fertile and Container-Friendly)

    Patio Peach Trees (Self-Fertile and Container-Friendly)

    Patio peach trees are a wonderful option for small garden spaces, offering both beauty and fruitfulness in a compact form. These trees are self-fertile, meaning you only need one tree to enjoy a bountiful harvest of juicy peaches.

    When growing patio peach trees in containers, choose a pot that is at least 18 inches wide to allow for adequate root expansion. Use a well-draining potting mix enriched with organic matter to ensure the tree has the nutrients it needs to thrive.

    These trees thrive in full sun, so place your container in a location that receives at least six hours of direct sunlight daily. Regular watering is crucial, especially during the growing season, so ensure that the soil remains consistently moist but not waterlogged.

    For optimal growth, feed your patio peach tree with a balanced, slow-release fertilizer formulated for fruit trees in early spring. Prune lightly after fruiting to maintain shape and encourage new growth, keeping in mind that these trees are naturally compact and require minimal pruning.

    Compact Fig Varieties (Low Maintenance and High Yield)

    Compact Fig Varieties (Low Maintenance and High Yield)

    Compact fig varieties are perfect for small spaces, offering both low maintenance and high yield. These trees can easily be grown in containers, making them ideal for patios or small gardens. To ensure healthy growth, use a well-draining potting mix that retains moisture but prevents waterlogging. Figs thrive in full sun, so place them in a location where they’ll receive at least six hours of sunlight daily.

    Regular watering is essential, especially during the growing season, but avoid overwatering as figs prefer slightly dry conditions between waterings. A simple way to check if your fig tree needs water is to stick your finger into the soil; if it’s dry about an inch down, it’s time to water. Fertilize your fig tree in early spring and again in midsummer with a balanced fertilizer to promote fruit production. Pruning is minimal, typically only needed to remove dead or crossing branches in late winter or early spring.

    For gardeners in colder climates, consider bringing your potted fig indoors during the winter months to protect it from frost. When moving the plant indoors, place it near a sunny window and reduce watering to prevent root rot. If you notice yellowing leaves, it might be a sign of overwatering or poor drainage, so adjust your watering schedule accordingly. Additionally, keeping an eye out for pests like aphids or scale insects will help maintain a healthy fig tree.

    Advanced gardeners might experiment with different fig varieties like ‘Petite Negra’ or ‘Little Miss Figgy’, known for their compact growth and abundant fruit production. These varieties not only fit perfectly in small spaces but also offer delicious fruit that can be enjoyed fresh or used in recipes. To maximize yield, ensure your fig tree is properly pollinated, although many varieties are self-pollinating, which makes them even more convenient for small space gardening. Whether you’re a beginner or an experienced gardener, compact fig trees offer a satisfying and productive addition to your garden.

    Dwarf Pomegranate Trees (Exotic Appeal on a Smaller Scale)

    Dwarf Pomegranate Trees (Exotic Appeal on a Smaller Scale)

    Dwarf pomegranate trees are a delightful choice for those seeking exotic appeal in limited spaces. These compact trees, reaching only 3 to 4 feet in height, are perfect for patios, balconies, or small garden beds.

    To thrive, dwarf pomegranates require a location with full sun exposure for at least 6 hours a day. They prefer well-draining soil with a slightly acidic to neutral pH, so consider adding organic matter like compost to enhance soil quality.

    Watering should be consistent, especially during the growing season, but ensure the soil does not become waterlogged. A good rule of thumb is to water deeply once a week, allowing the top inch of soil to dry out between waterings to prevent root rot.

    Although dwarf pomegranates are relatively low-maintenance, pruning is essential to maintain their shape and encourage fruit production. Prune annually in late winter, removing any dead or crossing branches to improve airflow and sunlight penetration.

    Cordon Plum Trees (Efficient Use of Limited Space)

    Cordon Plum Trees (Efficient Use of Limited Space)

    Incorporating cordon plum trees into your small garden is a fantastic way to maximize limited space while enjoying delicious fruit. These trees are trained to grow vertically, making them perfect for tight spots such as patios or narrow garden beds.

    To plant a cordon plum tree, ensure you choose a sunny, sheltered location with well-draining soil. Plum trees thrive in fertile loam, so consider enriching your soil with organic compost before planting.

    Watering is crucial, especially during the tree’s first year; aim to keep the soil consistently moist but not waterlogged. Once established, these trees require less frequent watering, but during dry spells, a deep soak once a week will suffice.

    Prune cordon plum trees regularly to maintain their shape and encourage healthy fruit production. Remove any side shoots and focus on keeping a single, strong central leader to guide the tree’s growth upward.

    Bush Apricot Trees (Early Harvest and Easy Care)

    Bush Apricot Trees (Early Harvest and Easy Care)

    Bush Apricot Trees are an excellent choice for gardeners with limited space, providing an early harvest of delicious fruit. These compact trees are not only space-efficient but also require minimal care, making them ideal for both beginners and seasoned gardeners.

    To ensure optimal growth, plant your Bush Apricot Trees in well-draining soil with a pH between 6.0 and 7.5. Position them in a sunny location, as apricots thrive with at least 6 to 8 hours of direct sunlight each day.

    Regular watering is essential during the growing season, especially in dry spells; aim to keep the soil consistently moist but not waterlogged. Mulching around the base of the tree can help retain moisture and suppress weeds, creating a healthier growing environment.

    Pruning is a crucial step in maintaining the health and productivity of your Bush Apricot Trees. Perform light pruning in late winter or early spring to remove any dead or diseased wood, promoting better air circulation and fruit development.

    Container-Friendly Citrus Trees (Portable and Productive)

    Container-Friendly Citrus Trees (Portable and Productive)

    Container-friendly citrus trees are an excellent choice for gardeners with limited space. They allow you to enjoy fresh fruit and the delightful fragrance of citrus blossoms right on your patio or balcony.

    Start by selecting a dwarf variety, such as a Meyer lemon or Key lime, which are well-suited for containers. These trees thrive in well-draining potting mix specifically designed for citrus, ensuring healthy root development.

    Position your container in a location that receives at least six to eight hours of direct sunlight each day. Regular watering is crucial, but be careful not to overwater; allow the top inch of soil to dry out between waterings to prevent root rot.

    For optimal growth, feed your citrus trees with a balanced, slow-release fertilizer formulated for citrus plants. In the colder months, move your container indoors or to a sheltered area to protect it from frost, ensuring year-round productivity.

    Conclusion: Growing Success with These Plants

    In exploring the “Top 10 Fruit Trees For Small Spaces,” we’ve delved into ten key relationship concepts, each symbolized by a unique fruit tree: adaptability (dwarf apple), nurturing growth (fig), patience (lemon), balance (pear), resilience (peach), harmony (apricot), communication (plum), trust (cherry), commitment (olive), and renewal (pomegranate). These principles are the seeds that, when cultivated with care, will flourish into a thriving relationship, even in the smallest of spaces.

    As an actionable next step, choose one of these principles to focus on today. Perhaps you will work on communication by having an open conversation with your partner, or nurture growth by supporting each other’s dreams.

    To continue nurturing your relationship garden, bookmark this article for future reference. It can serve as a guide whenever you need to rejuvenate your connection.

    Remember, successful relationships are not built overnight but cultivated over time. By integrating these principles, you’re planting the seeds for a fulfilling and enduring partnership. Embrace this journey with optimism and watch your relationship bloom like a well-tended orchard. Save this article as a reminder of the fruitful path ahead. 🌳❤️

  • 12 Colorful Water-Saving Garden Ideas

    12 Colorful Water-Saving Garden Ideas

    Gardening is a vibrant symphony of colors and textures, a delightful canvas that both beginners and seasoned green thumbs can endlessly explore. Whether you’re just getting your hands dirty for the first time or you’ve been nurturing your garden for years, “12 Colorful Water-Saving Garden Ideas” offers you a treasure trove of inspiration to create a stunning, sustainable landscape. This guide is more than just a collection of ideas; it’s a gateway to crafting a garden that flourishes with beauty while being mindful of our planet’s precious resources.

    In today’s world, where water conservation is as crucial as ever, this guide empowers you to cultivate a garden that’s both breathtaking and responsible. You’ll discover practical tips and techniques that not only save water but also enhance your garden’s resilience and vibrancy. Dive in with confidence, knowing that each idea is designed to bring out the joy and fulfillment that comes from seeing your garden thrive with minimal water usage. Get ready to transform your space into a colorful oasis, where every bloom and leaf sings a song of sustainability and success.

    Plant Drought-Tolerant Flowers

    Plant Drought-Tolerant Flowers

    Choosing drought-tolerant flowers is a smart way to maintain a colorful garden even in dry conditions. These resilient plants are adapted to thrive with minimal water, making them ideal for water-saving gardens.

    Consider planting Lavender, as it is not only drought-resistant but also adds a splash of purple blooms and a pleasant aroma. It thrives in well-drained soil and full sun, requiring watering only when the soil is completely dry.

    Another excellent choice is the Blanket Flower (Gaillardia), which blooms in vibrant reds and oranges. It thrives in poor, sandy soils with good drainage and needs little more than occasional watering during prolonged dry spells.

    For those looking to experiment further, try planting Russian Sage, which is both drought-tolerant and deer-resistant. This plant prefers sandy or rocky soil and full sun, and it rewards with long-lasting blue blooms that require minimal maintenance.

    Incorporate Colorful Mulch Options

    Incorporate Colorful Mulch Options

    Adding colorful mulch to your garden is an excellent way to enhance its aesthetic appeal while conserving water. Organic options like dyed wood chips or bark can provide vibrant hues that complement your plant palette and help retain soil moisture.

    When selecting mulch, it’s important to choose a color that matches or contrasts with your existing foliage for maximum impact. Additionally, consider the mulch’s ability to suppress weeds, as reducing weed growth can significantly decrease water competition among your plants.

    Beginners might start with easy-to-find options like red or black dyed mulches, which are readily available at garden centers. For those with a bit more experience, experimenting with materials like cocoa hulls or pine bark can offer unique textures and shades.

    Beyond aesthetics, the right mulch can improve soil health by slowly decomposing and adding nutrients back into the earth. Apply a 2-3 inch layer around your plants, ensuring to leave space around the stems to prevent rot and disease.

    Use Rain Barrels for Watering

    Use Rain Barrels for Watering

    Rain barrels are a fantastic way to conserve water and keep your garden lush and vibrant. By collecting rainwater, you can provide your plants with a natural source of hydration that is free of chemicals often found in tap water.

    Setting up a rain barrel is straightforward and can be done with minimal tools. Position the barrel under a downspout to capture runoff, and make sure it is securely placed on a level surface to prevent tipping.

    Regular maintenance is essential to keep your rain barrel functioning effectively. Clean the barrel and gutters periodically to prevent debris buildup, which can clog the system and reduce water quality.

    For a more advanced setup, consider linking multiple barrels to increase your water storage capacity. This technique is especially useful in areas with sporadic rainfall, allowing you to maximize your water collection for dry periods.

    Select Vibrant Native Species

    Select Vibrant Native Species

    Choosing vibrant native species for your garden is a brilliant way to save water while adding color. Native plants are naturally adapted to local climates, often requiring less maintenance and irrigation.

    To start, research plants that are native to your specific region, as these will thrive with minimal intervention. Look for species that offer a variety of colors and blooming seasons to keep your garden lively throughout the year.

    Consider incorporating plants like echinacea, which boasts bright, daisy-like flowers and attracts pollinators. Echinacea thrives in well-drained soil and should be watered sparingly once established, making it a water-efficient choice.

    For a stunning display, plant California poppies if they are native to your area. These vibrant orange blooms prefer sandy soil and full sun, and they require little water once mature, making them perfect for a water-wise garden.

    Group Plants by Water Needs

    Group Plants by Water Needs

    Grouping plants by their water needs is a smart way to conserve water and ensure your garden thrives. Begin by identifying plants that require similar moisture levels and place them together to optimize watering efficiency. This method helps prevent over-watering or under-watering, which can stress plants and reduce their vigor. For instance, succulents and cacti thrive with minimal water and should be grouped in well-draining soil.

    To create a successful water-saving garden, consider using drip irrigation systems. These systems deliver water directly to the root zone, minimizing waste and ensuring plants receive the right amount of moisture. Additionally, applying a layer of mulch around your plant groupings can retain soil moisture and reduce evaporation. Use organic mulches, such as shredded bark or straw, to improve soil quality as they decompose.

    For beginners, start with a simple group of drought-tolerant plants like lavender, sage, and yarrow. These plants not only require less water but also add vibrant color to your garden. More experienced gardeners might explore xeriscaping, which involves designing landscapes to reduce or eliminate the need for supplemental water. It’s a sustainable choice that can be both beautiful and practical.

    Regularly assess the water needs of your plant groups, especially during seasonal changes. In hotter months, you may need to increase watering frequency slightly, while cooler months could require less. Remember to check the soil moisture by inserting your finger into the soil; if it’s dry an inch below the surface, it’s time to water. By monitoring your plants closely, you can tailor your watering schedule to meet their specific needs, ensuring a thriving, colorful garden year-round.

    Add Colorful Gravel Paths

    Add Colorful Gravel Paths

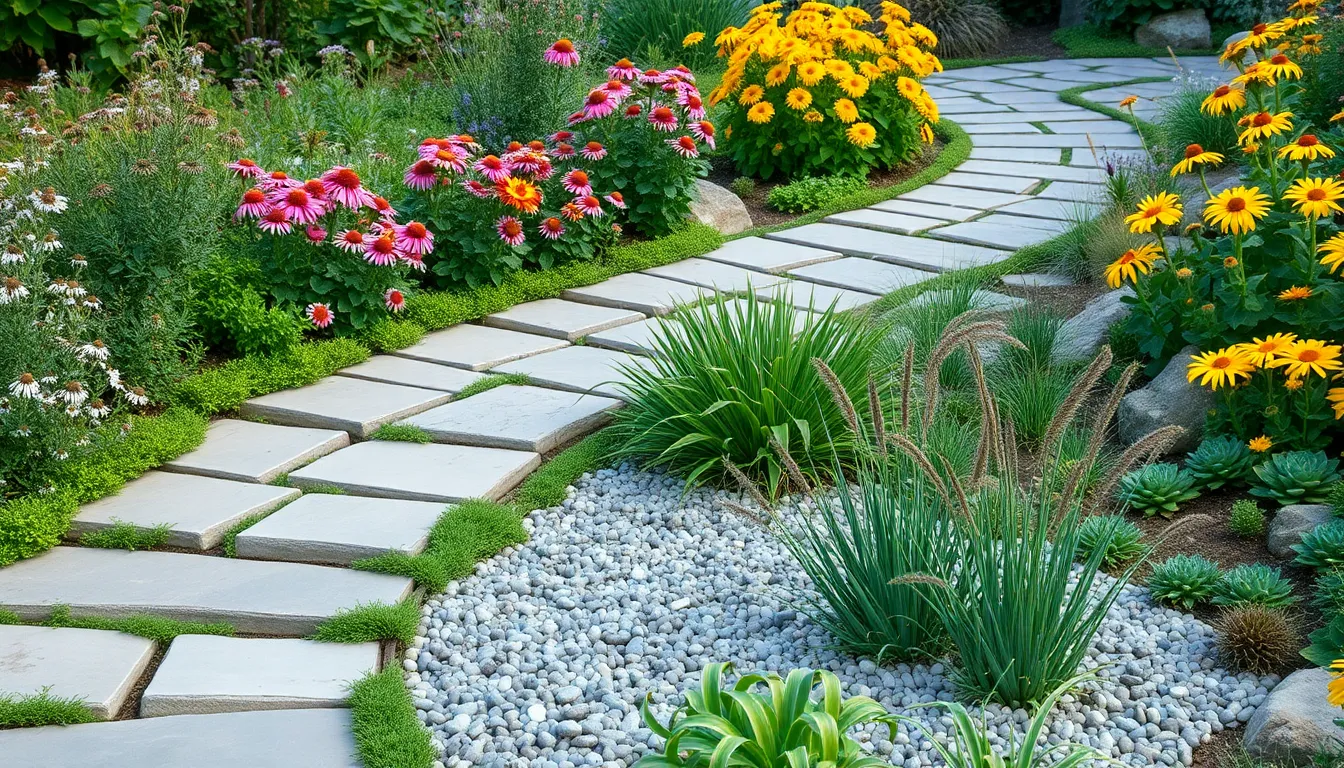
    Adding colorful gravel paths can significantly enhance the beauty and functionality of your garden. These paths not only provide a stunning visual contrast but also help reduce water usage by minimizing the need for expansive lawns.

    To create a gravel path, start by selecting a vibrant color that complements your garden’s existing palette. Choose gravel shades like terra cotta, deep blue, or natural stone hues to create a striking path that draws attention.

    Install the path by first removing any existing vegetation and leveling the ground. Cover the area with a landscape fabric to prevent weeds, then layer about 2-3 inches of gravel on top, compacting it firmly for stability.

    For a more polished look, consider edging the path with materials like bricks or stones. This not only defines the path but also keeps the gravel contained, reducing maintenance needs.

    Advanced gardeners can experiment with patterns or mixing different gravel colors for a unique effect. Use a mix of larger stones and fine gravel to create a textured path that stands out while being water-efficient.

    Choose Brightly Hued Succulents

    Choose Brightly Hued Succulents

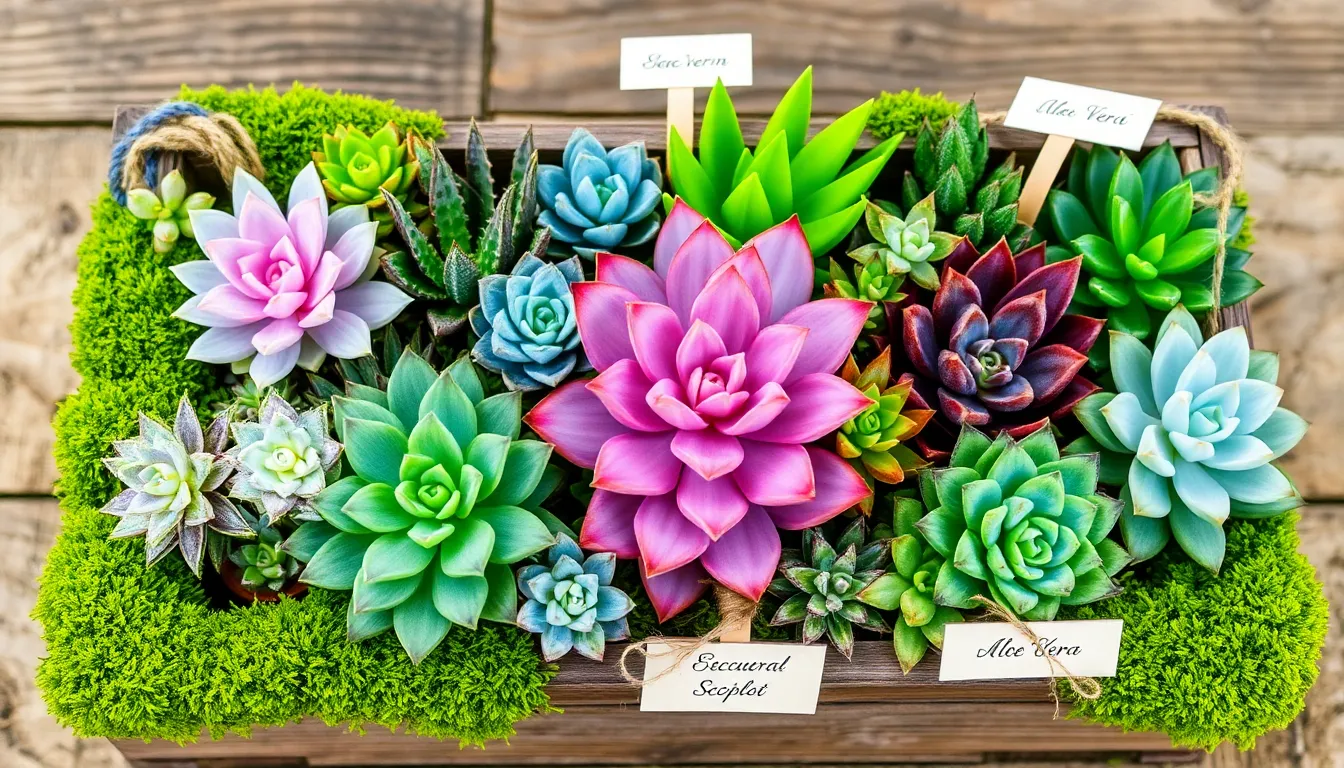
    Brightly hued succulents add a splash of color to any water-saving garden, making them an excellent choice for both beginners and experienced gardeners. These resilient plants come in a variety of colors, including vibrant reds, purples, and blues, which can add striking contrast to the greens and browns typically found in xeriscapes.

    When selecting succulents, consider incorporating varieties like Echeveria, Crassula, and Kalanchoe, known for their colorful foliage. These plants thrive in well-draining soil, such as a cactus mix or a blend of potting soil with sand or perlite added to enhance drainage.

    To maintain their vibrant colors, succulents require plenty of sunlight, ideally about six hours a day. Position them in a spot that receives morning sun and afternoon shade to prevent leaf burn, especially in hotter climates.

    Water your succulents deeply but infrequently, allowing the soil to dry out completely between waterings. Overwatering is a common mistake, so check the soil moisture with your finger or a moisture meter before deciding to water again.

    For advanced gardeners, try grouping succulents with similar light and water needs together to create a cohesive and thriving display. Additionally, consider using a top dressing of colorful gravel or pebbles around your succulents to enhance their appearance and help retain soil moisture.

    Install Drip Irrigation Systems

    Install Drip Irrigation Systems

    Drip irrigation systems are an excellent way to ensure your garden receives consistent moisture while conserving water. These systems deliver water directly to the plant’s root zone, minimizing evaporation and runoff, making them ideal for water-saving gardens.

    Begin by assessing the layout of your garden and identifying which plants will benefit most from drip irrigation. Group plants with similar watering needs together to optimize the efficiency of your system and ensure each plant type receives the appropriate amount of moisture.

    Installation can be straightforward with a bit of planning. Use flexible tubing to maneuver around your garden beds, and install emitters or drippers at the base of each plant. This targeted approach helps maintain soil moisture levels without over-saturating areas, promoting healthier root systems.

    For those new to drip irrigation, start with a basic kit which includes all necessary components like tubing, connectors, and emitters. Once comfortable, you can upgrade your system with timers and moisture sensors, allowing for more precise control over water usage and further conservation efforts.

    Create Shaded Plant Zones

    Create Shaded Plant Zones

    Creating shaded plant zones in your garden can significantly conserve water and protect your plants from extreme heat. Start by selecting plants that naturally thrive in shade, such as ferns, hostas, and astilbes, which require less water and provide lush greenery.

    Incorporate structures like pergolas or strategically placed umbrellas to create artificial shade. This not only reduces water evaporation but also allows for the inclusion of more diverse plant species that prefer filtered light.

    Consider using taller plants or trees as natural shade providers for smaller, water-sensitive plants. For example, plant drought-tolerant trees like the Desert Willow or Redbud to cast shade on more delicate flora beneath.

    Mulching is essential in shaded zones to maintain soil moisture and suppress weed growth. Use organic mulches, such as bark chips or pine needles, which help keep the soil cool and reduce the need for frequent watering.

    Utilize Reflective Garden Surfaces

    Utilize Reflective Garden Surfaces

    Incorporating reflective surfaces in your garden can significantly enhance light distribution, especially in shaded areas. Mirrors, aluminum foil, or even reflective mulch can redirect sunlight to areas that need more light, promoting healthier plant growth.

    To start, place reflective materials strategically to bounce light onto your plants, especially those that thrive in bright conditions. This not only boosts the aesthetic appeal of your garden but also helps in conserving water since plants can photosynthesize more efficiently with increased light.

    For beginners, using aluminum foil behind potted plants or along garden edges is a simple and effective method. More experienced gardeners might consider installing garden mirrors, which not only reflect light but also create the illusion of space, making small gardens feel larger.

    It’s crucial to monitor plant responses to the increased light, as too much reflection can lead to overheating. Ensure your plants are not stressed by the extra light by adjusting the angle and distance of reflective surfaces as needed, especially during peak sunlight hours.

    Mix Perennials for Seasonal Color

    Mix Perennials for Seasonal Color

    To achieve vibrant seasonal color with perennials, consider planting a mix of species that bloom at different times of the year. This approach ensures your garden is never without color, providing continuous interest and allure.

    Start by selecting perennials that thrive in your climate, taking into account the amount of sunlight and type of soil available. For example, Lavender prefers well-drained soil and full sun, while Hostas flourish in shaded, moist environments.

    Incorporate a variety of heights and textures to create depth and visual interest. Taller perennials like Delphiniums can serve as a backdrop, while shorter varieties such as Coreopsis provide a cheerful ground cover.

    For water-saving benefits, choose drought-tolerant perennials that require less irrigation once established. Consider plants like Blanket Flower (Gaillardia) and Russian Sage, which are both hardy and colorful options for low-water gardens.

    Opt for Colorful Drought-Resistant Shrubs

    Opt for Colorful Drought-Resistant Shrubs

    Adding colorful drought-resistant shrubs to your garden can significantly reduce water usage while maintaining visual appeal. These plants are ideal for areas with limited rainfall and can thrive in well-draining soil types such as sandy or loamy soil.

    Consider planting shrubs like Lavender (Lavandula) or Russian Sage (Perovskia atriplicifolia), which are both hardy and vibrant. Lavender requires full sun and should be watered deeply but infrequently, allowing the soil to dry out between waterings.

    For year-round color, choose California Lilac (Ceanothus), which blooms profusely in spring and tolerates drought conditions once established. It’s important to plant it in a spot with at least six hours of sunlight per day to ensure optimal growth and flowering.

    Experienced gardeners might explore using mulch around the base of these shrubs to conserve moisture and reduce weeds. A layer of organic mulch, such as bark chips or straw, can also help moderate soil temperature and improve plant health.

    Conclusion: Growing Success with These Plants

    In “12 Colorful Water-Saving Garden Ideas,” we explored innovative ways to nurture not just your garden but also your relationships. We delved into the importance of communication, much like selecting the right plants, and how establishing boundaries is akin to creating a garden layout. We highlighted the role of trust, represented by the roots that support vibrant blooms, and the patience required to see your garden—and your relationships—flourish. We also touched on conflict resolution, akin to weeding, and the significance of shared goals as in planning a seasonal harvest. Each idea mirrors a key relationship concept, offering you a unique perspective on growth and sustainability.

    Now, take a moment to identify one relationship in your life that could benefit from a little extra care. Apply one of these ideas today by initiating an open conversation or setting a shared goal. This article is a treasure trove of strategies—bookmark it as your go-to guide for nurturing your relationships.

    As you cultivate these connections, remember that every small effort contributes to a thriving relationship landscape. Embrace this journey with optimism, for your dedication today lays the foundation for lasting success tomorrow. Save this article as a reminder that your relationship garden is ever-growing and worth every effort.

  • 12 Essential Water-Saving Garden Ideas

    12 Essential Water-Saving Garden Ideas

    Welcome to the lush world of gardening where your green thumb can thrive, no matter your level of experience! Whether you’re just starting to cultivate your gardening passion or you’re a seasoned horticulturist seeking fresh inspiration, “12 Essential Water-Saving Garden Ideas” is here to transform your outdoor space into a vibrant oasis. In a time when sustainability and resourcefulness are more crucial than ever, this guide offers innovative strategies that not only conserve water but also enhance the beauty and resilience of your garden.

    Imagine the joy of nurturing a garden that flourishes with less water, allowing you to spend more time enjoying your outdoor sanctuary and less time worrying about maintenance. This collection of ideas provides practical benefits like reducing water bills, promoting plant health, and minimizing environmental impact, making it a must-have for anyone looking to cultivate a sustainable and thriving garden. Dive into these engaging techniques with confidence, knowing that each tip is designed to empower you to create a bountiful garden that stands the test of time.

    Install Drip Irrigation Systems

    Install Drip Irrigation Systems

    Drip irrigation systems are an excellent way to conserve water while ensuring your plants receive the moisture they need. These systems deliver water directly to the plant roots, which minimizes evaporation and runoff.

    To set up a drip irrigation system, start by planning the layout to match your garden’s needs. Consider the size of your garden and the types of plants you have to determine the appropriate emitter spacing and flow rate.

    Begin with a starter kit if you’re new to drip irrigation; they typically include everything you need, including tubing, emitters, and connectors. Follow the instructions carefully, ensuring that the tubing is securely connected and laid out to reach all plants.

    For advanced gardeners, consider adding a timer to your drip system for automated watering, which can be especially beneficial during vacations or busy periods. Additionally, install a filter to prevent clogs, and periodically check and maintain the system for optimal performance.

    Mulch to Retain Soil Moisture

    Mulch to Retain Soil Moisture

    Mulching is a powerful technique for conserving soil moisture, making it an essential practice in water-saving gardening. By applying a layer of mulch, such as shredded bark, straw, or even grass clippings, gardeners can significantly reduce evaporation and keep the soil consistently moist.

    This protective layer not only conserves water but also helps regulate soil temperature, which is crucial during hot weather. In addition to retaining moisture, mulch suppresses weed growth, reducing competition for water and nutrients that your plants need to thrive.

    For those new to mulching, start by applying a 2-3 inch layer around your plants, ensuring not to pile it directly against stems or trunks to prevent rot. Choose mulch materials that suit your garden style; organic options like wood chips and leaf mold can gradually enrich your soil as they decompose.

    Experienced gardeners might consider using inorganic mulches like gravel or stone for areas with perennial plants, as these materials don’t decompose and require less frequent replenishment. However, it’s essential to remember that organic mulches often provide more benefits to soil health over time. By incorporating mulching into your gardening routine, you’ll not only save water but also create a healthier garden environment.

    Collect Rainwater in Barrels

    Collect Rainwater in Barrels

    Collecting rainwater in barrels is an effective way to conserve water while maintaining a healthy garden. This sustainable practice not only reduces your water bill but also provides plants with naturally soft, chlorine-free water.

    To set up a rainwater harvesting system, position barrels under downspouts to capture runoff efficiently. Ensure the barrels are equipped with a secure lid and a spigot for easy access to the harvested water.

    For beginners, start with a single barrel to understand the system’s benefits and management. More experienced gardeners might consider connecting multiple barrels to increase storage capacity, especially during rainy seasons.

    Regularly check for clogs and clean the barrels to prevent algae and mosquito breeding. Adding a fine mesh screen over the lid can further protect the water from debris and pests.

    Use your collected rainwater to water plants early in the morning or late in the afternoon to minimize evaporation. This approach ensures that your garden remains lush and vibrant, even during dry spells.

    Choose Drought-Tolerant Plants

    Choose Drought-Tolerant Plants

    Choosing drought-tolerant plants is a savvy way to conserve water while maintaining a vibrant garden. These plants are specially adapted to survive with minimal watering, making them perfect for areas prone to dry spells or for gardeners looking to reduce water usage.

    Succulents such as sedum and agave are excellent choices for a water-wise garden. They store water in their leaves, allowing them to thrive in well-drained soil with infrequent watering.

    Native plants are another fantastic option, as they have evolved to thrive in the local climate with little intervention. Research local native species to find those that will seamlessly integrate into your garden, offering beauty and resilience.

    When planting drought-tolerant species, it’s vital to consider the soil composition. Amend the soil with organic matter like compost to improve drainage and nutrient retention, which helps these plants establish strong root systems.

    For those looking to expand their knowledge, consider the technique of hydrozoning, grouping plants with similar water needs. This approach not only saves water but also simplifies irrigation, ensuring each plant gets just the right amount of moisture.

    Water Plants in Early Morning

    Water Plants in Early Morning

    Watering your plants in the early morning is a highly effective way to conserve water and promote healthy growth. During this time, temperatures are cooler, reducing the amount of water lost to evaporation.

    Early morning watering also allows plants to absorb moisture more efficiently, which is crucial for their health and vitality. This approach helps in preventing diseases, as foliage dries more quickly during the day, reducing the risk of fungal infections.

    For beginners, it’s important to water at the base of the plants to ensure that the roots receive the moisture they need. Using a soaker hose or drip irrigation system can help deliver water directly to the soil, minimizing waste and ensuring even distribution.

    Experienced gardeners might consider using mulch to further enhance water retention in the soil. Mulch not only conserves moisture but also keeps the soil temperature stable, which is beneficial for plant roots, especially during hotter days.

    Group Plants by Water Needs

    Group Plants by Water Needs

    Grouping plants by their water needs is a smart strategy for conserving water in your garden. By doing so, you create zones where plants with similar moisture requirements can thrive, simplifying your watering routine and reducing waste.

    Start by identifying the water requirements of each plant in your garden. Cacti and succulents, for instance, have low water needs, while hydrangeas and ferns require more frequent watering.

    Once you have an understanding of each plant’s needs, arrange them in clusters or sections based on this information. Use mulch to help retain moisture in the soil and reduce evaporation, especially in areas where plants need more water.

    For a low-maintenance approach, consider installing a drip irrigation system tailored to these zones, ensuring each plant group receives the precise amount of water they need. This not only saves water but also promotes healthier growth by preventing overwatering.

    Use Greywater for Non-Edibles

    Use Greywater for Non-Edibles

    Reusing greywater can significantly reduce water waste in your garden, especially for non-edible plants. This water can come from your shower, bathroom sink, or washing machine, provided you use mild, biodegradable soaps.

    To use greywater safely, ensure it is applied directly to the soil and not on the plant leaves. Non-edible plants such as ornamental shrubs, trees, and flowers often thrive with greywater, as long as it is not too salty or greasy.

    It’s essential to rotate the use of greywater with fresh water to prevent the build-up of harmful substances in the soil. A simple drip irrigation system can help you distribute greywater efficiently, minimizing the risk of over-saturation.

    For those looking to optimize greywater use, consider installing a filtration system that removes impurities before the water reaches your plants. Advanced gardeners might set up a three-tiered garden bed that filters greywater through layers of gravel and sand, further purifying it before it reaches the roots.

    Add Organic Matter to Soil

    Add Organic Matter to Soil

    Adding organic matter to your soil is a key strategy for conserving water in your garden. Organic matter improves soil structure, enhancing its ability to retain moisture and nutrients.

    For beginners, incorporating compost into your garden is an excellent starting point. Simply spread a 2-3 inch layer of compost over your soil and work it in using a garden fork or tiller, ensuring it’s evenly distributed.

    Experienced gardeners might consider using aged manure or leaf mold as alternatives for enriching the soil. These materials not only improve water retention but also encourage beneficial microbial activity, which can enhance plant health.

    To maximize water savings, focus on mixing organic matter into the top 6-8 inches of soil, where plant roots are most active. Regularly replenish organic material each growing season to maintain soil health and improve water efficiency.

    Create Shaded Garden Areas

    Create Shaded Garden Areas

    Creating shaded garden areas can significantly reduce water loss by minimizing evaporation from soil and plant surfaces. To achieve this, consider installing structures like pergolas or using shade cloths strategically above plant beds.

    Another effective method is to plant trees or tall shrubs that naturally provide shade. Opt for fast-growing species such as Japanese maples or elderberries which can establish a canopy quickly.

    For smaller gardens, use trellises or arbors to support climbing plants such as clematis or wisteria that can offer shade as they mature. These plants not only provide cover but also add vertical interest and beauty to your garden.

    Advanced gardeners might explore intercropping techniques where taller plants provide shade for shorter, more sun-sensitive species. This approach requires careful planning of plant heights and growth patterns to ensure all species thrive.

    Set Up Automatic Timers

    Set Up Automatic Timers

    Setting up automatic timers for your garden’s irrigation system is a smart way to conserve water while ensuring your plants get the moisture they need. Automatic timers allow you to schedule watering sessions during the cooler parts of the day, reducing evaporation and water waste.

    For beginners, start by selecting a basic timer that suits your garden’s size and complexity. These devices can be easily attached to your garden tap or hose, making them highly accessible and user-friendly.

    Advanced gardeners might consider timers with more sophisticated features, such as soil moisture sensors and weather-based adjustments. These systems can automatically skip watering sessions on days when rain is expected, further optimizing water use.

    To ensure your plants thrive, set your timer to water early in the morning or late in the evening. This timing minimizes evaporation and allows plants to absorb moisture more effectively, promoting healthier growth.

    Aerate Soil for Better Absorption

    Aerate Soil for Better Absorption

    To maximize water absorption in your garden, aerating the soil is crucial. Over time, soil can become compacted, which limits the roots’ access to water and nutrients.

    Consider using a garden fork or a mechanical aerator to gently loosen the soil. This process helps to break up compacted areas, allowing water to penetrate more deeply and efficiently.

    For gardeners working with clay-heavy soils, aeration is particularly beneficial as it prevents waterlogging and improves drainage. Adding organic matter like compost can further enhance soil structure, making it more porous and supportive of root growth.

    Incorporate this practice into your gardening routine by aerating your soil once or twice a year, ideally in spring and fall. This not only improves water retention but also boosts the overall health of your plants, encouraging vigorous growth and resilience.

    Check for Leaks Regularly

    Check for Leaks Regularly

    Regularly checking for leaks in your garden’s irrigation system is crucial for both water conservation and plant health. Leaky hoses or connections not only waste water but can also lead to overwatering, which harms plants and may encourage disease.

    Begin by inspecting all visible components of your watering system, such as hoses, taps, and sprinkler heads, for any signs of wear or damage. If you notice any damp spots in the soil or moss growing in unusual places, it could indicate an underground leak that needs attention.

    For beginner gardeners, make it a habit to walk through your garden while the irrigation system is running. This allows you to spot any issues early on, preventing water waste and ensuring your plants receive the right amount of moisture.

    Advanced gardeners might consider installing a moisture sensor to monitor soil conditions more accurately. This ensures that your irrigation system only operates when necessary, optimizing water usage and supporting sustainable gardening practices.

    Conclusion: Growing Success with These Plants

    In exploring the ’12 Essential Water-Saving Garden Ideas,’ we’ve unearthed powerful parallels for nurturing relationships. We discussed the importance of intentionality, akin to drought-resistant planting, where choosing the right elements ensures sustainability. We emphasized the value of communication, much like efficient watering techniques ensuring nourishment. Flexibility in relationships mirrors the adaptability of mulching, and the importance of boundaries aligns with the strategic use of garden zones. Attentive listening was linked to mindful observation, while shared goals were likened to the collective benefits of rainwater harvesting. We also touched on the significance of patience, the art of letting go, and the joy found in cultivating shared experiences.

    Now, take the next step: identify one relationship area that could benefit from a ‘water-saving’ strategy and commit to nurturing it today. Whether it’s setting aside time for intentional conversation or creating shared goals, your actions will sow seeds of growth.

    Remember to save this article as a handy guide for future reference. As you embark on this journey, know that each thoughtful action you take brings you closer to a flourishing, resilient connection. Here’s to a future where your relationships thrive, grounded in understanding and care.

  • 10 Low-Maintenance Indoor Plants For Beginners

    10 Low-Maintenance Indoor Plants For Beginners

    Bringing a touch of greenery indoors can transform your living space, infusing it with life and vibrancy. Yet, for many, the idea of caring for indoor plants can seem daunting—especially for those just starting on their gardening journey. Whether you’re a beginner eager to cultivate your first indoor oasis or an experienced gardener looking to add some fuss-free foliage to your collection, the world of low-maintenance plants offers something for everyone. These resilient green companions are not only forgiving, but they also bring a sense of tranquility and well-being, making them perfect partners for our busy lives.

    Indoor gardening doesn’t have to be a complex endeavor reserved only for those with a green thumb. With the right selection of plants, even the busiest or most forgetful gardener can enjoy the benefits of indoor greenery without the stress of constant upkeep. In this article, you’ll discover ten easy-care indoor plants that thrive with minimal attention, providing you the joy of gardening without the usual demands. From the robust Snake Plant to the charming Pothos, we’ll guide you through each plant’s unique qualities and simple care tips, ensuring your indoor garden flourishes with ease.

    So, whether you’re looking to brighten up your home office or breathe new life into your living room, these beginner-friendly plants are your key to indoor gardening success. By the end of this article, you’ll be equipped with the knowledge to choose and care for plants that fit seamlessly into your lifestyle. Let’s embark on this delightful journey of discovering low-maintenance indoor plants that promise to elevate your home with their enduring beauty.

    Introduction to Low-Maintenance Plants

    Introduction to Low-Maintenance Plants

    Low-maintenance plants are perfect for those new to gardening or those with a busy lifestyle. These plants are typically hardy and can thrive with minimal attention, making them an excellent choice for beginners looking to add greenery to their living spaces.

    When selecting low-maintenance plants, consider those that can tolerate a range of light conditions and have low water requirements. Succulents and snake plants are ideal examples because they store water in their leaves, allowing them to survive infrequent watering.

    To keep low-maintenance plants healthy, use a well-draining potting mix. A mix containing perlite or coarse sand is beneficial, as it prevents root rot by allowing excess water to escape easily.

    Most low-maintenance plants only require watering every 1-2 weeks, depending on the humidity and temperature of your home. Always check the soil moisture by inserting your finger about an inch deep; if it feels dry, it’s time to water.

    For those looking for advanced tips, consider integrating a self-watering pot system to further reduce watering frequency. Additionally, placing your plants on a rotation schedule ensures they receive even light exposure, promoting balanced growth.

    Why Choose Indoor Plants?

    Why Choose Indoor Plants?

    Choosing indoor plants can transform your living space into a lush, green oasis while also improving air quality. They are perfect for those who want to enjoy nature’s beauty without the need for a large outdoor garden.

    Indoor plants are ideal for beginners because they often require less maintenance than outdoor plants. Most indoor plants thrive in indirect light and can adapt to a variety of home conditions, making them versatile and easy to care for.

    When starting with indoor plants, consider those that are known for being particularly low-maintenance. Snake plants, pothos, and peace lilies are excellent choices as they can tolerate low light and infrequent watering.

    To ensure success, it’s important to use the right type of soil and pot. Choose a pot with good drainage and a soil mix that retains moisture while allowing excess water to escape, such as a peat-based potting mix.

    Watering is a key factor in keeping indoor plants healthy. Most indoor plants prefer to dry out slightly between waterings, so check the top inch of soil and water only when it feels dry.

    For those looking to advance their indoor gardening skills, try experimenting with humidity levels. Using a humidity tray or misting your plants can help mimic their natural environment, particularly for tropical species.

    Top Benefits of Easy-Care Greenery

    Top Benefits of Easy-Care Greenery

    Integrating easy-care greenery into your home offers significant benefits, especially for those new to gardening. These plants often require minimal attention, making them perfect companions for busy lifestyles.

    A major advantage of low-maintenance plants is their adaptability to various indoor environments. Many thrive in indirect sunlight and can tolerate occasional neglect, which suits spaces with limited natural light.

    These plants are not only resilient but also improve indoor air quality, creating a healthier living space. By selecting species known for their air-purifying qualities, such as spider plants or peace lilies, you enhance both the aesthetic and health benefits of your home.

    For beginners, starting with easy-care plants can build confidence in gardening skills. Choose plants like pothos or ZZ plants, which are forgiving of common beginner mistakes like overwatering or inconsistent care.

    Here are some practical tips for maintaining these hardy plants:

    • Use a well-draining potting mix to prevent root rot.
    • Water them only when the top inch of soil feels dry to the touch.
    • Fertilize sparingly, about once a month during growing seasons, to support their growth without overwhelming them.

    Advanced gardeners can still appreciate the beauty and simplicity of low-maintenance plants by experimenting with different varieties and styling techniques. Try grouping plants with similar care needs to create a lush, cohesive display that requires minimal effort to maintain.

    Succulent Sensations: Aloe Vera

    Succulent Sensations: Aloe Vera

    Aloe Vera is a succulent that is both aesthetically pleasing and incredibly low-maintenance, making it perfect for beginners. Known for its medicinal properties, aloe vera can thrive indoors with minimal care, provided it receives adequate sunlight.

    Place your aloe vera in a bright spot, such as a south or west-facing window, to ensure it gets plenty of light. However, be cautious of direct, harsh sunlight, which can cause the leaves to scorch; a sheer curtain can help diffuse the light.

    Watering aloe vera is straightforward: let the soil dry out completely between waterings, typically every two to three weeks. Overwatering is a common mistake, so make sure the pot has drainage holes to prevent root rot, which aloes are particularly susceptible to.

    For optimal growth, use a well-draining cactus or succulent mix, which often contains sand or perlite. Beginners can keep it simple by purchasing a commercial succulent blend, while more seasoned gardeners might mix their own using equal parts potting soil, sand, and perlite.

    Air-Purifying Peace Lily

    Air-Purifying Peace Lily

    Among the easiest plants to care for, the Peace Lily is an excellent choice for beginners seeking an air-purifying companion. Known for its ability to thrive in low-light conditions, this plant is perfect for adding greenery to dim corners of your home.

    To ensure optimal growth, place your Peace Lily in indirect sunlight and water it only when the top inch of soil feels dry. Overwatering can lead to root rot, so it’s crucial to let the soil dry out between waterings.

    For the best results, use a well-draining potting mix and consider incorporating a small amount of perlite to improve aeration. Fertilize sparingly, applying a balanced houseplant fertilizer every two months during the growing season.

    Advanced gardeners might try propagating Peace Lilies by dividing larger plants during repotting. This not only multiplies your collection but also helps rejuvenate older plants, ensuring they remain healthy and vibrant over the years.

    Versatile Spider Plant Guide

    Versatile Spider Plant Guide

    The Spider Plant is not just a favorite among houseplant enthusiasts; it’s also incredibly easy to care for, making it perfect for beginners. Thriving in a variety of conditions, this plant can adapt to both bright indirect light and partial shade, ensuring it fits well into almost any home environment.

    When it comes to watering, Spider Plants prefer to dry out between waterings, which means they only need to be watered approximately once a week. Overwatering can cause root rot, so ensure the pot has good drainage and use a well-draining soil mix like one containing peat and perlite.

    These plants are known for their ability to produce “pups” or offshoots, which can be easily propagated. Simply snip the pups off when they develop small roots and plant them in soil to expand your indoor garden effortlessly.

    For those looking to boost their Spider Plant’s health, occasional feeding with a balanced liquid fertilizer during the growing season can be beneficial. Keep in mind that these plants are sensitive to fluoride, so it’s a good idea to use distilled or rainwater if your tap water is fluoridated.

    Resilient Snake Plant Insights

    Resilient Snake Plant Insights

    Snake plants, also known as Sansevieria or mother-in-law’s tongue, are ideal for beginners due to their resilience and low maintenance. They thrive in a variety of light conditions, making them perfect for almost any indoor environment.

    Watering a snake plant is straightforward: allow the soil to dry out completely between waterings. Typically, this means watering every two to six weeks, depending on your home’s humidity, light conditions, and the season.

    To ensure optimal growth, use a well-draining potting mix, such as a cactus or succulent blend, that prevents root rot. Additionally, choose a pot with drainage holes to further safeguard against excess moisture.

    For beginners, it’s encouraging to know that snake plants can tolerate neglect and infrequent watering. For those looking to advance their skills, consider propagating snake plants by dividing their rhizomes or leaf cuttings, which is a rewarding process.

    Caring for the ZZ Plant

    Caring for the ZZ Plant

    The ZZ plant, or Zamioculcas zamiifolia, is an excellent choice for beginners due to its tolerance of a wide range of conditions. This hardy plant thrives in low-light environments, making it ideal for spaces with limited natural sunlight.

    Watering the ZZ plant is simple, as it prefers to dry out completely between waterings. In general, watering every two to three weeks is sufficient, but always check the top inch of soil before adding more water.

    ZZ plants aren’t fussy about soil, but they do best in a well-draining potting mix. A blend designed for succulents or cacti is perfect, as it helps prevent water from sitting at the roots and causing rot.

    Though ZZ plants are low-maintenance, they benefit from occasional feeding. Use a balanced, water-soluble fertilizer diluted to half strength every month during the growing season in spring and summer.

    For those looking to expand their ZZ plant collection, propagation is straightforward. Simply cut a healthy leaf near the base and place it in water or moist soil, where it will eventually develop new roots.

    Low-Light Lover: Pothos Plant

    Low-Light Lover: Pothos Plant

    Pothos plants are an excellent choice for beginners due to their ability to thrive in low-light conditions. These resilient plants can adapt to almost any indoor environment, making them highly versatile.

    To ensure your pothos plant remains healthy, place it in a spot with indirect sunlight. Although they tolerate low light, keeping them near a window will promote more robust growth.

    Avoid overwatering your pothos by letting the top inch of soil dry out between waterings. Use a well-draining potting mix to prevent root rot, which is a common issue with excessive moisture.

    For optimal growth, feed your pothos with a balanced liquid fertilizer every 4 to 6 weeks during the growing season. Pruning leggy vines will encourage bushier growth and maintain a neat appearance.

    Final Thoughts on Indoor Plant Care

    Final Thoughts on Indoor Plant Care

    Incorporating indoor plants into your living space is a rewarding endeavor, offering both aesthetic and health benefits. To ensure your plants thrive, focus on understanding each plant’s specific needs, such as light, water, and soil preferences.

    Regularly inspect your plants for signs of stress, such as yellowing leaves or wilting, which can indicate either overwatering or underwatering. Adjust your watering schedule based on the plant’s requirements and the season, as some plants need less water during their dormant period in the colder months.

    Choosing the right soil is crucial for indoor plant success. Most houseplants thrive in a well-draining potting mix; you can enhance drainage by mixing in materials like perlite or orchid bark for plants that need excellent aeration.

    Lighting is often the most challenging aspect of indoor plant care, but it can be managed with a few simple adjustments. If natural light is insufficient, consider using grow lights to supplement; these are especially useful during shorter winter days.

    As you gain confidence, experiment with more advanced techniques, such as propagation, to expand your indoor garden. Propagating plants like pothos or spider plants is a simple way to create new plants from cuttings, offering both a cost-effective and rewarding gardening experience.

    Finally, remember that patience and observation are your best tools in indoor plant care. By taking the time to understand your plants’ needs and responding to their signals, you’ll cultivate a thriving indoor garden that brings joy and tranquility to your home.

    Conclusion: Growing Success with These Plants

    In exploring the article ’10 Low-Maintenance Indoor Plants For Beginners,’ we discovered the parallels between nurturing plants and fostering healthy relationships. From understanding the importance of patience and providing space, to appreciating growth and consistent care, each plant taught us a unique lesson on strengthening bonds. We touched on the significance of setting foundations like the resilient Snake Plant, embracing adaptability with the flexible Spider Plant, and cherishing simplicity as the Peace Lily does. Each plant metaphorically mirrored essential relationship concepts such as trust, communication, and mutual respect.

    As a next step, consider integrating these insights into your daily interactions. Choose one relationship principle highlighted by a plant and apply it today, whether it’s offering more patience or giving your partner space to grow.

    To ensure these valuable lessons accompany you on your relationship journey, save or bookmark this article now. It can serve as a handy guide whenever you seek inspiration or a gentle reminder of how to nurture your connections.

    Remember, just as these plants thrive with mindful care, so too can your relationships blossom into enduring sources of joy and support. Here’s to cultivating thriving relationships that stand the test of time!

  • 6 Common Patio Garden Inspirations

    6 Common Patio Garden Inspirations

    Transforming your patio into a lush, vibrant garden can be both an exciting challenge and a rewarding retreat. Whether you’re just starting your gardening journey or have green thumbs seasoned by years of experience, the possibilities for patio gardens are as diverse as they are delightful. Each patio garden has the potential to be a personal oasis, a reflection of your style, and a testament to your creativity.

    Understanding the importance of maximizing small spaces is key to creating a stunning patio garden. With the right inspiration, even the tiniest of patios can become a verdant escape that soothes the mind and delights the senses. Our guide will introduce you to six inspiring patio garden ideas that cater to various tastes and expertise levels, ensuring that every gardener can find something to ignite their passion.

    As we explore these inspirations, you’ll discover practical strategies that can easily be adapted to fit your space and lifestyle. From vertical gardens that use every inch of available space to themed gardens that transport you to another world, there’s a wealth of creativity waiting to be unlocked. Dive in and find the inspiration you need to turn your patio into a garden paradise, where tranquility and beauty flourish side by side.

    Choosing the Perfect Containers

    Choosing the Perfect Containers

    When choosing containers for your patio garden, consider both the aesthetic and functional aspects. Opt for containers that are large enough to allow for root growth, as this will support the health and vigor of your plants.

    It’s crucial to select containers with adequate drainage to prevent root rot. If your chosen container doesn’t have drainage holes, you can easily drill some or add a layer of stones at the bottom for improved drainage.

    Material choice is also important; terracotta pots offer breathability, while plastic containers retain moisture better. For those living in hot climates, consider using light-colored pots to reflect heat and keep root zones cooler.

    Advanced gardeners might experiment with self-watering pots, which can help maintain consistent moisture levels, reducing the frequency of watering. Ensure your soil mix is appropriate for your plant type, such as a cactus mix for succulents or a loamy mix for vegetables.

    Incorporating Vertical Planting Ideas

    Incorporating Vertical Planting Ideas

    Vertical planting can transform a small patio into a lush, productive garden space. By utilizing vertical space, you can grow more plants without taking up additional ground area, which is perfect for limited patio spaces.

    Start by choosing the right structures to support your vertical garden—trellises, wall planters, and hanging baskets are excellent options. Ensure these structures are sturdy and can support the weight of fully grown plants, especially if you plan to grow heavier crops like tomatoes or cucumbers.

    When selecting plants, consider those that naturally grow upwards or trail down. Vining plants like peas, beans, and certain varieties of squash thrive in vertical setups, while herbs such as thyme and oregano can cascade beautifully over the edges of hanging baskets.

    Soil quality is crucial in vertical planting as containers can dry out quickly. Use a high-quality potting mix with good drainage, and incorporate slow-release fertilizers to provide consistent nutrients over time.

    Watering is another critical aspect; vertical plants often need more frequent watering due to increased exposure to wind and sun. Consider installing a drip irrigation system to automate watering and ensure even moisture distribution, which is especially beneficial for busy gardeners.

    Creating a Relaxing Seating Space

    Creating a Relaxing Seating Space

    To create a relaxing seating space in your patio garden, start by choosing comfortable outdoor furniture that suits the aesthetic and function of your area. Consider materials like weather-resistant wicker or teak that can withstand various weather conditions while providing durability.

    Position your seating area strategically where you can enjoy the best views and sunshine, or opt for a shaded spot if you prefer cooler temperatures. Incorporate movable elements like cushions and throws, which allow you to easily adapt to changing weather conditions and add a personal touch.

    Enhance the ambiance with plants that are both visually appealing and functional. Use aromatic plants like lavender or rosemary nearby to deter pests and provide a calming scent—these plants thrive in well-draining soil and require moderate watering.

    For an advanced touch, consider integrating a small water feature or wind chimes to enhance the sensory experience. Ensure the water feature is properly maintained by regularly cleaning it and checking its pump to avoid algae growth and ensure smooth operation.

    Selecting Vibrant Plant Varieties

    Selecting Vibrant Plant Varieties

    Enhancing your patio garden with vibrant plant varieties can transform it into a colorful oasis. Opt for plants that thrive in your specific climate to ensure lasting vibrancy and health.

    Annuals like marigolds and petunias are excellent choices for a burst of color. These flowers are not only easy to grow but also require minimal maintenance, making them perfect for beginners.

    Consider adding perennials such as lavender and echinacea, which return year after year. These plants thrive in well-drained soil and need watering about once a week, depending on rainfall.

    For a touch of exotic flair, tropical plants like hibiscus can be a stunning addition to your patio. Ensure they receive plenty of sunlight and are kept in a warm environment, especially during cooler months.

    Experiment with container gardening to easily swap out plant varieties as seasons change. Use containers with good drainage and fill them with a quality potting mix to support healthy growth.

    Integrating Stylish Garden Lighting

    Integrating Stylish Garden Lighting

    Integrating stylish garden lighting can transform your patio into a magical outdoor space. It’s essential to choose lights that not only enhance the aesthetic but also withstand outdoor conditions.

    Consider using solar-powered lights for an energy-efficient and eco-friendly option. These lights are perfect for lining pathways or highlighting specific plants, requiring minimal maintenance.

    String lights can add a whimsical touch by draping them across pergolas or weaving them through trees. Choose LED string lights for their long lifespan and low energy consumption, providing a warm ambiance without increasing your electricity bill.

    For a more dramatic effect, consider installing uplights to accentuate the textures of trees or garden sculptures. Ensure these lights are strategically placed to avoid harsh shadows, enhancing the garden’s visual depth while keeping pathways safe.

    Finally, remember to test your lighting setup before permanently installing it to ensure it meets your desired effect. Experiment with different placements and colors to find the perfect balance that complements your garden’s style and plant varieties.

    Sustainable Garden Maintenance Tips

    Sustainable Garden Maintenance Tips

    Sustainable garden maintenance is not only environmentally friendly but also cost-effective. One way to achieve this is by using compost as a natural fertilizer, which enriches the soil without chemical additives.

    To create your own compost, collect kitchen scraps like vegetable peels and coffee grounds, along with garden waste such as leaves and grass clippings. Layer these materials in a bin or pile, turning them regularly to speed up decomposition and create a nutrient-rich compost.

    Water conservation is another crucial aspect of sustainable gardening. Install a rainwater collection system to gather water for your garden, reducing reliance on municipal water sources and lowering your water bill.

    In addition to collecting rainwater, consider using mulch around your plants. Mulch helps retain soil moisture, suppresses weeds, and can be made from organic materials like straw or wood chips, further enriching the soil as it breaks down.

    For pest management, opt for natural solutions such as introducing beneficial insects like ladybugs and lacewings. These predators help control pest populations without the need for harsh chemicals, making your garden a healthier ecosystem.

    Additionally, rotating crops each season can prevent soil nutrient depletion and reduce the likelihood of pest infestations. This technique ensures a more resilient and productive garden over time, preserving soil health for future planting.

    Conclusion: Growing Success with These Plants

    In exploring the ‘6 Common Patio Garden Inspirations,’ we’ve delved into the enriching parallels between nurturing a garden and cultivating relationships. From the importance of setting a solid foundation with clear communication, akin to preparing fertile soil, to the necessity of regular attention and care, much like the watering of plants, these concepts remind us of the dedication required for relationships to thrive. We’ve also examined the value of embracing change and growth, the beauty of diversity through shared experiences, the strength found in resilience when weathering storms, and the joy of celebrating small victories together.

    Now is the perfect time to put this newfound wisdom into practice. Choose one concept to focus on this week, such as enhancing communication or planning a shared activity, and observe how it enriches your relationship dynamics. To ensure you have these insights at your fingertips, save or bookmark this article for easy future reference.

    Remember, like a garden, relationships are ever-evolving. By investing time and love, you cultivate a bond that blooms beautifully over the years. Here’s to your journey towards flourishing relationships—plant the seeds of change today and watch them grow into lasting success.

  • 6 Common Creating A Rock Garden

    6 Common Creating A Rock Garden

    Imagine transforming a mundane corner of your garden into a captivating landscape that echoes the serene beauty of nature’s rugged terrain. Rock gardens, with their harmonious blend of stones and resilient plants, invite both tranquility and an artistic touch to any outdoor space. Whether you’re a seasoned gardener ready to embrace a new challenge or a beginner eager to dip your toes into the world of horticulture, crafting a rock garden offers a rewarding experience that marries creativity with practicality. This endeavor not only enhances your garden’s aesthetic appeal but also provides a habitat for an array of plants that thrive in less-than-ideal soil conditions.

    In this article, we will guide you through six common mistakes to avoid when creating your own rock garden, ensuring your efforts yield a stunning and sustainable masterpiece. From understanding the importance of choosing the right location to selecting hardy plants that will flourish amidst rocky terrain, our insights aim to equip you with the knowledge needed to succeed. You’ll discover how to strategically place rocks for natural drainage, how to integrate different textures for visual interest, and how to maintain your garden so it continues to thrive season after season. By the end, you’ll feel empowered to create a rock garden that not only reflects your personal style but also stands as a testament to the beauty and resilience of nature itself.

    Choosing the Perfect Site

    Choosing the Perfect Site

    When selecting the site for your rock garden, consider the natural features of your landscape. Look for areas that naturally slope or have good drainage, as these mimic the conditions where alpine plants thrive.

    Sunlight is crucial for most rock garden plants, so choose a site that receives at least six hours of direct sunlight per day. If your garden is in a shadier location, opt for shade-tolerant plants like ferns and hostas.

    Soil quality is another important factor, and it’s essential to provide well-draining soil to prevent root rot. You can amend heavy clay soils with sand or gravel to improve drainage.

    For those with more experience, consider the microclimates within your garden space. Areas near walls or buildings can create heat traps, ideal for more delicate or heat-loving species.

    Selecting Suitable Rocks and Stones

    Selecting Suitable Rocks and Stones

    When selecting rocks and stones for your rock garden, it’s essential to consider their size and texture. Larger rocks can serve as focal points, while smaller stones can fill in spaces and add detail to the overall design.

    Consider the color of the stones as it can influence the aesthetic of your garden. Lighter-colored rocks can make your garden appear larger and more open, while darker stones can create a cozy, intimate feel.

    It’s also important to choose rocks that are native to your area, as they will blend more naturally into your landscape. Local stones are often more cost-effective and environmentally friendly, reducing the carbon footprint associated with transporting non-native materials.

    For a more dynamic appearance, incorporate a variety of shapes and sizes within your rock garden. Flat stones can be used to create pathways or terraces, providing additional structure and functionality to your garden space.

    Understanding Soil and Drainage Needs

    Understanding Soil and Drainage Needs

    Understanding the soil and drainage needs is crucial when creating a thriving rock garden. Rock gardens often require well-draining soil to mimic the natural habitats of alpine plants and succulents.

    Well-draining soil can be achieved by mixing equal parts of sand, gravel, and organic matter like compost. This blend allows water to flow through quickly, preventing root rot and ensuring that plants do not sit in waterlogged soil.

    For those in regions with heavy clay soil, consider amending it with additional sand and small gravel. These materials will help break up the clay, improving both drainage and aeration around plant roots.

    It’s also wise to elevate your rock garden slightly, creating a gentle slope that encourages water to drain away from plant roots. This can be done by building up the soil and positioning larger rocks strategically to guide water flow.

    Incorporate a layer of mulch or small stones on the surface to help retain moisture while still allowing for proper drainage. This layer will also help in reducing weed growth and maintaining soil temperature.

    Regularly check your garden’s drainage by watering lightly and observing how quickly the water disappears. Adjust soil composition as needed to ensure optimal drainage and plant health.

    Picking Ideal Plant Varieties

    Picking Ideal Plant Varieties

    In choosing plant varieties for your rock garden, it’s essential to consider species that thrive in well-drained soil conditions. Succulents and alpine plants are popular choices as they naturally adapt to rocky environments and require minimal watering.

    When selecting plants, pay attention to the climate in your area to ensure compatibility. For example, sedums and sempervivums are excellent for colder climates, while lavender and rosemary are better suited for warmer regions.

    Opt for a mix of ground covers, perennials, and shrubs to create a visually appealing and dynamic rock garden. Ground covers like creeping thyme provide a lush carpet effect, while perennials like dianthus add vibrant bursts of color.

    Experiment with different textures and colors to enhance the aesthetic appeal of your rock garden. Silver foliage plants like artemisia can contrast beautifully with the darker greens of junipers, creating a striking visual impact.

    Arranging Rocks for Aesthetic Appeal

    Arranging Rocks for Aesthetic Appeal

    Arranging rocks in your garden can transform a simple space into a visually stunning landscape. Begin by selecting rocks of varying sizes and textures to create a natural look, as diversity in rock choice adds depth and interest to your design.

    Consider the natural flow of your existing landscape when positioning rocks. Placing larger rocks at focal points and using smaller stones to create pathways or borders can enhance the garden’s overall structure.

    Ensure stability by partially burying rocks into the soil, which prevents shifting over time. This technique not only keeps your arrangement secure but also gives the appearance that the rocks are a natural part of the landscape.

    For advanced gardeners, incorporating rocks with moss or lichen can add a touch of age and authenticity. Regularly misting these rocks with water can help maintain the growth of these natural additions, offering a more vibrant and lived-in feel to the garden.

    Maintaining Your Rock Garden Year-Round

    Maintaining Your Rock Garden Year-Round

    Maintaining a rock garden year-round involves consistent care and observation. Start by regularly checking for weeds, as they can quickly detract from the beauty of your garden; remove them gently to avoid disturbing the rocks and plant roots.

    Incorporating a mix of drought-tolerant plants is essential for a low-maintenance rock garden. Choose plants like sedums and sempervivums, which thrive in well-drained soil and can withstand dry spells, making them perfect for rock gardens.

    Watering is crucial but should be done judiciously. In general, rock garden plants require less water than traditional garden plants; water deeply but infrequently to encourage deep root growth.

    Consider enhancing your garden’s health by adding a thin layer of mulch around plants. This not only helps retain moisture but also suppresses weed growth and insulates plant roots from temperature extremes.

    As seasons change, adjust your care routine to suit the climate. In winter, protect sensitive plants by covering them with burlap or moving them to sheltered areas if they’re in pots.

    For those seeking advanced techniques, try incorporating a variety of rock sizes and textures. This not only improves the aesthetic appeal but also creates microclimates, allowing you to grow a broader range of plants successfully.

    Conclusion: Growing Success with These Plants

    In exploring the art of building a “rock garden” in relationships, we delved into six fundamental concepts: establishing a strong foundation of trust, embracing each other’s individuality, nurturing open communication, cultivating shared goals, managing conflicts constructively, and celebrating mutual growth. These building blocks are essential to creating a thriving relationship landscape that can weather any storm.

    To put these insights into action, consider setting aside time this week for a heartfelt conversation with your partner, focusing on one of these areas. Whether it’s aligning on future goals or simply appreciating each other’s unique qualities, taking this step can fortify your connection.

    Remember, relationships are dynamic and require constant nurturing. Bookmark this article as your go-to guide whenever you need a reminder of these principles or a boost of motivation. As you commit to these practices, envision a future where your relationship not only survives but flourishes, brimming with understanding, joy, and resilience.

    Empowered by these insights, take the first step today towards a more harmonious and enriching partnership. Your journey to relationship success starts here—save this article, and let it be your companion in crafting an enduring love story.