Category: Grow Your Own Food

  • How to Grow Lavender in Your Garden

    How to Grow Lavender in Your Garden

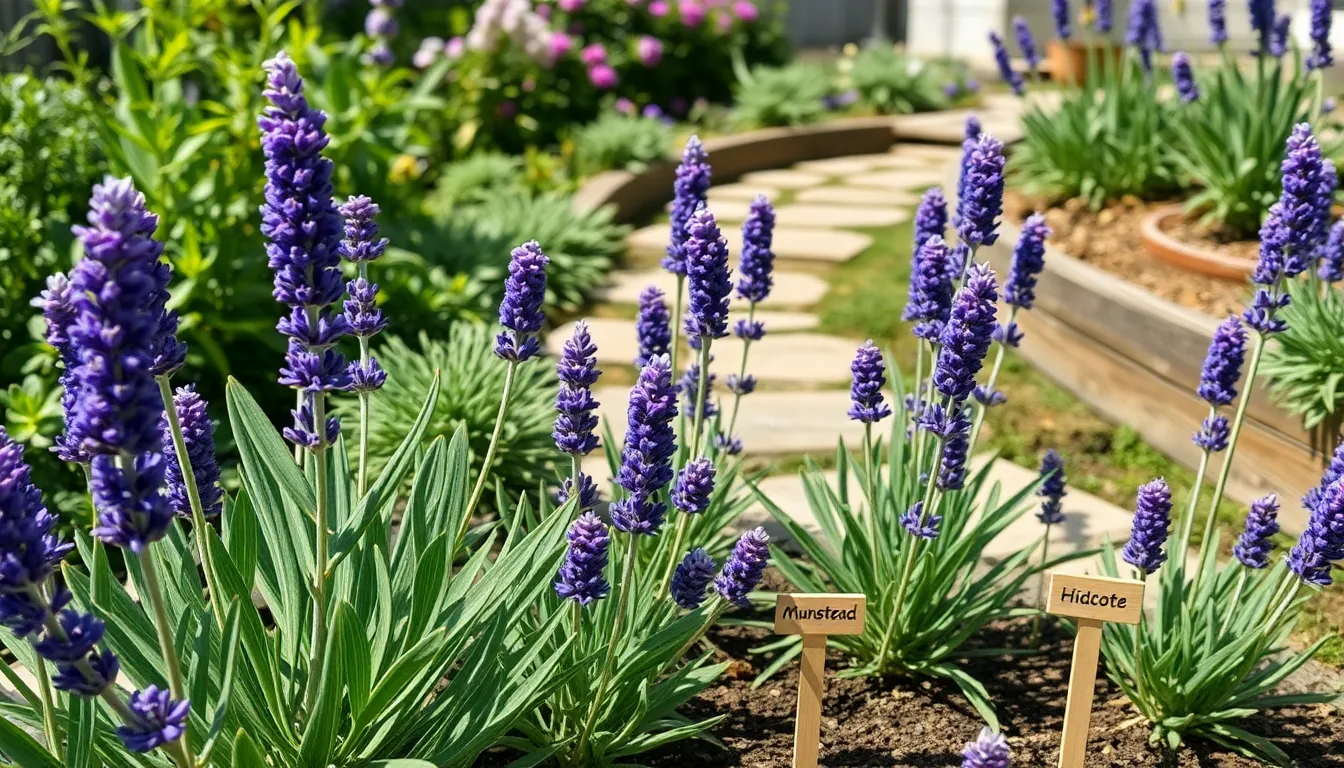
    Imagine stepping into your garden on a warm summer’s evening, the gentle breeze carrying the calming scent of lavender through the air. This enchanting experience is within reach, whether you’re a gardening novice or a seasoned horticulturist. Lavender, with its silvery foliage and striking purple blooms, offers more than just aesthetic allure—it invites tranquility and a touch of Mediterranean charm to any garden space.

    For those just starting their gardening journey, lavender can serve as a delightful introduction to the joys of nurturing plants. It’s a hardy, forgiving plant that rewards even minimal effort with a flourish of color and fragrance. Meanwhile, experienced gardeners will find new challenges and rewards in cultivating different lavender varieties, experimenting with their placement, and perfecting soil conditions to coax the most vibrant growth.

    In this guide, we’ll explore everything you need to know to successfully grow lavender in your garden, from selecting the right variety for your climate to mastering the art of pruning. You’ll learn how to create the ideal environment for your lavender plants to thrive, employing tips and tricks that will ensure their health and longevity. Embark on this lavender-growing journey with us, and soon enough, you’ll be enjoying both the visual and aromatic benefits of this beloved herb right in your own backyard.

    Select a Sunny Location

    Select a Sunny Location

    To grow lavender successfully, choosing a sunny location is crucial as lavender thrives in full sun. Aim for a spot that receives at least six to eight hours of direct sunlight each day to ensure robust growth.

    Consider the soil conditions in your chosen location, as well-drained soil is essential for lavender. If your garden soil is heavy clay, amend it with sand or gravel to improve drainage and prevent root rot.

    For those with limited space, lavender also grows well in containers placed in sunny areas like patios or decks. Use a potting mix specifically designed for Mediterranean plants and ensure the container has drainage holes to avoid waterlogged roots.

    Advanced gardeners may explore companion planting by placing lavender near other sun-loving herbs like rosemary and thyme. This not only maximizes the use of sunny spaces but also creates a fragrant herb garden with complementary benefits.

    Prepare Well-Draining Soil

    Prepare Well-Draining Soil

    To successfully grow lavender, you need to ensure the soil is well-draining to prevent waterlogged roots. Lavender thrives in sandy or gravelly soil types, which allow excess water to escape easily and reduce the risk of root rot.

    A good way to improve drainage in your garden soil is to mix in coarse sand or small gravel. For every square foot of planting area, incorporate about 2 to 3 inches of sand or gravel into the top 8 to 12 inches of soil.

    Consider using raised beds if your garden soil tends to retain moisture. This helps keep the roots dry and allows you to control the soil composition more effectively, ensuring it remains suitable for lavender.

    If you’re starting with heavy clay soil, amend it with generous amounts of organic matter such as compost or well-rotted manure. This not only improves drainage but also enhances soil structure, making it more conducive for lavender’s growth.

    Plant Lavender Seedlings

    Plant Lavender Seedlings

    After preparing well-draining soil, it’s time to plant your lavender seedlings. Choose a sunny spot in your garden, as lavender thrives in full sun, requiring at least six to eight hours of sunlight daily.

    Spacing is crucial for healthy growth, so plant your lavender seedlings about 12 to 18 inches apart. This allows adequate air circulation, helping to prevent common fungal diseases and ensuring the plants have enough room to grow.

    When planting, ensure the crown of the seedling is level with the soil surface. This avoids root rot, a common issue if lavender is planted too deeply.

    Water your lavender seedlings immediately after planting to help them establish. However, be cautious with watering frequency; lavender prefers to dry out slightly between waterings, so water only when the top inch of soil feels dry to the touch.

    For gardeners in warmer climates, consider adding a layer of light-colored mulch to help retain soil moisture and keep the roots cool. Avoid heavy mulches that might hold too much moisture, as this can lead to root issues.

    As your lavender grows, it will need trimming to maintain a tidy shape and promote bushy growth. Aim to prune lightly in early spring, cutting back about one-third of the plant, but avoid cutting into the woody stems, as this can damage the plant.

    Water Sparingly but Consistently

    Water Sparingly but Consistently

    Lavender thrives best when watered sparingly but consistently, making it essential to find the right balance for your garden. Too much water can lead to root rot, while too little can stunt growth and reduce flowering.

    Consider watering your lavender once every two weeks, allowing the soil to dry out completely between waterings. During particularly hot or dry periods, you might need to increase the frequency slightly, but always check the soil moisture first by sticking your finger about an inch into the soil.

    It’s best to water in the morning to allow any excess moisture to evaporate before evening. This practice helps prevent fungal diseases that can develop in damp, cool night conditions.

    For gardeners looking to optimize, installing a drip irrigation system can ensure your lavender receives consistent moisture without overwatering. This method delivers water directly to the roots, minimizing evaporation and keeping foliage dry, which is ideal for lavender’s preferences.

    Prune for Healthy Growth

    Prune for Healthy Growth

    Pruning lavender is essential for maintaining its shape and promoting healthy growth. Begin by trimming your lavender plants in early spring, just as new growth starts to appear.

    Using sharp, clean shears, cut back about one-third of the plant’s height, focusing on the older, woody stems. Regular pruning helps prevent the plant from becoming too woody and unproductive.

    For optimal results, aim to shape the lavender into a neat mound, which encourages even growth and allows sunlight to penetrate the center. Ensure you avoid cutting into the old wood, as this can inhibit new growth.

    Advanced gardeners might experiment with pruning in late summer after the flowering season, which can stimulate a second bloom in warmer climates. Consistent pruning over the years will result in a bushier and more vibrant plant, rewarding your efforts with lush blooms and a delightful fragrance.

    Conclusion: Growing Success with These Plants

    In nurturing your lavender garden, you’ve learned five essential relationship concepts that can transform your connections. First, like finding the right soil for lavender, relationships thrive when built on a solid foundation of trust and understanding. Second, just as lavender needs sunlight to flourish, relationships require consistent attention and warmth. Third, pruning your plants for better growth parallels the importance of healthy communication and resolving conflicts. Fourth, recognizing when to water and when to let roots breathe mirrors the balance between togetherness and personal space. Lastly, the patience required for lavender to bloom is a reminder that relationships deepen over time with effort and care.

    Now, take action by identifying one relationship that could benefit from a little extra attention and apply one of these principles today. Bookmark this article for easy access as you continue your journey toward deeper, more fulfilling connections. Remember, investing in your relationships is the key to blooming success in all areas of life. With each mindful step you take, you’re not just growing lavender; you’re cultivating a garden of thriving relationships that can withstand any season.

  • How to Grow Potatoes in a Bag

    How to Grow Potatoes in a Bag

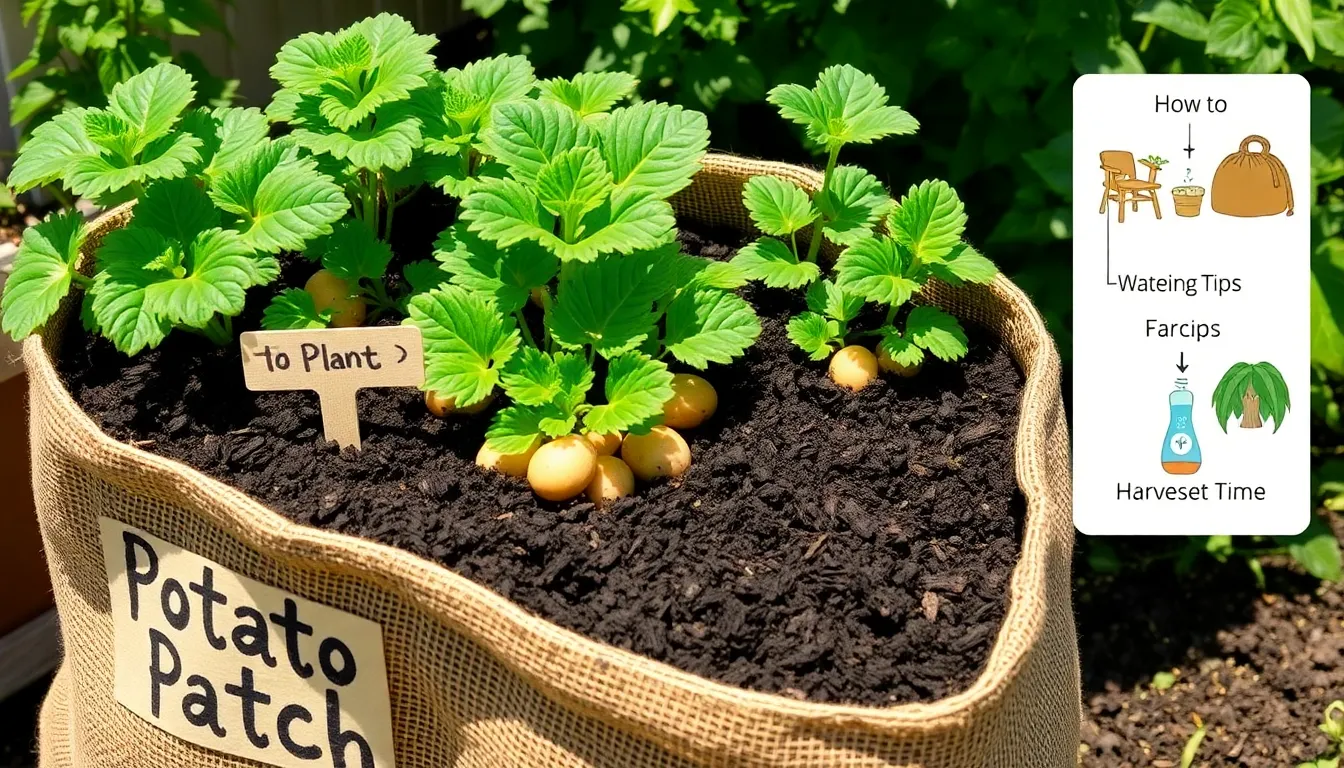
    Imagine savoring the taste of freshly harvested potatoes, knowing they came from your very own garden. Growing potatoes in a bag is not only a space-saving solution but also a rewarding endeavor that both novice and seasoned gardeners can enjoy. This approach brings the joy of gardening to urban balconies and small backyards, transforming even the tiniest of spaces into a productive oasis. Whether you’re a beginner looking to start your first crop or an experienced gardener seeking a new challenge, this method offers a delightful way to engage with your plants.

    Potatoes, with their versatility and rich nutritional profile, are a staple in kitchens worldwide, making them an invaluable addition to your home garden. Growing them in bags not only simplifies the process but also helps in managing soil quality and pests more effectively. In this article, we will guide you through selecting the right materials and setting up your potato-growing bag, ensuring a bountiful harvest. You’ll also learn essential tips on watering, fertilization, and harvesting techniques, all while maintaining a sustainable approach to gardening.

    By the end of this guide, you’ll have the confidence to cultivate your own potatoes, regardless of your gardening experience. Embrace the satisfaction of nurturing your food from seed to table, and discover the joys of a productive, small-space garden. So, let’s dive into the world of potato bag gardening, where practicality meets the pleasure of homegrown produce. Your journey to delicious, home-harvested potatoes begins here, promising not just a harvest, but a fulfilling gardening adventure.

    Select a Suitable Bag

    Select a Suitable Bag

    When selecting a bag for growing potatoes, consider its size and material for the best results. A bag with a capacity of at least 10 gallons is ideal, as it provides sufficient space for the potato tubers to develop and grow.

    Look for breathable materials such as fabric or burlap, which allow for better air circulation and drainage. Proper drainage is crucial to prevent waterlogging, which can lead to rot and diseases in your potato plants.

    Ensure the bag has sturdy handles, as this will make it easier to move your potato plants if necessary. This can be especially useful if you need to relocate them for better sunlight exposure or to protect them from harsh weather conditions.

    For advanced gardeners looking to optimize yield, consider using a bag with a flap or window to easily access the potatoes. This feature allows you to harvest mature potatoes without disturbing the rest of the plant, promoting continuous growth.

    Prepare Soil Mixture

    Prepare Soil Mixture

    To start growing potatoes in a bag, a well-prepared soil mixture is crucial for success. Use a combination of high-quality potting soil and compost to create a nutrient-rich environment for your potatoes.

    Begin by filling your bag with a layer of soil mixture about 4 inches deep. This initial layer will provide essential nutrients and support for the seed potatoes as they begin to sprout.

    Mix together equal parts of potting soil and compost to ensure a balanced blend that retains moisture while providing good drainage. This will help prevent waterlogging, which can lead to rot and other issues.

    Incorporate a handful of organic fertilizer into the soil mix to give your potatoes a strong start. Choose a balanced fertilizer, such as a 10-10-10 NPK ratio, to promote healthy growth throughout the season.

    For additional aeration, consider adding a small amount of perlite or sand to the mixture. This will improve drainage and help keep the soil loose, which is ideal for potato tubers to expand freely.

    Once the soil mixture is ready, place your seed potatoes on top, spacing them evenly. Cover them with another 4 inches of the prepared soil mix, ensuring they are well-protected and positioned for optimal growth.

    Plant Seed Potatoes

    Plant Seed Potatoes

    After preparing your soil mixture, it’s time to focus on planting your seed potatoes. Choose certified seed potatoes as they are disease-free and offer the best chance for a healthy crop.

    Begin by cutting larger seed potatoes into chunks, ensuring each piece has at least one or two eyes. Allow these pieces to dry for a day or two, which helps prevent rot when planted.

    Fill your grow bag with about 4 inches of the prepared soil mixture. Place the seed potato pieces on the soil surface, spacing them evenly to allow for growth.

    Cover the potatoes with an additional 3-4 inches of soil, ensuring they are completely buried. Water the soil lightly to encourage the potatoes to start sprouting, but avoid overwatering, which can lead to rot.

    • Ensure the grow bag is placed in a sunny location, receiving at least 6 hours of sunlight daily.
    • As the plants grow, continue to add soil until the bag is full.
    • Monitor moisture levels; the soil should remain consistently moist but not soggy.

    For enthusiastic gardeners looking to maximize their harvest, consider using a balanced, slow-release fertilizer. This added nutrient boost can promote vigorous growth and higher yields.

    Water Consistently and Correctly

    Water Consistently and Correctly

    Maintaining a consistent watering schedule is crucial for growing healthy potatoes in a bag. Begin by watering the bag thoroughly after planting, ensuring the soil is evenly moist but not waterlogged.

    Check the soil moisture regularly by feeling the top inch of soil with your fingers. If it feels dry, it’s time to water again; aim to keep the soil consistently moist without allowing it to dry out completely.

    For consistent results, consider using a drip irrigation system or soaker hose to deliver water evenly to the roots. This approach helps prevent common issues like overwatering or uneven moisture distribution, which can lead to rot or stunted growth.

    As the plants grow, their water needs will increase, especially during hot and dry weather. Be prepared to adjust your watering frequency accordingly, ensuring plants remain hydrated without standing in water, which can suffocate roots.

    Harvest When Ready

    Harvest When Ready

    Once your potato plants have flowered and the foliage begins to yellow, it’s a sign that they are nearly ready to harvest. Generally, this happens around 10 to 12 weeks after planting, but it might vary slightly depending on the potato variety and growing conditions.

    Before you start harvesting, stop watering the plants for about a week to help the skins toughen up. This will make the potatoes easier to handle and help them store better.

    To harvest, gently dump the bag onto a tarp or another clean surface and sift through the soil to find your potatoes. Be sure to handle them carefully to avoid bruising, as damaged potatoes will not store well.

    For a more extended storage period, cure the potatoes by laying them out in a single layer in a well-ventilated, dark area. Allow them to sit for about two weeks to let the skins harden and any small cuts to heal.

    If you’re aiming for immediate use, simply wash the potatoes after harvesting and enjoy your fresh produce. For longer storage, keep them in a cool, dark, and dry place, ideally between 45 to 50 degrees Fahrenheit. Remember, proper storage can extend the shelf life of your potatoes significantly.

    Conclusion: Growing Success with These Plants

    In ‘How to Grow Potatoes in a Bag’, we’ve explored five key relationship concepts that are as nurturing as they are practical. First, we delved into the importance of a solid foundation, akin to selecting the right soil, ensuring your relationship has what it needs to thrive. Second, we discussed the necessity of regular communication, much like watering, to maintain vitality. Third, we highlighted the need to address issues early, similar to removing weeds, to prevent deeper problems. Fourth, we emphasized consistent nurturing, just as sunlight fosters growth, to strengthen bonds over time. Finally, we touched on celebrating small wins, like harvesting, to enjoy the fruits of your labor together.

    Now, take a moment to reflect on one area where you can introduce these nurturing practices into your relationship today. Whether it’s planning a heartfelt conversation or simply expressing gratitude, these small steps can lead to significant growth.

    Don’t forget to bookmark this article as your go-to guide for cultivating a flourishing relationship. By applying these principles, you’re on the path to a loving and resilient partnership that stands the test of time. Together, let’s sow the seeds of success in your relationship journey!

  • How to Grow Tomatoes in Pots

    How to Grow Tomatoes in Pots

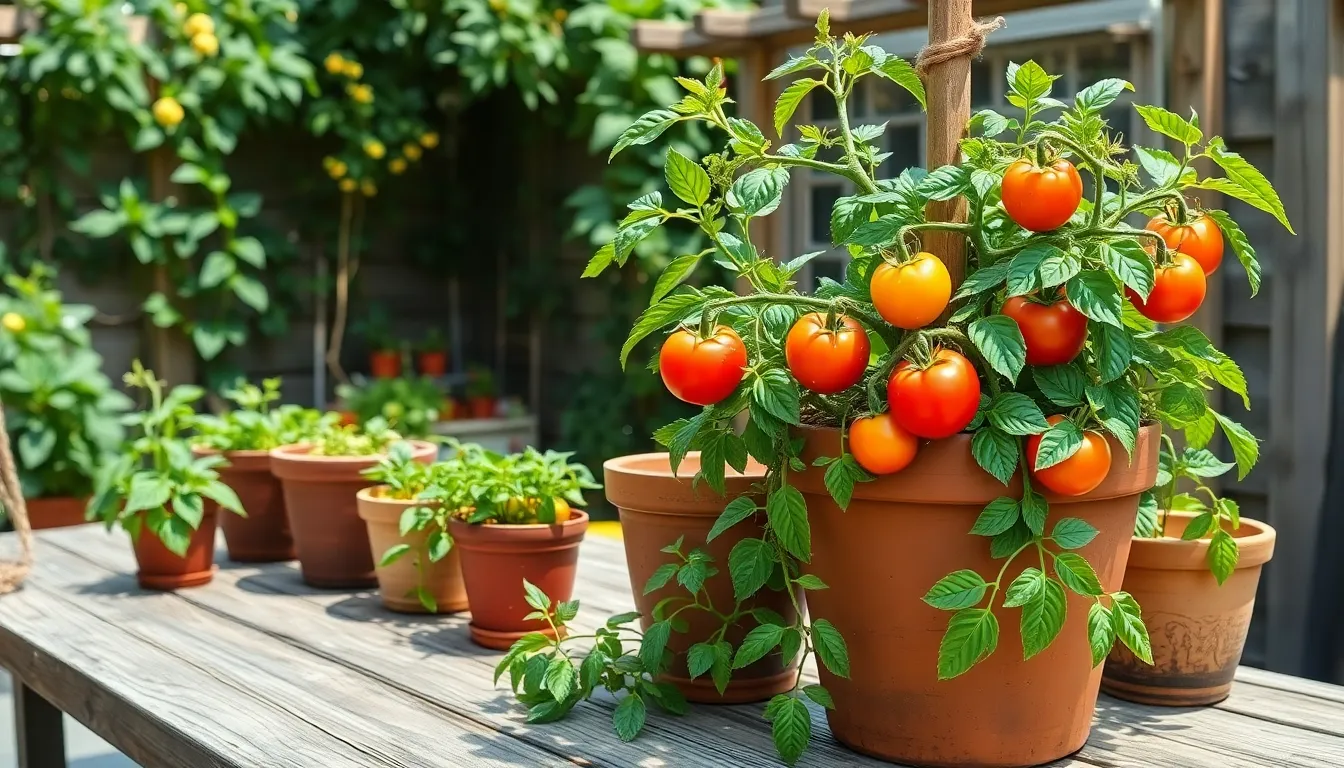
    There’s something utterly delightful about plucking a ripe, juicy tomato from your very own plant—especially when that plant is thriving right outside your kitchen door. Whether you’re a seasoned gardener with years of experience or just starting your green-thumb journey, growing tomatoes in pots is not only doable, but it’s also immensely rewarding. Container gardening brings the joy of fresh produce to those with limited space, making it possible for apartment dwellers and small-space enthusiasts to enjoy the fruits of their labor.

    Tomatoes, with their vibrant colors and robust flavors, are a staple in countless dishes, so why not grow your own? In this article, we’ll explore the essentials of cultivating tomatoes in containers, from choosing the right pot and soil to understanding the needs of various tomato varieties. You’ll discover practical tips and expert advice to ensure your tomato plants flourish, no matter the size of your garden or level of your expertise.

    We understand that every gardener’s space and circumstances are unique, which is why our approach is both flexible and comprehensive. You’ll learn how to tackle common challenges such as watering, pest control, and supporting your plants as they grow. By the end of this guide, you’ll be well-equipped to transform your patio, balcony, or even a sunny windowsill into a thriving tomato haven. So grab your gardening gloves and let’s embark on this exciting journey together, bringing the taste of summer to your home all season long.

    Select Appropriate Tomato Varieties

    Select Appropriate Tomato Varieties

    When growing tomatoes in pots, it’s essential to select varieties that thrive in confined spaces. Determinate tomato varieties are ideal for container gardening because they grow to a manageable size and produce fruit all at once.

    Consider choosing varieties like ‘Patio Princess’, ‘Tiny Tim’, or ‘Bush Early Girl’, which are specifically bred for container gardening. These varieties not only fit well in pots but also offer a bountiful harvest with minimal care.

    For those interested in heirloom varieties or unique flavors, try ‘Balcony’ or ‘Micro Tom’. These cultivars are known for their compact growth habits and can provide an intriguing addition to your patio or balcony.

    Ensure that the potting soil is rich in organic matter and well-draining to support the tomato plants’ needs. A mixture of peat, compost, and perlite will create an optimal growing environment for your potted tomatoes.

    Watering is crucial, as pots can dry out faster than garden beds. Aim to water consistently, keeping the soil moist but not waterlogged, especially during hot weather when evaporation rates are higher.

    Advanced gardeners might consider using a slow-release fertilizer or a liquid feed every couple of weeks to maximize growth and fruit production. Regular feeding ensures that your tomato plants receive all the necessary nutrients for robust growth.

    Choose Suitable Pot Size

    Choose Suitable Pot Size

    Choosing the right pot size is crucial for growing healthy tomato plants in containers. For most tomato varieties, a pot that is at least 18 inches in diameter and 20 inches deep will provide enough space for root development.

    Smaller pots can restrict root growth, leading to poor plant health and reduced yields. If you’re growing determinate varieties, which are generally more compact, you might manage with pots that are 12-14 inches in diameter, but larger is always better.

    To improve drainage and prevent waterlogging, consider using pots with multiple drainage holes at the bottom. Placing a layer of gravel or small rocks at the base of the pot can also help ensure excess water flows away from the roots.

    For advanced gardeners, using a self-watering container can be a game-changer, as it maintains consistent soil moisture levels, which tomatoes love. These containers are especially helpful if you live in a hot climate or have a busy schedule, as they reduce the frequency of watering.

    Fill Pots with Quality Soil

    Fill Pots with Quality Soil

    To give your tomato plants the best start, fill your pots with a high-quality potting mix that’s rich in organic matter. A well-draining soil blend ensures roots have the proper balance of moisture and air, critical for healthy growth.

    Opt for a potting soil that includes ingredients like peat moss, perlite, and compost. These components retain moisture without becoming waterlogged, creating an ideal environment for tomato roots.

    For gardeners looking to boost their results, consider adding a slow-release granular fertilizer to your mix. This step provides a steady supply of nutrients as your tomatoes grow, supporting lush foliage and bountiful fruit production.

    Before planting, moisten the potting mix slightly to help roots establish quickly. Aim for a damp but not soggy consistency, which encourages strong root development from the start.

    Plant Seeds or Seedlings Correctly

    Plant Seeds or Seedlings Correctly

    To start growing tomatoes in pots, you can choose between planting seeds or using seedlings. Seeds offer a more economical choice, while seedlings provide a head start in the growing season.

    When planting seeds, ensure they are sown indoors about 6-8 weeks before the last expected frost date. Use a quality seed-starting mix and keep them under grow lights or in a sunny windowsill.

    For those opting for seedlings, select healthy plants with vibrant green leaves and no signs of wilting or disease. Acclimate seedlings gradually to outdoor conditions by placing them outside for a few hours each day over a week.

    Whether starting from seeds or seedlings, ensure your pots have drainage holes to prevent waterlogging. Tomatoes thrive in well-draining soil, so consider adding perlite or sand to your potting mix for improved aeration.

    • Water seeds regularly to keep the soil moist but not soggy.
    • For seedlings, water deeply and allow the top inch of soil to dry out between waterings.
    • Ensure pots receive at least 6-8 hours of sunlight daily.

    Advanced gardeners may want to consider using a liquid fertilizer every two weeks to promote vigorous growth. Choose a balanced fertilizer or one specifically formulated for tomatoes for the best results.

    Water and Fertilize Regularly

    Water and Fertilize Regularly

    Ensuring regular watering is crucial for tomatoes grown in pots, as they tend to dry out faster than those planted in the ground. It is advisable to check the soil moisture daily by inserting your finger an inch deep into the soil; water when the top inch feels dry.

    Tomatoes need a consistent supply of nutrients to thrive, especially in containers where nutrients can be depleted quickly. Use a balanced, water-soluble fertilizer every two weeks to maintain healthy growth and abundant fruit production.

    During hot weather, your potted tomatoes may require watering twice a day to prevent wilting and stress. To help retain soil moisture, consider adding a layer of organic mulch, such as straw or shredded leaves, on top of the soil.

    Advanced gardeners might want to explore using a slow-release granular fertilizer at the start of the season to ensure a steady nutrient supply. Additionally, supplementing with a calcium-rich fertilizer can help prevent blossom end rot, a common tomato ailment.

    Remember, overwatering can be just as harmful as underwatering, leading to root rot and other issues. When watering, ensure that excess water can drain freely from the bottom of the pot to prevent waterlogging.

    Conclusion: Growing Success with These Plants

    In cultivating thriving tomatoes in pots, we’ve explored five essential relationship concepts that extend beyond gardening and into nurturing our personal connections. Firstly, understanding the importance of selecting the right ‘soil’—or foundational values—helps to anchor any relationship. Secondly, providing consistent ‘watering’—through communication and attention—ensures growth. Thirdly, offering ample ‘sunlight’—or mutual support—encourages flourishing. Fourthly, recognizing the need for ‘pruning’—addressing issues as they arise—maintains health. Finally, being patient with the ‘harvest’—celebrating growth and achievements—solidifies bonds.

    Now, take action by choosing one of these concepts to focus on today. Whether it’s initiating a heartfelt conversation or offering support to your partner, every small step counts. Save or bookmark this article to revisit these principles whenever you need a reminder or motivation.

    As you nurture these essential aspects, envision a future where your relationships are as vibrant and rewarding as a bountiful tomato harvest. Remember, every effort you make today lays the foundation for tomorrow’s success. Keep this guide close, and let it empower your journey towards relationship fulfillment.

  • Best Soil for Vegetable Plants

    Best Soil for Vegetable Plants

    Gardening is a journey filled with discovery and delight, whether you’re just starting out with your first seedling or you’re a seasoned green thumb. One of the most thrilling aspects of growing your own vegetables is the satisfaction that comes from nurturing your plants and watching them flourish, right from the soil up. In this guide, we’ll unveil the secrets to choosing the best soil for your vegetable plants, ensuring a bountiful harvest and a garden that thrives with life.

    For both beginners eager to get their hands dirty and experienced gardeners seeking to refine their craft, understanding soil is key to unlocking your garden’s full potential. The right soil not only boosts plant health but also enhances flavor and yield, giving you a kitchen full of fresh, homegrown produce. With our practical tips and expert insights, you’ll gain the confidence to create the ideal growing environment, transforming your garden into a vibrant oasis of abundance and joy.

    Carrot (Nantes)

    Carrot (Nantes)

    The Nantes carrot is known for its sweet taste and cylindrical shape, making it a popular choice for home gardens. To achieve the best results, it is essential to plant them in **loose, sandy loam soil** that is rich in organic matter.

    Ensure the soil is well-draining, as carrots do not thrive in waterlogged conditions. To prevent compacted soil, consider using raised beds or adding plenty of compost to improve aeration and **nutrient availability**.

    Before planting, test the soil pH and aim for a range of **6.0 to 6.8**, which is optimal for carrots. If your soil is too acidic, incorporate lime to adjust the pH, or use sulfur to reduce alkalinity if necessary.

    As carrots are root vegetables, they require consistent moisture to grow properly. Water them regularly, especially during dry spells, ensuring the top layer of soil remains moist but not soaked to promote **even growth**.

    For those with more experience, try succession planting every three weeks to ensure a continuous harvest throughout the growing season. This technique can help you maximize your yield and enjoy fresh Nantes carrots for an extended period.

    Lettuce (Buttercrunch)

    Lettuce (Buttercrunch)

    Lettuce, particularly the ‘Buttercrunch’ variety, thrives in soil that is rich in organic matter and well-draining. Loamy soil, which retains moisture without becoming waterlogged, is ideal for this tender leafy green.

    To prepare the perfect spot for Buttercrunch lettuce, start by incorporating compost or aged manure into your garden bed. This practice not only enriches the soil with nutrients but also enhances its texture, making it more conducive for lettuce growth.

    Maintaining a consistent watering schedule is crucial for lettuce, as it prefers evenly moist soil. Use a gentle spray nozzle to water the plants deeply, ensuring they receive about an inch of water weekly, adjusting for rainfall.

    For advanced gardeners seeking higher yields, consider using mulch around the base of the plants. Mulching helps retain soil moisture and suppresses weeds, allowing your Buttercrunch lettuce to thrive without competition.

    Tomatoes (Roma)

    Tomatoes (Roma)

    Growing Roma tomatoes successfully begins with choosing the right soil, as it affects the plant’s health and fruit production. Aim for a well-draining soil with a pH between 6.0 and 6.8 to provide the best environment for Roma tomatoes.

    To enhance soil fertility, consider blending compost or well-rotted manure into your planting area a few weeks before planting. This organic matter will enrich the soil, improving moisture retention and nutrient availability.

    When planting Roma tomatoes, ensure they receive at least six to eight hours of direct sunlight each day. This amount of sunlight will encourage robust growth and increase fruit yield.

    For gardeners seeking advanced tips, consider using a mulch layer around the plants to conserve moisture and suppress weeds. Additionally, employing a drip irrigation system can provide consistent moisture, helping to prevent blossom end rot and other moisture-related issues.

    Zucchini (Black Beauty)

    Zucchini (Black Beauty)

    The ‘Black Beauty’ zucchini thrives best in rich, well-drained soil with a pH level between 6.0 and 7.5. To achieve this, mix in plenty of organic matter like compost or rotted manure, which will also help retain moisture while providing essential nutrients.

    When planting zucchini, it’s crucial to ensure the soil is warm, ideally between 70°F and 95°F, to promote healthy germination. You can speed up this process by covering the planting area with black plastic a few weeks before planting to trap heat.

    Consistent watering is key, with zucchini needing about 1 inch of water per week. Use a soaker hose or drip irrigation to water at the base of the plants, minimizing the risk of fungal diseases that can occur with overhead watering.

    For those looking to maximize yield, consider employing succession planting every two weeks during the growing season. This technique ensures a continuous supply of fresh zucchini and can also mitigate the impact of pests and diseases.

    Cilantro (Santo)

    Cilantro (Santo)

    When cultivating Cilantro (Santo), choosing the right soil is crucial for thriving plants. These herbs prefer a well-draining, loamy soil with a pH range of 6.2 to 6.8, ensuring optimal nutrient uptake for lush growth.

    Amending the soil with organic matter such as compost or well-rotted manure can significantly enhance its fertility and drainage. This addition not only enriches the soil with essential nutrients but also improves its overall structure, promoting healthier root development.

    While cilantro enjoys moderate moisture, it’s important to avoid waterlogged conditions that can lead to root rot. A consistent watering schedule, approximately once or twice a week depending on the weather, helps maintain the right balance of moisture.

    For advanced gardeners, consider using a mulch layer around the plants to retain soil moisture and suppress weeds. Additionally, rotating cilantro with other crops can help prevent soil-borne diseases, ensuring a bountiful harvest season after season.

    Conclusion: Growing Success with These Plants

    In exploring the fertile ground of cultivating thriving relationships, we delved into five essential concepts: understanding each partner’s needs, fostering open communication, nurturing mutual respect, cultivating trust, and embracing growth together. These elements form the bedrock of any flourishing partnership, much like the perfect soil for your vegetable garden. By applying these principles, relationships can grow stronger and more resilient, ready to weather any storm.

    As an immediate next step, take a moment today to have an open conversation with your partner about one of these key concepts. Choose an area where you both can nurture improvement and commit to taking action together. This small, intentional effort can yield substantial growth in your relationship.

    Remember, relationships are ever-evolving, and having quick access to this guide can make all the difference. Save or bookmark this article to revisit these vital insights whenever needed. By doing so, you’re investing in an enduring partnership, rooted in understanding and trust.

    Looking ahead, envision a relationship that not only survives but thrives, continually blossoming through intentional care and commitment. You have the tools—now nurture your relationship into something truly remarkable.

  • How to Start a Vegetable Garden

    How to Start a Vegetable Garden

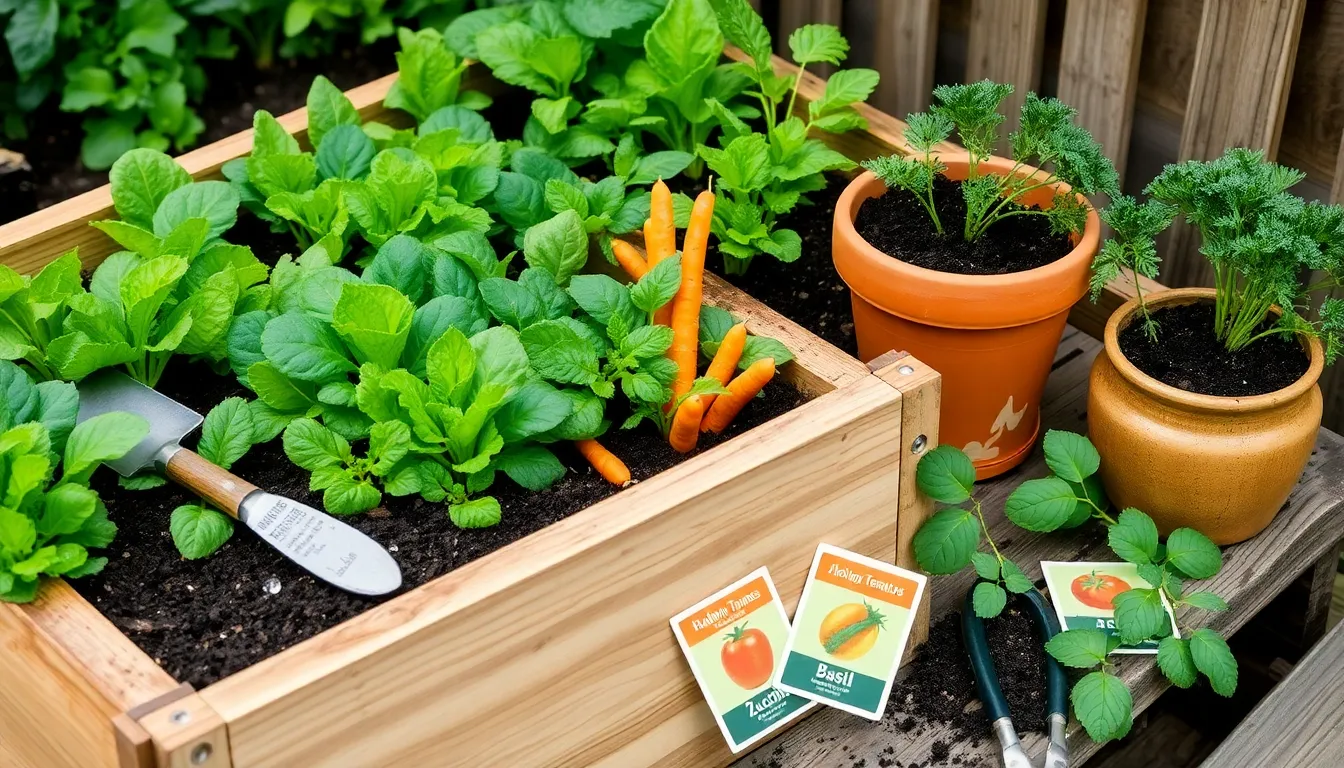
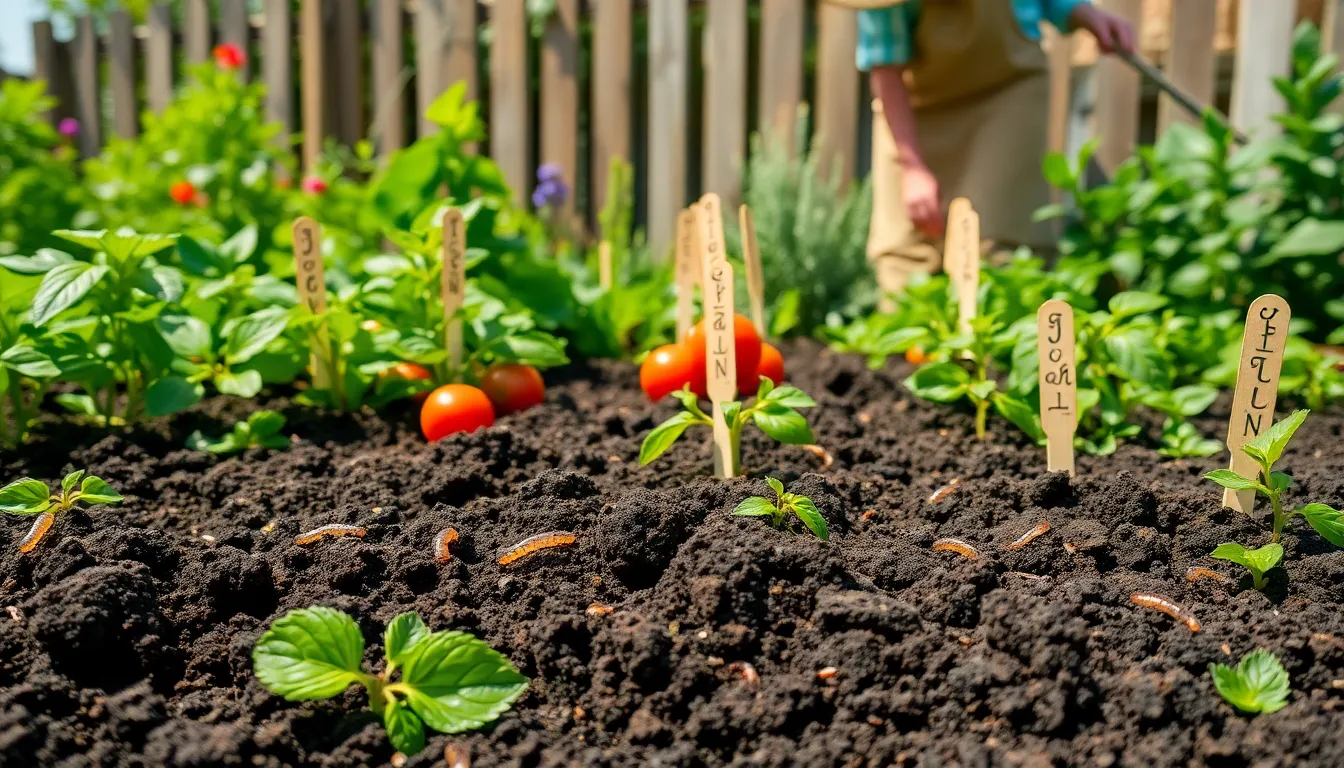
    There’s something inherently magical about transforming a patch of earth into a thriving vegetable garden. Whether you’re a seasoned green thumb or just beginning to explore the joys of gardening, starting your own vegetable garden is a journey filled with rewards—fresh produce, a deeper connection to nature, and a profound sense of accomplishment. This endeavor not only nurtures the body with wholesome food but also nourishes the soul, offering a serene escape from the hustle of daily life.

    Embarking on this green journey might seem daunting at first, but rest assured, the path to a flourishing vegetable garden is lined with simple, actionable steps. In this article, you’ll discover how to choose the perfect spot, select the right vegetables for your climate, and prepare the soil to give your plants the best start possible. We’ll guide you through the essentials of planting, watering, and caring for your garden, ensuring that whether you’re planting your first seed or your hundredth, you feel confident and inspired. Welcome to the world of vegetable gardening, where every seed holds the promise of a bountiful harvest and every gardener is a steward of growth.

    Select the Ideal Garden Spot

    Select the Ideal Garden Spot

    Choosing the right spot for your vegetable garden is crucial for maximizing growth and yield. Begin by observing your yard to identify areas that receive at least six to eight hours of full sun daily, as most vegetables thrive under these conditions.

    It’s important to consider the soil quality in your chosen location. Look for an area with well-draining soil, as this will help prevent waterlogging, which can lead to root rot in your plants.

    Ensure your garden spot is easily accessible for regular maintenance activities like watering and harvesting. Having a water source nearby is ideal, as consistent moisture is essential, especially in the early growth stages of your vegetables.

    Advanced gardeners might opt for a soil test to determine the pH and nutrient levels of the garden site. This will allow you to amend the soil with the right fertilizers or organic matter, promoting optimal plant health and productivity.

    Prepare Soil for Planting

    Prepare Soil for Planting

    Before you plant your first seed, you’ll need to ensure the soil is in top condition to support healthy plant growth. Begin by removing any weeds, rocks, or debris from the area to create a clean slate for your vegetable garden.

    Next, assess the soil type by taking a handful and squeezing it in your palm. If it forms a loose ball that’s not sticky, it’s likely a loamy soil, which is ideal for most vegetable gardens due to its balanced texture.

    It’s important to test the soil’s pH level, which should ideally be between 6.0 and 7.5 for most vegetables. You can purchase a simple pH testing kit from a garden center and adjust the pH by adding lime to raise it or sulfur to lower it as needed.

    Incorporating organic matter such as compost or well-rotted manure can significantly improve soil fertility and structure. Aim to mix in about 2 to 3 inches of organic material to a depth of 6 to 8 inches for optimal results.

    For those with heavy clay or sandy soils, consider amending with additional organic matter or using raised beds to enhance drainage and soil quality. This step is particularly beneficial for ensuring that your vegetables have access to the right amount of nutrients and moisture throughout the growing season.

    Choose Suitable Vegetable Seeds

    Choose Suitable Vegetable Seeds

    Choosing the right vegetable seeds is crucial for a successful garden, as it sets the foundation for what you will harvest. Start by considering your local climate and the growing season length, which are essential factors in selecting seeds that will thrive.

    For beginners, it’s best to opt for vegetables that are easy to grow and maintain. Varieties like radishes, lettuce, and bush beans are excellent choices because they require minimal care and have a short time to harvest.

    Experienced gardeners might want to explore heirloom or unique varieties for more diverse flavors and textures. These seeds often require specific conditions, so pay attention to details like soil type and sunlight requirements indicated on the seed packet.

    When planning your garden, think about the space you have available. If your garden area is limited, choose compact or container-friendly options such as cherry tomatoes or dwarf peppers, which can thrive in smaller spaces.

    It’s also beneficial to consider the soil quality in your garden to ensure it’s suitable for the seeds you choose. Conduct a simple soil test to determine pH and nutrient levels, and amend your soil accordingly with compost or fertilizers to create the ideal growing environment.

    Finally, for a continuous harvest throughout the season, practice succession planting by sowing new seeds every few weeks. This technique allows you to enjoy fresh produce continuously and maximizes the productivity of your garden space.

    Plan and Create Planting Layout

    Plan and Create Planting Layout

    Designing the layout of your vegetable garden begins with understanding the space you have available. Take into consideration the amount of sunlight your garden receives daily, as most vegetables thrive in full sun.

    Next, think about the spacing requirements for each type of vegetable. Leafy greens like lettuce can be planted closer together, while larger plants such as tomatoes need more room to spread.

    It’s important to group plants with similar needs together to make watering and maintenance easier. For instance, plant water-loving vegetables like cucumbers and zucchinis together, and keep drought-tolerant species in another section.

    Consider using companion planting techniques to maximize your garden’s productivity. For example, plant basil near tomatoes to improve flavor and deter pests naturally.

    • Use a grid layout for easy access and maintenance.
    • Incorporate pathways to avoid compacting the soil.
    • Rotate crops each season to maintain soil health.

    Advanced gardeners may experiment with vertical gardening to save space and increase yield. This technique is especially useful for climbing plants like beans and peas, which can be trained up trellises or supports.

    Water and Maintain Regularly

    Water and Maintain Regularly

    Once your planting layout is ready, it’s essential to establish a regular watering routine. Vegetables typically require about 1-1.5 inches of water per week, which can come from rainfall or supplemental watering.

    Consider using a soaker hose or drip irrigation system for more efficient watering. These methods allow water to seep directly into the soil, minimizing evaporation and ensuring consistent moisture levels for your plants.

    Monitoring soil moisture is crucial, especially during hot, dry spells. Stick your finger about an inch into the soil; if it feels dry, it’s time to water.

    Avoid overwatering, which can lead to root rot and other issues. Ensure your garden has well-draining soil to prevent water from pooling around your vegetable roots.

    In addition to watering, maintaining your garden involves regular upkeep like weeding and mulching. Mulching helps retain soil moisture and suppress weeds, providing a healthier growing environment for your plants.

    Keep an eye out for pests and diseases, removing any affected plants or leaves promptly. Practicing crop rotation and companion planting can also help reduce pest issues and promote a thriving garden.

    Feed your vegetables with a balanced fertilizer every few weeks to support their growth. For an organic approach, consider using compost or well-rotted manure as a nutrient-rich soil amendment.

    Conclusion: Growing Success with These Plants

    In exploring the journey of starting a vegetable garden, we’ve uncovered five key relationship concepts that extend well beyond the soil. First, we’ve learned the importance of communication, as nurturing plants requires understanding their needs just like tending to a partner’s needs. Next, patience stands out; relationships, like gardens, flourish over time with consistent care. Third, adaptability is crucial, as weathering life’s storms requires flexibility and resilience. Fourth, shared goals foster unity, whether you’re planting seeds or planning a future together. Lastly, celebrating small victories cultivates joy and strengthens bonds.

    As an actionable step, consider planting a small herb garden with your partner this weekend. It’s a simple yet powerful way to practice these concepts and deepen your connection. Remember, growth takes time, and every effort counts.

    Bookmark this article to revisit these insights whenever you seek inspiration. As you nurture both your garden and your relationship, you’ll find that the fruits of your labor are both plentiful and rewarding. Embrace the journey, and know that with love and dedication, your relationship will thrive and blossom beautifully.