Category: Home Gardening Ideas
  • Common Gardening Mistakes to Avoid

    Common Gardening Mistakes to Avoid

    Gardening is a journey filled with discovery, growth, and the occasional unexpected twist, much like the plants we lovingly tend to. Whether you’re planting your very first seed or you’ve cultivated a thriving garden for years, understanding common pitfalls can transform your gardening experience from frustrating to fulfilling. Mistakes in the garden are not merely missteps; they are opportunities for learning and growth, providing valuable insights that enrich our green-thumbed adventures.

    For both novice and seasoned gardeners, recognizing and avoiding frequent missteps can be the key to unlocking the full potential of your garden. In this article, you’ll learn how to steer clear of common errors that could hinder your plants’ health and vitality, ensuring a thriving garden that bursts with life. By delving into these pitfalls, you’ll be equipped with the knowledge to nurture your garden more effectively, making your gardening experience not only more successful but also more enjoyable.

    Join us as we explore these essential insights, helping you cultivate a garden that thrives in harmony with nature. You’ll discover practical strategies and tips that empower you to create a lush, vibrant sanctuary, no matter your level of expertise. With these tools in hand, you can embrace the joys of gardening with confidence and a deeper understanding of how to foster a flourishing environment.

    Overcrowded Planting Spaces

    Overcrowded Planting Spaces

    One common mistake gardeners make is overcrowding their planting spaces, which can lead to unhealthy plants. When plants are too close together, they compete for nutrients, water, and sunlight, often resulting in stunted growth and increased susceptibility to diseases.

    To avoid this, always check the recommended spacing for each plant on the seed packet or plant label. As a general rule, ensure there is enough room for air circulation, as this helps prevent fungal diseases and promotes healthier growth.

    For beginners, a simple way to gauge spacing is to use your hand as a guide; most vegetables need at least a hand’s width between them. Advanced gardeners might use a planting grid or square foot gardening techniques for more precise spacing, optimizing plant health and yield.

    Consider the mature size of the plant when planning your garden layout, as some plants, like tomatoes and zucchini, need more space than others such as carrots or lettuces. Companion planting can also be an effective strategy; for instance, planting taller plants like corn next to low-growing ones like beans can maximize space and resources.

    Ignoring Soil pH Levels

    Ignoring Soil pH Levels

    Understanding soil pH levels is crucial for the health and productivity of your garden. Neglecting this aspect can lead to poor plant growth and nutrient deficiencies. Soil pH affects nutrient availability, and most plants thrive in a slightly acidic to neutral pH range, typically between 6.0 and 7.0. To determine your soil’s pH, you can use an affordable home test kit available at garden centers.

    Once you know your soil’s pH, you can make necessary adjustments to create the optimal growing environment for your plants. If your soil is too acidic, adding lime can help raise the pH, whereas sulfur can lower the pH if your soil is too alkaline. Incorporating organic matter such as compost can also help moderate soil pH levels over time, providing a balanced medium for plant roots.

    For beginners, start by testing a small section of your garden to get a feel for the process. Advanced gardeners might opt for regular testing, especially if introducing new plants with specific pH preferences. Plants like blueberries and azaleas prefer more acidic soils, whereas many vegetables do best in near-neutral conditions. Tailoring your soil amendments to these needs will ensure robust growth and vibrant blooms.

    Regular monitoring and adjusting of soil pH can prevent common issues such as yellowing leaves and stunted growth. It’s a small step that can make a significant difference in the health of your garden. By paying attention to soil pH, you cultivate an environment where plants can access the nutrients they need, leading to a thriving, productive garden.

    Underwatering Young Seedlings

    Underwatering Young Seedlings

    Underwatering young seedlings is a common mistake that can severely hinder their growth. It’s crucial to remember that seedlings have delicate roots that require a consistent moisture level to thrive.

    To ensure your seedlings get the right amount of water, check the soil’s moisture by sticking your finger about an inch into the soil. If it feels dry, it’s time to water; if it’s moist, wait a day or two before checking again.

    Using a spray bottle is often the best way to water seedlings, as it provides gentle moisture without overwhelming them. Ensure that water reaches the roots by lightly misting the soil surface until it is evenly damp.

    For gardeners looking to refine their technique, consider using a moisture meter for more precise measurements. These tools can help you determine the exact moisture level of the soil and take the guesswork out of watering.

    Neglecting Pest Management

    Neglecting Pest Management

    While growing a garden can be incredibly rewarding, neglecting pest management is a common mistake that can lead to disappointment. Pests can quickly damage or destroy plants if not addressed, so it’s crucial to monitor your garden regularly for any signs of infestation.

    Implementing an integrated pest management (IPM) approach is a practical way to keep pest populations in check. This approach combines cultural, mechanical, biological, and chemical methods to manage pests sustainably and effectively.

    Start by ensuring your plants are healthy, as robust plants are less susceptible to pest damage. Use well-draining soil and amend it with compost to improve its structure and nutrient content, which will support strong plant growth.

    Introduce beneficial insects like ladybugs and lacewings to your garden, as they naturally control pest populations. For more serious infestations, consider using organic pesticides like neem oil, but always follow label instructions carefully to avoid harming beneficial organisms.

    Planting at Wrong Depth

    Planting at Wrong Depth

    Planting at the wrong depth can significantly hinder a plant’s growth and vitality. Ensuring that seeds or seedlings are planted at the correct depth is crucial for proper root development and nutrient uptake.

    For seeds, a general rule of thumb is to plant them at a depth that is two to three times their diameter. This ensures that they have enough soil coverage for stability without being too deep to hinder emergence.

    When transplanting seedlings, it’s important to plant them at the same depth they were growing in their pots, with the exception of tomatoes. Tomatoes benefit from deeper planting, as their stems can develop additional roots when buried.

    For advanced gardeners, consider the type of soil when determining planting depth. Sandy soils may require slightly deeper planting to retain moisture, whereas clay soils might need shallower planting to prevent waterlogging.

    Conclusion: Growing Success with These Plants

    In nurturing a flourishing relationship, much like a thriving garden, it’s essential to avoid common pitfalls. First, remember the importance of consistent communication; neglect here can lead to misunderstandings, just as failing to water plants can cause them to wither. Second, ensure you both set healthy boundaries, akin to planting each seed with adequate space. Third, be mindful of nurturing trust, which, like the soil, supports every aspect of your relationship. Fourth, embrace patience, allowing time for growth, as relationships, like gardens, need time to bloom. Lastly, celebrate your unique journey together, resisting the urge to compare your relationship to others, just as no two gardens are the same.

    As a proactive next step, take a moment today to express appreciation to your partner, nurturing your bond with positivity. Bookmark this article for a handy reminder of these relationship essentials. Saving it ensures you have a ready guide to help steer your shared journey.

    Remember, your relationship, like any garden, holds the potential for abundant growth and joy. By avoiding these common mistakes and tending to your relationship with care, you pave the way for a future filled with love and mutual support. 🌱❤️

  • How to Make Natural Pesticides

    How to Make Natural Pesticides

    In the serene world of gardening, every plant tells a story, but sometimes unwanted characters—pests—can disrupt the narrative. For both budding gardeners dipping their toes into this verdant art and seasoned horticulturists tending to their flourishing green spaces, understanding how to protect plants naturally is crucial. Embracing natural pesticides not only shields your garden from these pesky invaders but also nurtures a healthier, more sustainable environment. Whether you’re just starting your gardening journey or have a history of green-thumb triumphs, there’s always something new to learn about keeping your plants both vibrant and pest-free.

    By choosing natural pesticides, you’re opting for an eco-friendly and effective solution that respects the delicate balance of your garden’s ecosystem. In this article, we’ll delve into the world of natural pest control, equipping you with the knowledge to craft your own solutions using everyday ingredients. You’ll discover how common kitchen staples can be transformed into powerful allies in your fight against pests, proving that sometimes the best remedies are right under our noses. Along the way, we’ll share tips and tricks that cater to gardens of all sizes, ensuring that your sanctuary remains a haven for plants and beneficial insects alike.

    As we explore the art of making natural pesticides, you’ll gain confidence in your ability to tackle pest problems without resorting to harsh chemicals. We’ll guide you through simple, actionable steps that promise to safeguard your plants while being kind to the planet. By the end of this article, you’ll be well-equipped to create a garden that thrives in harmony with nature, celebrating the beauty of a pest-free, chemical-free environment. So grab your gardening gloves and a dash of curiosity—let’s embark on this exciting venture together, making your garden a vibrant, resilient paradise.

    Identify Targeted Pest Species

    Identify Targeted Pest Species

    Understanding the specific pests affecting your garden is crucial for creating effective natural pesticides. Start by observing which plants are being damaged and look for signs like holes in leaves, wilting, or discoloration, which can help pinpoint the culprit.

    Next, inspect the plants closely, ideally during early morning or late afternoon when pests are most active. Use a magnifying glass to identify small insects and check the undersides of leaves, as many pests, like aphids and spider mites, tend to hide there.

    Once you have identified the pest, research its habits and lifecycle to target it more effectively. For example, if dealing with slugs, you might focus on creating barriers or traps, as they thrive in moist, shaded areas.

    To enhance your pest identification skills, consider keeping a gardening journal where you can record observations and compare notes over time. This practice not only helps in recognizing patterns but also in developing a more targeted and efficient pest management strategy.

    Select Effective Natural Ingredients

    Select Effective Natural Ingredients

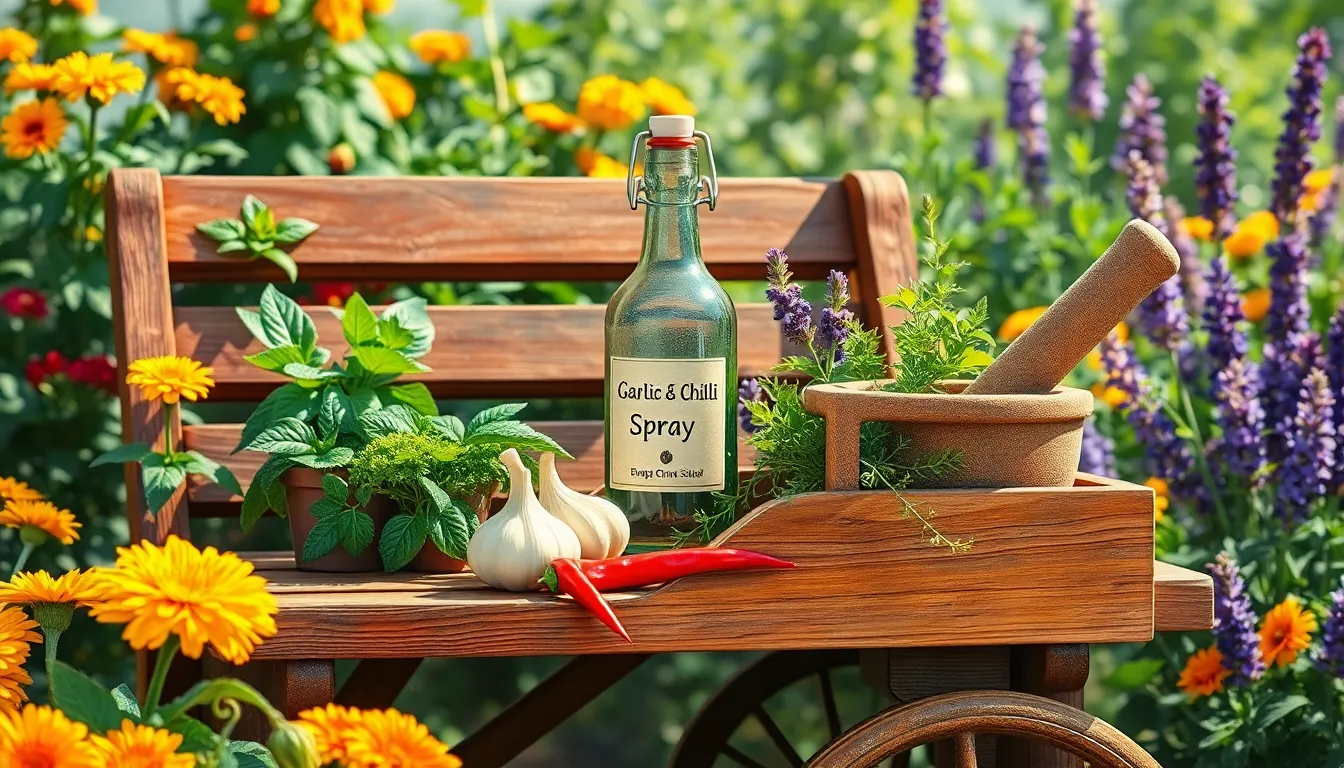
    When crafting natural pesticides, selecting effective ingredients is crucial to their success. Garlic is a powerful option due to its strong odor, which repels a variety of insects such as aphids and beetles. Beginner gardeners can easily make a garlic spray by crushing a few cloves and mixing them with water. For an advanced twist, consider adding a small amount of mineral oil to enhance the spray’s effectiveness.

    Another excellent natural pesticide ingredient is neem oil, derived from the seeds of the neem tree. It acts as an insect growth regulator, making it especially useful against pests like caterpillars and whiteflies. Mix neem oil with a small amount of liquid soap and water to create a potent spray. Experienced gardeners may choose to apply it during the early morning or late afternoon to avoid harming beneficial insects.

    Chili peppers are also used to deter pests, thanks to their heat-producing compound, capsaicin. To create a spicy deterrent, blend fresh chilies with water and strain the mixture before spraying. It’s a straightforward process suitable for beginners looking to protect their plants from chewing insects. Those with more experience might ferment the peppers for a few days to increase the mixture’s potency.

    Diatomaceous earth offers a non-toxic way to manage pests by damaging their exoskeletons. This fine powder is sprinkled directly onto soil or plant leaves, providing a barrier against crawling insects. Be sure to apply it after watering or rain to ensure it remains effective. Advanced gardeners might use it in combination with other natural ingredients for a multi-faceted approach to pest control.

    Prepare Ingredients for Mixing

    Prepare Ingredients for Mixing

    Once you’ve selected your natural ingredients, it’s time to prepare them for mixing. Begin by gathering clean containers and tools, ensuring they are free of any chemical residues that could compromise your pesticide’s effectiveness.

    Chop or grind your ingredients to increase their surface area, enhancing their potency when mixed. For example, finely mincing garlic cloves or crushing dried chili peppers will help release their active compounds.

    Measure each ingredient carefully according to your chosen recipe, as the right proportions are crucial for an effective blend. Use a kitchen scale or measuring spoons to maintain accuracy, especially when dealing with potent substances like neem oil or diatomaceous earth.

    It’s essential to wear protective gloves and possibly goggles when handling certain ingredients to avoid skin irritation. Some natural substances can be surprisingly potent, so take precautions to protect yourself while preparing them.

    Mix Ingredients Thoroughly

    Mix Ingredients Thoroughly

    After preparing your ingredients, it’s time to move on to the mixing process. Thorough mixing is crucial to ensure that your natural pesticide is effective and evenly distributed when applied to plants.

    Begin by using a clean spray bottle or garden sprayer to combine your prepared ingredients. Use a funnel to avoid spills and ensure that all components are added in the right proportions.

    For best results, shake or stir the mixture vigorously for at least one to two minutes. This helps to fully integrate the ingredients, ensuring that the active properties are evenly dispersed throughout the solution.

    Consider adding a drop of gentle dish soap to the mixture as a surfactant. This will help the solution adhere better to plant leaves, increasing its effectiveness against pests.

    Once mixed, test your pesticide on a small section of a plant to check for any adverse reactions. Wait 24 hours and observe the plant’s response; this is especially important for sensitive plants like herbs or flowering species.

    For advanced gardeners, experimenting with different ratios or adding extra ingredients like neem oil can enhance the pesticide’s potency. Always label your bottles with the date and contents, ensuring you use the mixture while it’s fresh.

    Apply Solution to Affected Areas

    Apply Solution to Affected Areas

    Once you have mixed your natural pesticide thoroughly, it’s time to apply it directly to the affected areas of your plants. Target the specific parts of the plant where pests are most prevalent, such as the undersides of leaves or around the base of the stems.

    Using a spray bottle or garden sprayer, apply the solution evenly over the affected areas. Ensure that you cover all surfaces where pests might linger, as incomplete coverage can reduce effectiveness.

    It’s best to apply the solution during cooler parts of the day, such as early morning or late afternoon. This helps to prevent the sun from causing the solution to evaporate too quickly, which might diminish its effectiveness.

    For more persistent infestations, reapply the solution every few days until the pest problem is under control. Monitor your plants closely to assess whether additional treatments are needed.

    For gardeners dealing with delicate plants, consider testing the solution on a small area first. This will help you ensure that the mixture doesn’t cause any harm or stress to the plant, maintaining its overall health.

    Conclusion: Growing Success with These Plants

    In navigating the intricate dance of relationships, the article ‘How to Make Natural Pesticides’ offers valuable insights that transcend gardens, nurturing the bonds we cherish. We explored five key concepts: the importance of clear communication to prevent misunderstandings, the power of empathy in fostering deeper connections, the role of compromise in balancing differing needs, the value of quality time in enriching relationships, and the significance of trust as the foundation of lasting partnerships.

    As a meaningful next step, take a moment today to practice active listening with a loved one—a simple act that can transform your interactions. This actionable approach not only strengthens your bond but also reinforces mutual understanding.

    To keep these essential strategies at your fingertips, save or bookmark this article. It serves as a handy guide for continually cultivating healthy and thriving relationships. Remember, every small effort counts in building a future filled with love and harmony.

    Embrace these insights and look forward to a journey of relationship success, where each step taken fosters a more fulfilling and joyful connection. Your commitment now paves the way for enduring happiness.

  • Benefits of Raised Bed Gardening

    Benefits of Raised Bed Gardening

    Imagine stepping into your garden and finding a sanctuary of thriving plants, all meticulously organized in neat, elevated rows. Raised bed gardening offers just that—a practical and visually appealing way to elevate your gardening experience, quite literally. Whether you’re a beginner eager to dig your hands into the soil for the first time or a seasoned green thumb looking to optimize your space, raised beds promise a plethora of benefits that can transform your gardening journey.

    With raised beds, the challenges of poor soil quality and tricky terrain are easily overcome, making it accessible for anyone, anywhere. This method not only enhances soil drainage and improves aeration but also offers the gardener more control over their plant’s environment, leading to healthier growth. As you delve into this article, you’ll discover how raised beds can simplify planting, reduce maintenance efforts, and even extend your growing season. Prepare to unlock the potential of your garden with insights that cater to all skill levels, providing both inspiration and practical knowledge to nurture your garden dreams.

    Maximizing Space Efficiency

    Maximizing Space Efficiency

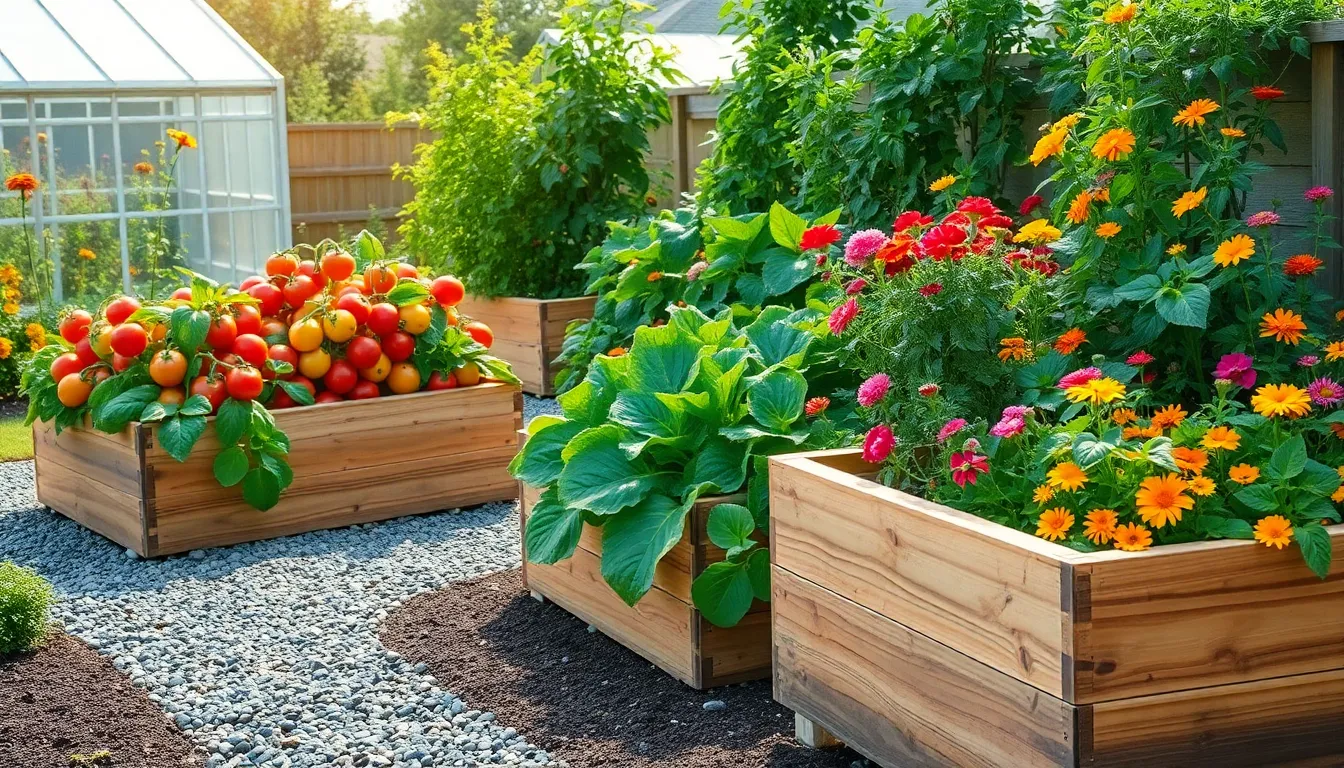
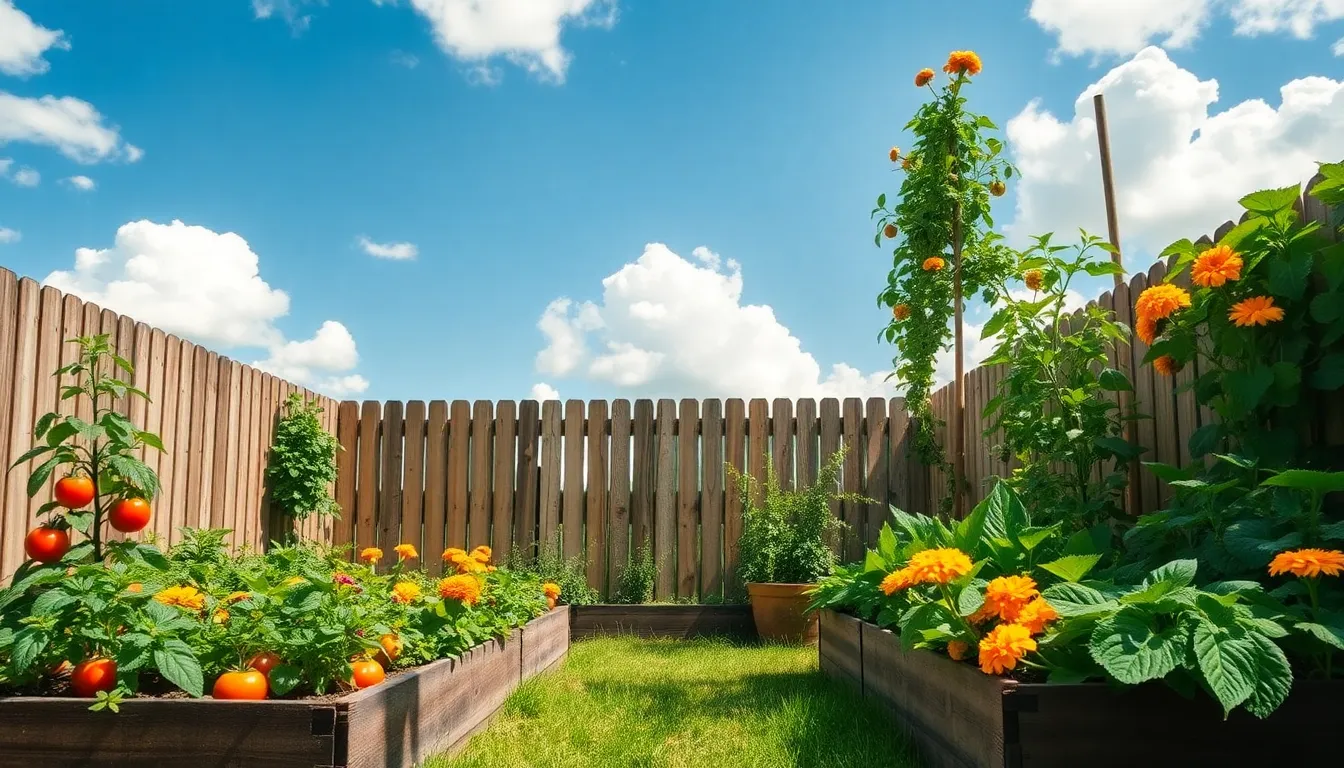
    Raised bed gardening allows you to make the most of your space by planting crops closer together than traditional row gardening. This intensive planting method not only maximizes your yield per square foot but also helps in suppressing weeds by shading the soil.

    Consider using vertical space by incorporating trellises or stakes for climbing plants such as tomatoes, peas, and cucumbers. This technique enables you to grow more varieties in a limited area and improves air circulation around the plants, reducing disease risk.

    For beginners, starting with a soil mix of 60% topsoil, 30% compost, and 10% perlite is ideal for most plants as it ensures good drainage and nutrient availability. More experienced gardeners might experiment with specific soil amendments, like worm castings or biochar, to further enhance growth conditions.

    Watering efficiently is crucial in raised beds; consider installing a drip irrigation system to deliver water directly to the plant roots. This method conserves water and minimizes evaporation, ensuring your plants consistently receive the moisture they need without over-watering.

    Improved Soil Quality Control

    Improved Soil Quality Control

    Raised bed gardening allows for better control over soil quality, enhancing plant health significantly. By choosing your own soil mix, you can create the perfect blend that meets the specific needs of your plants.

    Start with a base layer of high-quality garden soil, supplemented with organic matter like compost or well-rotted manure. This combination improves drainage and nutrient availability, crucial for healthy plant growth.

    For beginners, a simple mixture of 1/3 topsoil, 1/3 compost, and 1/3 peat moss or coconut coir is an excellent start. This mix ensures a balance of moisture retention and aeration, making it versatile for a wide range of plants.

    Experienced gardeners might consider adding specific amendments like perlite for enhanced drainage or vermiculite for better moisture retention, depending on local climate conditions. Adjusting the soil pH by incorporating lime or sulfur can also optimize growing conditions for particular plant species.

    Enhanced Drainage Benefits

    Enhanced Drainage Benefits

    Raised bed gardening offers the significant advantage of enhanced drainage, which is crucial for healthy plant growth. By elevating the soil, water is able to drain more effectively, preventing issues such as root rot that can occur in traditional in-ground gardens.

    One practical tip for gardeners is to use a well-draining soil mix specifically designed for raised beds. Combining equal parts of compost, peat moss, and vermiculite can create a light and fluffy soil that promotes excellent drainage while retaining enough moisture for plant roots.

    To further improve drainage, consider lining the bottom of the raised bed with a layer of coarse material like gravel or crushed stone. This layer helps to keep excess water away from the root zone, which is particularly beneficial during heavy rainfall.

    Watering practices also play a critical role in maintaining optimal drainage. It’s advisable to water deeply but less frequently, allowing the top inch of soil to dry out between waterings to prevent waterlogging.

    For those in regions with heavy clay soil, raised beds can be a game-changer. They allow gardeners to bypass the challenges of poor drainage inherent in clay, providing a more controlled environment for plants to thrive.

    Advanced gardeners might experiment with installing a simple drip irrigation system in their raised beds. This method can provide consistent moisture levels without oversaturation, making it easier to manage water usage efficiently.

    Easier Pest Management

    Easier Pest Management

    Raised bed gardening naturally simplifies pest management due to its elevated structure. The height of raised beds makes it more difficult for common garden pests like slugs and snails to access plants, reducing damage without the need for harsh chemicals.

    By filling raised beds with high-quality soil, you can reduce the risk of soil-borne pests. Soil that is free from pests and diseases supports healthier plant growth and minimizes the need for interventions.

    Planting companion plants in raised beds can further deter pests. Partnering plants such as marigolds with vegetables can naturally repel insects due to their scent and chemicals they release into the soil.

    For advanced pest management, consider installing a simple barrier around the edges of your raised bed. A copper tape or mesh lining can effectively prevent crawling pests from climbing up into the beds, offering a chemical-free solution that protects your crops.

    Extended Growing Season

    Extended Growing Season

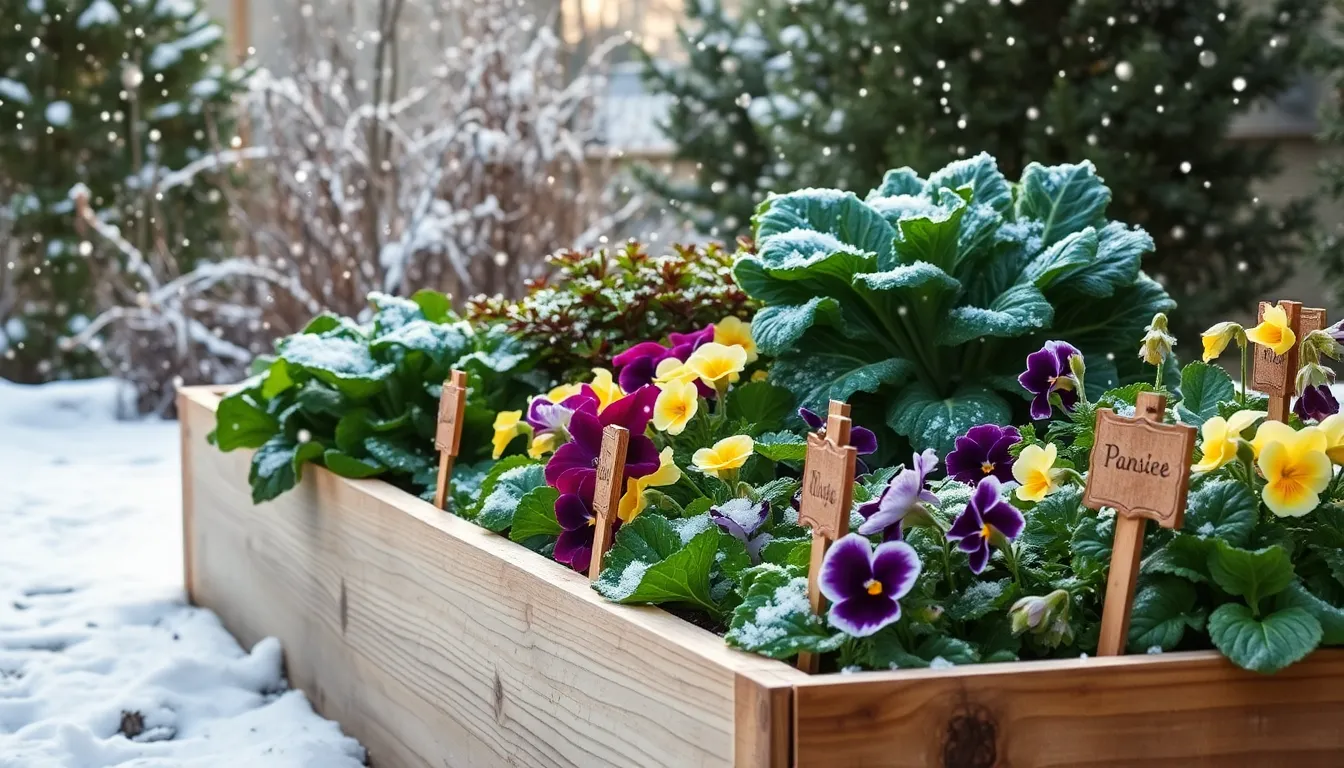
    Raised bed gardening offers an excellent opportunity to extend your growing season, allowing you to start planting earlier and harvest later. By elevating the soil, these beds warm up faster in the spring, giving you a head start on the growing season.

    For those eager to get planting, consider using row covers or cold frames to protect tender seedlings from late frosts. These simple structures can significantly increase the temperature around your plants, effectively creating a microclimate that supports early growth.

    To maximize your extended growing season, select crops that thrive in cooler temperatures, such as spinach, kale, and radishes. These vegetables can be sown directly into the soil as soon as it can be worked, taking advantage of the warmer raised bed conditions.

    Advanced gardeners might employ techniques such as succession planting to keep their beds productive longer. By staggering plantings at two-week intervals, you can enjoy a continuous harvest throughout the season.

    Conclusion: Growing Success with These Plants

    In exploring the harmonious parallels between raised bed gardening and nurturing relationships, we uncovered five enriching concepts: the importance of building a solid foundation, the benefits of maintaining healthy boundaries, the value of consistent care and attention, the rewards of patience, and the power of cultivating diversity. Each of these principles guides us in fostering relationships that flourish and withstand the test of time.

    To immediately apply these insights, choose one relationship you cherish and identify a small step you can take today to strengthen it—whether it’s setting aside time for meaningful conversation or appreciating the unique qualities that person brings into your life.

    Remember, relationships—like gardens—thrive with ongoing care. Bookmark this article now to revisit these strategies whenever you need a gentle reminder of how to nurture your connections. As you incorporate these principles into your interactions, look forward to a future where your relationships are not only resilient but also incredibly rewarding. Embrace this journey with confidence, knowing that every effort you make today plants the seeds for a more vibrant and fulfilling tomorrow.

  • How to Start a Greenhouse Garden

    How to Start a Greenhouse Garden

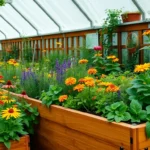
    Imagine a space where the constraints of seasons fade away, and the joy of nurturing plants thrives year-round. Welcome to the world of greenhouse gardening—a haven for both budding enthusiasts and seasoned green thumbs looking to extend their growing potential. Whether you’re dreaming of cultivating tropical treasures in cold climates or simply yearning to enjoy homegrown vegetables during the chilly months, a greenhouse can transform your gardening experience. This article will guide you through the essentials, offering insights that cater to both novices and veterans in the art of greenhouse cultivation.

    For those just starting their gardening journey, a greenhouse can seem like an intimidating endeavor, yet it holds the promise of a controlled environment where learning and experimentation are encouraged. Meanwhile, experienced gardeners will find that a greenhouse offers expanded opportunities to refine their skills and tackle new challenges. We will explore everything from selecting the right structure to understanding the nuances of temperature and humidity control. By the end of this guide, you’ll have a comprehensive roadmap to create a thriving greenhouse garden tailored to your unique needs and aspirations.

    In the sections that follow, you’ll discover tips for choosing the best location, selecting the optimal plants, and mastering the balance of nutrients and watering. We’ll delve into the specifics of maintaining a healthy environment, ensuring your plants not only survive but flourish. With thoughtful advice and practical steps, this article aims to make the journey into greenhouse gardening both accessible and rewarding. Let’s embark together on this adventure, turning the vision of a personal plant paradise into a vibrant reality.

    Select an Ideal Greenhouse Site

    Select an Ideal Greenhouse Site

    Finding the right location for your greenhouse is crucial for the success of your garden. Look for a site that offers maximum sunlight exposure, ideally facing south or southeast, to ensure your plants receive sufficient natural light.

    Avoid placing your greenhouse near large trees or buildings that can cast shadows and block sunlight. Consider wind protection as well, since a sheltered location can help prevent temperature fluctuations and reduce heating costs.

    It’s also essential to have easy access to water and electricity for your greenhouse. Installing a nearby water source will make watering your plants more convenient, and having an electrical outlet will be beneficial for heating or additional lighting if needed.

    For those in colder climates, consider installing thermal mass, such as water barrels, to capture and release heat during the night. This advanced technique can help maintain a stable temperature, promoting healthy plant growth even in chillier conditions.

    Plan the Greenhouse Layout

    Plan the Greenhouse Layout

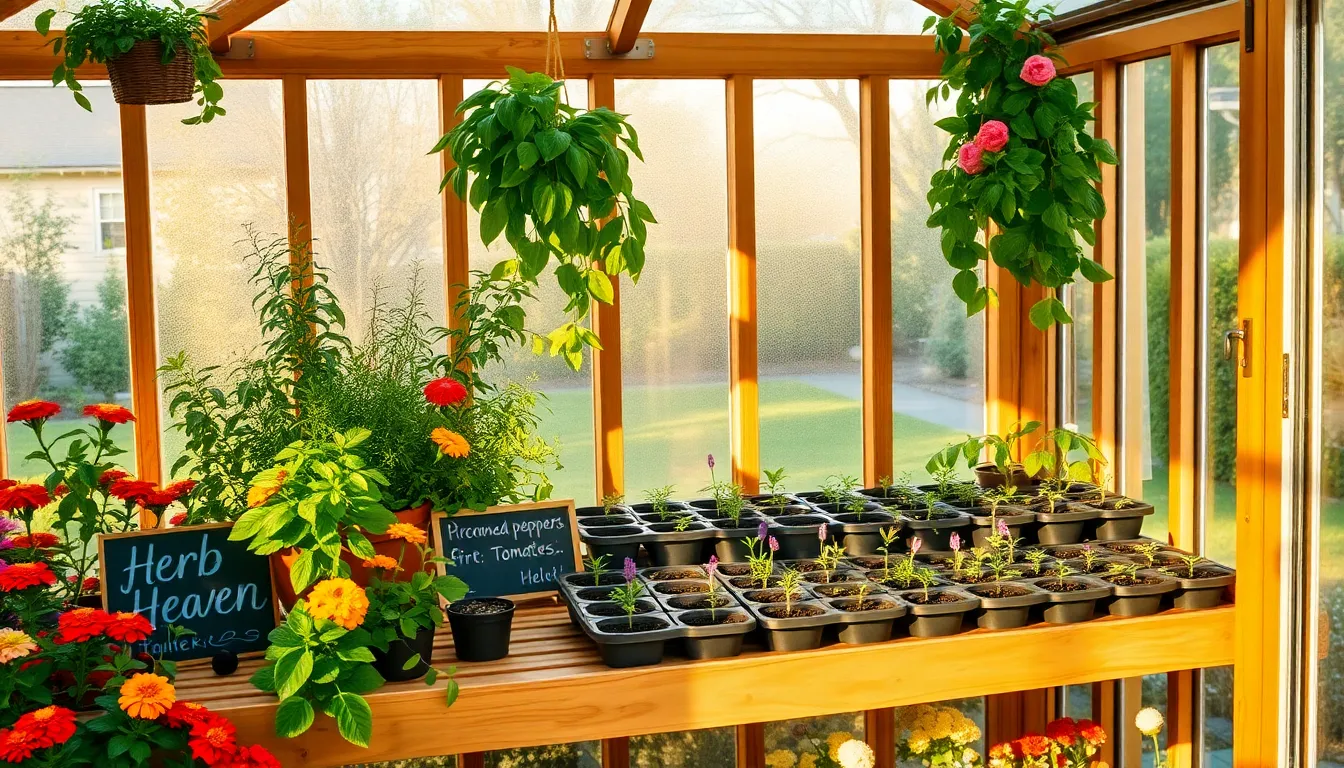
    To begin planning your greenhouse layout, consider the types of plants you wish to grow and their specific space requirements. Some plants, like tomatoes, need ample vertical space, while others, such as lettuce, can thrive in smaller containers stacked vertically.

    Next, think about how to organize your greenhouse for optimal sunlight exposure, as different plants have varying light needs. Position taller plants on the north side to prevent them from shading shorter ones, ensuring all receive adequate light.

    Incorporating a strategic watering system is crucial for plant health. Drip irrigation systems are highly effective for greenhouses as they provide consistent moisture directly to the plant roots, minimizing water waste and reducing the risk of disease.

    Lastly, use benches and shelving to maximize space and create a more efficient working environment. Adjustable shelving allows you to accommodate different plant heights and make the most of your vertical space, enabling you to grow a larger variety of plants.

    Install Proper Ventilation Systems

    Install Proper Ventilation Systems

    Proper ventilation is essential for maintaining a healthy environment inside your greenhouse. Ventilation helps regulate temperature, humidity, and air quality, preventing problems like mold growth and overheating.

    To begin, install ventilation systems that include both intake and exhaust options. Rooftop vents and sidewall louvers are effective in allowing hot air to escape and cool air to enter the greenhouse.

    For beginners, consider using automatic vent openers, which adjust based on temperature changes. These devices require no electricity and use a wax cylinder that expands and contracts to open and close vents as needed.

    Advanced gardeners might incorporate integrated climate control systems that automate both ventilation and shading. This can include thermostats and sensors to provide precise control over the greenhouse environment, optimizing plant growth conditions.

    For a cost-effective solution, install fans to promote air circulation. Oscillating fans can help distribute air evenly throughout the greenhouse, reducing the risk of hot spots and ensuring fresh air reaches all plants.

    Prepare Quality Soil Mixture

    Prepare Quality Soil Mixture

    Creating a quality soil mixture is crucial for a thriving greenhouse garden. Begin by selecting a balanced blend of organic matter, sand, and loam to ensure proper drainage and nutrient availability.

    To enhance soil fertility, incorporate well-decomposed compost into your mixture, which will supply essential nutrients and improve soil structure. Experienced gardeners might also consider adding a small amount of worm castings for an extra nutrient boost.

    For a more tailored approach, conduct a soil test to determine the pH level and nutrient content. Adjust these factors accordingly by adding lime to raise pH or sulfur to lower it, ensuring that your plants thrive in their optimal conditions.

    Consistency in soil moisture is key; ensure your soil mixture retains enough water without becoming soggy. Use a combination of perlite or vermiculite to improve aeration and moisture retention, providing a perfect environment for root development.

    For those growing a variety of plants, consider using separate soil mixtures tailored to specific plant needs, like a well-draining mix for cacti and succulents. This attention to detail will help accommodate diverse plant requirements and promote healthy growth.

    Choose Suitable Plant Varieties

    Choose Suitable Plant Varieties

    Choosing the right plant varieties is crucial for a successful greenhouse garden. Consider your climate zone and the growing conditions you can provide within your greenhouse to ensure that your plants will thrive.

    Beginners should start with hardy, easy-to-grow plants like lettuce, spinach, or radishes. These plants require minimal care and can tolerate a range of conditions, making them ideal for those still learning the ropes of greenhouse gardening.

    For more experienced gardeners, try experimenting with more challenging varieties such as orchids or citrus plants. These require specific conditions like precise humidity levels and temperature control, which can be adjusted within a greenhouse setting.

    It’s also important to consider the space available in your greenhouse. Compact plant varieties like dwarf tomatoes or bush beans can be excellent choices when space is limited, allowing you to maximize your growing area efficiently.

    To ensure optimal growth, research the specific light, water, and soil requirements of each plant variety you choose. Consistent monitoring and adjusting of these conditions will help you maintain a healthy and productive greenhouse garden.

    Conclusion: Growing Success with These Plants

    Embarking on the journey of starting a greenhouse garden can draw insightful parallels to nurturing relationships, fostering both growth and resilience. We explored key concepts: the importance of creating a nurturing environment, the balance of giving and receiving, the value of patience and understanding, the role of communication in thriving growth, and the significance of consistent care and attention. Each of these principles is as vital in a garden as they are in building strong, lasting relationships.

    As an actionable next step, why not take a moment today to apply one of these concepts? Perhaps initiate a heartfelt conversation with someone you cherish or dedicate time to actively listen and support their dreams. Small steps can lead to monumental changes.

    Remember, relationships, much like gardens, flourish with care and commitment. Bookmark this article so you can revisit these insights whenever you need a gentle reminder or encouragement.

    By prioritizing these principles, you’re planting the seeds for a future where your relationships grow abundantly. Embrace this journey, for the connections you cultivate today will bear the fruits of happiness and fulfillment tomorrow.

  • Rainwater Harvesting for Garden

    Rainwater Harvesting for Garden

    Imagine having a self-sufficient garden that not only flourishes with life but also contributes to conserving one of our planet’s most precious resources—water. Rainwater harvesting is an age-old practice that offers a modern solution to water scarcity, allowing both beginner and experienced gardeners to nurture their green spaces with nature’s own gift. By collecting and storing rainwater, you can reduce your dependency on municipal water systems, lower your water bills, and ensure your plants receive the purest form of hydration.

    Whether you’re just starting your gardening journey or have years of soil under your nails, mastering rainwater harvesting can transform how you care for your plants. This article will guide you through the essentials of setting up an efficient rainwater collection system, from selecting the right containers to integrating them seamlessly into your garden’s existing ecosystem. You will learn how to tailor your approach to suit the unique needs of your garden, ensuring that every drop is put to good use.

    Incorporating rainwater harvesting into your gardening practice is not only a step toward sustainability but also a way to deepen your connection with the natural world. You’ll discover practical tips on maintaining your system to maximize its efficiency, as well as creative ideas for utilizing harvested water throughout your garden. Let’s embark on this journey together, unlocking the potential of rainwater to support vibrant, resilient gardens while preserving our planet’s resources for future generations.

    Understanding Rainwater Harvesting Basics

    Understanding Rainwater Harvesting Basics

    Rainwater harvesting involves collecting and storing rainwater for later use in your garden, offering both ecological and economic benefits. This practice can significantly reduce your dependence on municipal water supplies, especially in areas prone to drought.

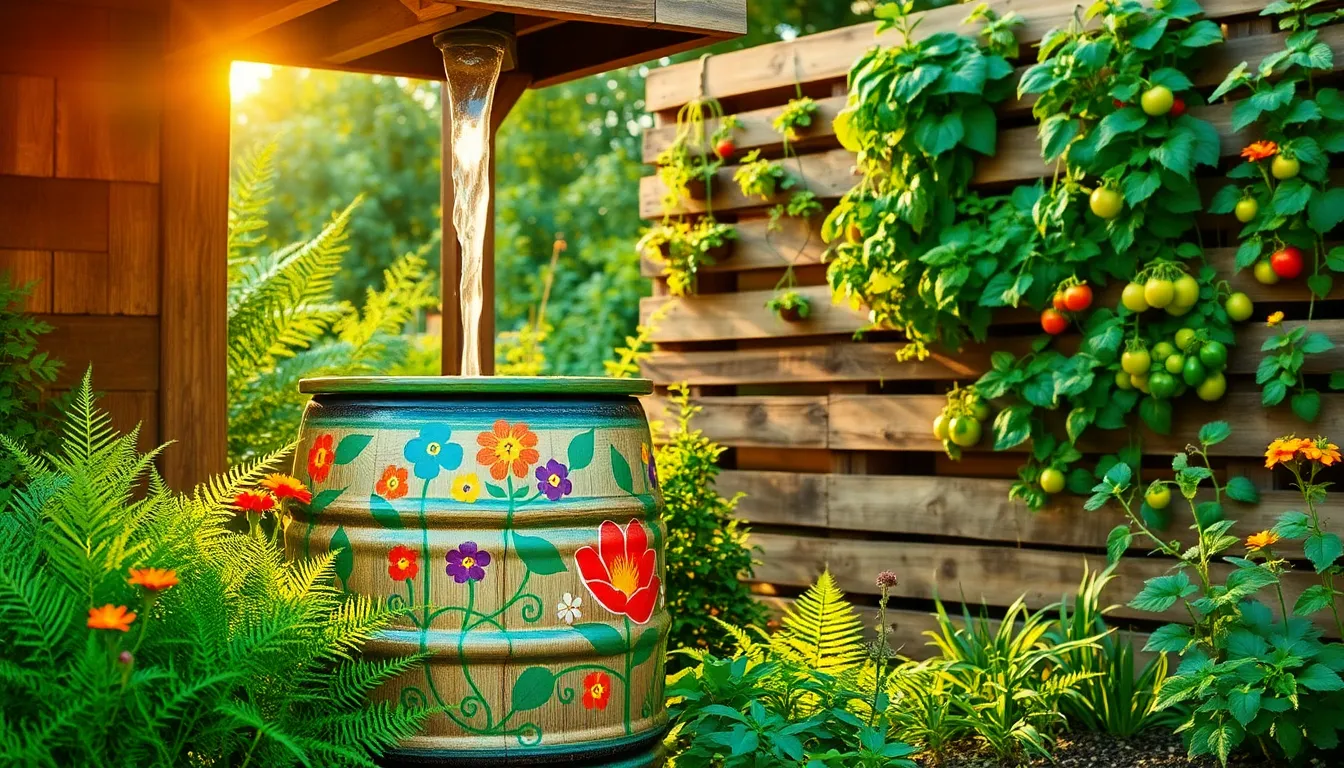
    To start harvesting rainwater, you’ll need a rain barrel or a more complex system depending on your garden size. Ensure your collection system is clean and free of contaminants to maintain water quality for your plants.

    Place your rain barrel under a downspout to maximize the capture of rainwater from your roof. Check for leaks and secure the lid to prevent insects like mosquitoes from breeding in the stored water.

    Using harvested rainwater can lead to healthier plants, as it is naturally soft and free of chemicals found in tap water. Incorporate a simple irrigation system or watering can to distribute the rainwater effectively to your plants.

    Choosing the Right Collection System

    Choosing the Right Collection System

    When selecting a rainwater collection system, consider the size of your garden and the average rainfall in your area. A small garden may require only a simple barrel, while larger spaces might benefit from a more extensive tank system.

    It’s essential to choose a system that fits your budget and maintenance capabilities. DIY options can be cost-effective, but pre-made systems often offer better durability and ease of use.

    Ensure that your collection system includes a first-flush diverter to prevent debris from contaminating your water supply. This component is crucial for maintaining water quality, especially if you plan to use the water for edible plants.

    For optimal performance, position your rain barrels or tanks to maximize water pressure. Elevating containers can improve gravity-fed irrigation systems, reducing the need for pumps.

    Regular maintenance is vital to keep your system efficient and safe. Check for leaks and clean filters regularly to prevent clogs that can impede water flow.

    Advanced gardeners might consider integrating rainwater collection with drip irrigation systems. This combination allows for precise watering, reducing waste and ensuring your plants receive the water they need directly at their roots.

    Storing Harvested Rainwater Efficiently

    Storing Harvested Rainwater Efficiently

    Storing harvested rainwater efficiently is crucial for maximizing its benefits in your garden. Begin by selecting a storage container that suits your space and water needs, such as a rain barrel or a larger cistern for extensive watering requirements.

    Placing your storage container on a stable, elevated platform can improve water flow when it’s time to use it. This setup not only enables gravity-fed watering systems but also reduces the risk of contamination from ground-level debris.

    To ensure the longevity and cleanliness of your stored rainwater, consider installing a first-flush diverter. This device prevents the initial flow of rain, which might contain contaminants from the roof, from entering your storage system.

    Regular maintenance is key to keeping your rainwater storage system efficient. Check for leaks and clean filters periodically to prevent blockages and ensure that water is free of debris.

    Irrigation Methods Using Rainwater

    Irrigation Methods Using Rainwater

    Using rainwater for irrigation not only conserves natural resources but also benefits your plants by providing them with naturally soft water free from salts and chemicals. To implement this, first, set up a rainwater collection system, such as a rain barrel, connected to your downspouts.

    Once collected, distributing rainwater to your garden can be achieved through various methods. Drip irrigation systems are highly effective, delivering moisture directly to the root zone where it’s most needed, minimizing evaporation.

    For smaller gardens or container plants, consider using a watering can to manually disperse the rainwater. This method allows you to control the amount of water each plant receives, which is especially helpful for plants with varying moisture needs.

    For a more automated approach, you can install a gravity-fed irrigation system. By elevating your rain barrel, you can use gravity to create water pressure, feeding it into soaker hoses laid out throughout your garden beds.

    It’s important to monitor the water needs of your plants regularly. During dry spells, check soil moisture by sticking a finger into the soil; if it feels dry up to your first knuckle, it’s time to water.

    Maintaining Your Harvesting System

    Maintaining Your Harvesting System

    To ensure your rainwater harvesting system remains efficient, regular maintenance is crucial. Begin by routinely inspecting your gutters and downspouts to remove any debris that may obstruct water flow.

    Cleaning your storage tanks is equally important to prevent algae growth and contamination. Using a non-toxic cleaner, scrub the interior of the tank annually, ensuring all residue is thoroughly rinsed out.

    It’s also vital to check the system’s filters and screens, replacing them as needed to maintain optimal water quality. A clogged filter can lead to poor water flow and might affect the health of your plants.

    Monitoring the water level in your tanks can help you manage your irrigation schedule effectively. During dry spells, prioritize watering plants that demand consistent moisture, such as tomatoes and cucumbers.

    For advanced gardeners, implementing a rain gauge can enhance your understanding of rainfall patterns and help optimize water usage. This tool will allow you to adjust your irrigation system based on precise measurements, ensuring your garden receives just the right amount of water.

    Conclusion: Growing Success with These Plants

    As we wrap up our exploration of ‘Rainwater Harvesting for Garden,’ it’s clear that nurturing a thriving garden is much like cultivating a healthy relationship. We’ve covered five key concepts: the importance of understanding your garden’s unique needs, the art of collecting and conserving resources, the value of consistent care and attention, the role of patience and timing in growth, and the benefits of sustainable practices for long-term flourishing. These principles mirror the dynamics of successful relationships, highlighting the need for empathy, resourcefulness, commitment, patience, and sustainability.

    Your actionable next step? Take a moment to reflect on one area in your relationship where you can apply these gardening principles today. Whether it’s listening more intently, sharing resources, or simply being patient, small changes can yield significant growth.

    Remember, relationships, like gardens, thrive with attention and care. Bookmark this article as a handy guide to revisit whenever you need a reminder of these valuable insights. By investing time and effort now, you’re planting the seeds for a future rich in love and connection. Here’s to a flourishing relationship and the sweet rewards it brings!

  • Best Gardening Tools for Beginners

    Best Gardening Tools for Beginners

    Gardening is a journey that begins with a single seed and blooms into a tapestry of colors, scents, and flavors. Whether you’re a novice just getting your hands dirty or a seasoned gardener seeking to refine your craft, the right tools can transform your garden from a patch of potential into a paradise. Our guide to the “Best Gardening Tools for Beginners” is crafted with every gardener in mind, showcasing essential tools that promise to make your gardening experience both rewarding and joyful.

    In this vibrant world of growing, having the right tools is like having a trusted companion by your side. They’ll not only ease your workload but also enhance your productivity, allowing you to focus on the simple pleasures of nurturing life from the earth. With each spade and trowel, you’ll discover the thrill of planting the seeds of success, confident in the knowledge that you’re equipped to create a thriving garden. Dive into our guide, and you’ll soon find that the garden of your dreams is within reach, ready to bloom under your care.

    Compact Hand Trowel (Precision Planting)

    Compact Hand Trowel (Precision Planting)

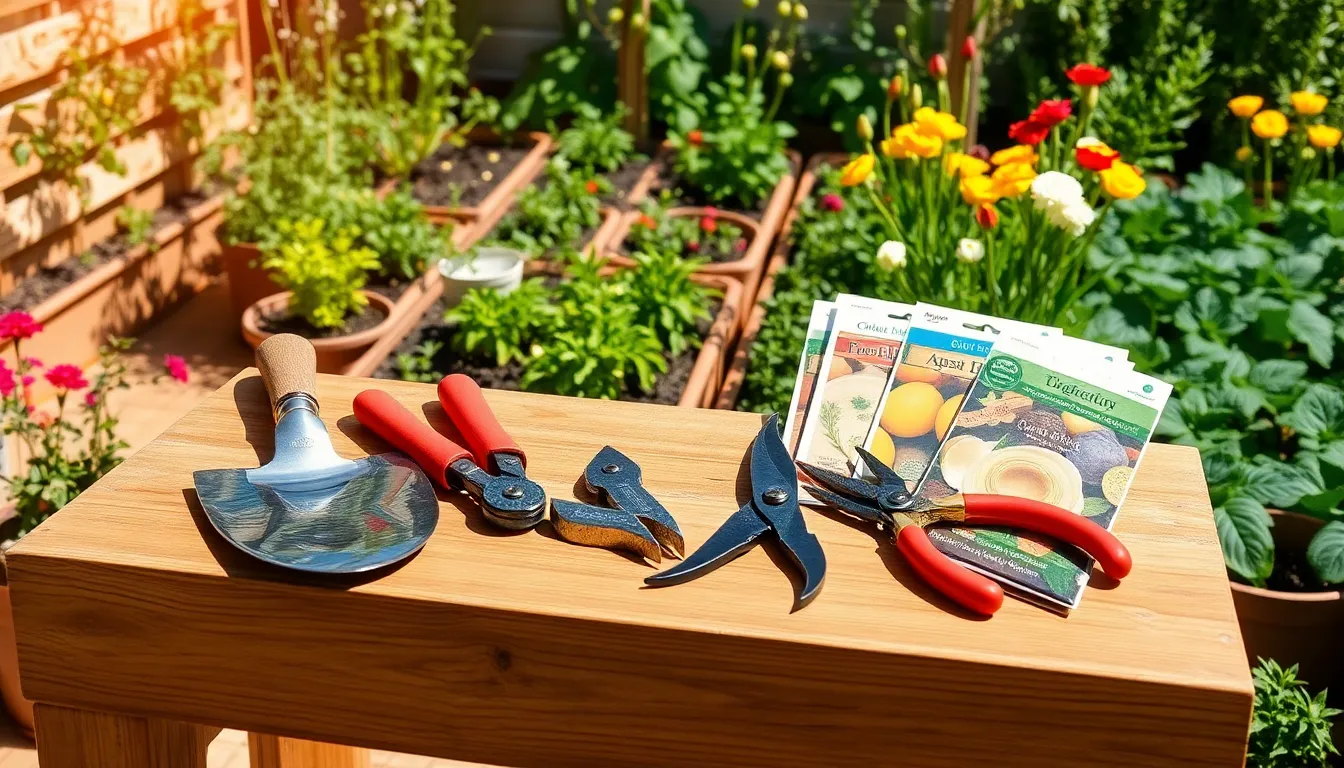
    When it comes to precision planting, the compact hand trowel is an indispensable tool for any beginner gardener. Its small size allows for accurate planting in tight spots, making it perfect for working in container gardens or densely planted areas.

    The hand trowel is ideal for tasks such as transplanting seedlings, digging small holes, and breaking up soil. Choose a trowel with a sturdy, ergonomic handle to reduce hand fatigue during extended periods of use.

    For beginners, it’s crucial to understand the soil condition before planting. Use your hand trowel to check the soil moisture by digging a small hole; the soil should be moist but not waterlogged, which is a common mistake.

    Advanced gardeners can use the hand trowel for more delicate work, such as root pruning or dividing perennials. Maintaining sharp edges on your trowel can improve efficiency, so consider sharpening it regularly for the best results.

    Adjustable Garden Pruners (Effortless Cutting)

    Adjustable Garden Pruners (Effortless Cutting)

    Adjustable garden pruners are an essential tool for any beginner gardener looking to maintain healthy plants easily. Their customizable cutting width allows you to tackle branches of various sizes, ensuring a clean cut that promotes plant health.

    Start by choosing pruners with a comfortable grip and a sharp blade, as these will reduce hand fatigue and make your pruning tasks much smoother. Opt for pruners with a bypass blade for most plants, as they offer a clean cut without crushing stems, which helps prevent disease.

    When using adjustable garden pruners, always ensure the blades are sharp and clean to avoid transferring diseases from one plant to another. After each use, wipe the blades with a solution of water and rubbing alcohol to keep them in optimal condition.

    For beginners, it’s wise to practice on less delicate plants before tackling more sensitive ones, like roses or fruit trees. Prune during the right season, typically late winter to early spring for most perennials, to encourage robust new growth when the plant emerges from dormancy.

    Lightweight Garden Hose (Flexible Watering)

    Lightweight Garden Hose (Flexible Watering)

    Choosing a lightweight garden hose is essential for beginners who want to make watering easy and efficient. These hoses are typically made of flexible materials, allowing for easy maneuverability around your garden without the hassle of heavy lifting.

    Investing in a flexible garden hose can help you reach every corner of your garden effortlessly. Look for hoses with a kink-resistant design to avoid water flow interruptions, which can be particularly frustrating during extended watering sessions.

    To ensure your plants receive the right amount of water, use your hose in conjunction with a watering schedule tailored to your plant’s needs. For most garden plants, watering in the early morning or late afternoon helps prevent evaporation and allows the soil to absorb moisture effectively.

    Advanced gardeners can benefit from using a lightweight hose with an adjustable nozzle, which provides different spray patterns for varied watering needs. This feature is especially useful for delicate plants that require a gentle mist, or for deep watering of larger plants and trees.

    Beginner-Friendly Seed Starter Kits (Simple Germination)

    Beginner-Friendly Seed Starter Kits (Simple Germination)

    Starting a garden from seed is an exciting journey, and beginner-friendly seed starter kits can make the process simple and rewarding. These kits usually come with everything you need, including biodegradable pots, growing medium, and often a selection of seeds, making them a perfect choice for those new to gardening.

    Choose a kit that offers a variety of seeds to give you a taste of different plants, such as herbs, vegetables, and flowers. When selecting seeds, consider your local growing conditions, as some plants might thrive better in your specific climate.

    For successful germination, place your seed starter kit in a warm, well-lit area, such as a windowsill that gets plenty of sunlight. If natural light is limited, supplement with a grow light to ensure your seedlings receive adequate light for healthy growth.

    Watering is crucial in the early stages, so keep the soil consistently moist but not waterlogged. A spray bottle is ideal for gently misting the soil, preventing disturbance to the delicate seeds and young roots.

    Once seedlings have sprouted and developed their first true leaves, it’s time to consider transplanting them into larger pots or directly into your garden. Harden off your seedlings by gradually exposing them to outdoor conditions over a week, helping them adapt to the new environment smoothly.

    Comfort Grip Gardening Gloves (Enhanced Dexterity)

    Comfort Grip Gardening Gloves (Enhanced Dexterity)

    Gardening can be both rewarding and physically demanding, making the right gloves essential for comfort and efficiency. Comfort Grip Gardening Gloves are designed to enhance dexterity, allowing you to perform intricate tasks with ease, such as pinching off dead leaves or delicately planting seedlings.

    These gloves typically feature a snug fit with flexible materials, providing a balance between protection and sensitivity. For beginners, investing in a pair with a breathable fabric can prevent sweaty hands, making longer gardening sessions more enjoyable.

    Advanced gardeners will appreciate gloves with reinforced fingertips, which offer durability for tasks like handling thorny plants or working in rocky soil. Look for gloves with water-resistant properties if you frequently work with moist soil or damp conditions, as they will keep your hands dry and comfortable.

    To ensure your gloves remain effective, it’s important to keep them clean and maintained.

    • Wash them regularly according to the manufacturer’s instructions
    • Store them in a dry, shaded area to prevent material degradation
    • Replace gloves when they show significant wear or lose their fit

    By taking care of your gloves, you enhance their longevity and maintain their protective capabilities.

    Conclusion: Growing Success with These Plants

    As we’ve delved into the world of gardening tools for beginners, we’ve uncovered five key relationship concepts that mirror the nurturing nature of gardening itself: communication, patience, growth, support, and commitment. Just as the right tools can transform a garden, these foundational principles can cultivate thriving relationships. Communication is like the spade, digging deep to unearth understanding. Patience is akin to the watering can, gently nurturing growth over time. Growth mirrors the pruning shears, encouraging healthy development. Support is the sturdy rake, gathering scattered pieces together. Lastly, commitment is the wheelbarrow, steadfastly carrying the load.

    Now, take action by choosing one of these principles to focus on this week. Whether it’s setting aside time for deeper conversations or supporting your partner in a new endeavor, each step brings you closer to a flourishing partnership.

    Bookmark this article to keep these insights at your fingertips, serving as a constant reminder of the tools needed for nurturing love. As you implement these concepts, envision a future where your relationships bloom and thrive, rooted in understanding and care. You have the power to cultivate an enduring bond—start today.

  • Creative Container Gardening Ideas

    Creative Container Gardening Ideas

    Welcome to the vibrant world of container gardening, where creativity blossoms as beautifully as the plants themselves! Whether you’re just starting your gardening journey or have years of experience under your belt, “Creative Container Gardening Ideas” promises to inspire you with innovative designs that transform any space into a lush, green sanctuary. The joy of watching your garden flourish, regardless of the size of your space, is unmatched, and this guide is here to ensure that every plant thrives under your care.

    In this guide, you’ll discover a treasure trove of practical design ideas that are as functional as they are beautiful, offering solutions for small balconies, sprawling patios, and everything in between. You’ll gain confidence as you learn how to select the right containers, understand the specific needs of different plants, and create stunning arrangements that make the most of your available space. With each page, you’ll find yourself more equipped to embrace the art of container gardening, reaping the rewards of a verdant oasis that reflects your unique style. Let’s embark on this rewarding journey together, cultivating not just plants but a lasting sense of accomplishment and joy.

    Choose Unique Container Materials

    Choose Unique Container Materials

    Thinking outside the box with your container choices can add a unique flair to your gardening space. Consider using unexpected materials like old wooden barrels or even vintage suitcases to create an eye-catching display.

    When selecting a container, ensure it has adequate drainage to prevent root rot, which is crucial for plant health. To enhance drainage, you can drill additional holes in the bottom of unconventional containers or add a layer of gravel before the soil.

    Wooden containers can provide a rustic look and are excellent for insulation, helping maintain consistent soil temperatures. However, they may require treatment with a non-toxic sealant to prevent them from rotting over time.

    For those with a creative streak, repurposing metal objects such as buckets or washtubs can be both trendy and sustainable. Make sure to select plants that thrive in warmer soil, as metal containers tend to heat up more quickly in the sun.

    Combine Plants for Visual Impact

    Combine Plants for Visual Impact

    Combining plants in your containers can transform them into stunning displays that capture attention. To achieve this, consider the growth habits and colors of the plants, ensuring they complement each other effectively.

    Start by selecting plants with varying heights to create depth and interest. For example, pair tall, spiky plants like ornamental grasses with trailing plants such as sweet potato vine for a dynamic look.

    Color coordination is crucial for visual impact. Choose a color palette that either harmonizes or contrasts, such as pairing purple petunias with yellow marigolds for a striking effect.

    Beyond aesthetics, it’s essential to match plants with similar care requirements. Ensure all selected plants thrive under the same light conditions—full sun, partial shade, or full shade—and have similar watering needs.

    For beginners, start with easy-to-care-for combinations like geraniums, bacopa, and ferns. These plants not only look beautiful together but also have compatible water and sunlight requirements.

    Advanced gardeners can experiment with more complex combinations, incorporating herbs and edible plants for both beauty and utility. Consider a mix of basil, purple sage, and trailing nasturtiums, which offer vibrant colors and edible delights.

    Incorporate Vertical Planting Techniques

    Incorporate Vertical Planting Techniques

    Vertical planting techniques are a fantastic way to maximize space and add dimension to your container garden. Consider using trellises or support structures for plants such as peas, beans, and tomatoes, which naturally grow upwards and thrive with vertical support.

    For beginners, starting with a simple vertical wall garden using small containers or pockets can be both rewarding and manageable. Choose herbs like thyme, mint, or basil, which require moderate watering and can be easily harvested from a vertical setup.

    To create a living wall, select a lightweight, well-draining soil mix to ensure your vertical garden remains healthy and vibrant. Remember to water these gardens more frequently than traditional containers, as they tend to dry out faster due to increased exposure.

    Advanced gardeners might explore growing vines such as clematis or morning glories, which can provide a stunning visual impact. Use sturdy frameworks and ensure adequate sunlight for these plants to encourage robust growth and abundant blooming.

    Use Colorful Pots for Accents

    Use Colorful Pots for Accents

    For a vibrant touch in your container garden, using colorful pots can serve as striking accents. Choose pots in shades that complement your plant’s foliage or flowers to create a visually appealing contrast.

    It’s essential to select pots that are not only colorful but also suitable for the plants you wish to grow. Ensure the pots have adequate drainage holes to prevent waterlogging, which can harm plant roots.

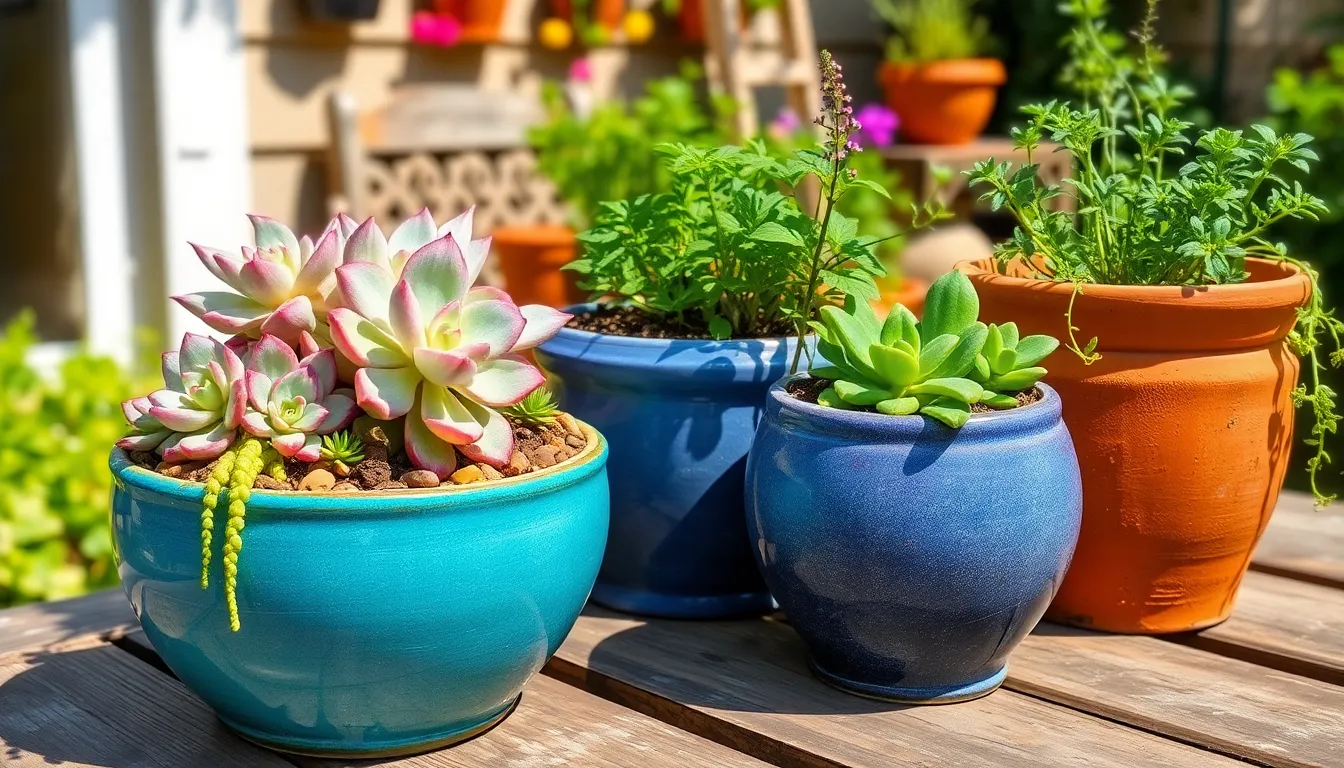
    Consider the material of the pots, as it impacts both the plant’s growing environment and the pot’s durability. Ceramic or terracotta pots retain moisture well but can be heavier, while plastic pots are lightweight and easier to move around.

    For advanced gardeners, mixing and matching different pot styles can add depth and interest to your container garden. Experiment with varying pot sizes and shapes, using smaller pots for herbs or succulents and larger ones for small trees or shrubs.

    Mix Herbs and Flowers Together

    Mix Herbs and Flowers Together

    Mixing herbs and flowers in a container can create a visually stunning and functional garden. To start, choose a large pot with good drainage to accommodate different root systems and plant sizes.

    Herbs like basil, rosemary, and thyme not only add fragrance but can repel pests from your flowers. For vibrant blooms, consider pairing them with marigolds or nasturtiums, which also thrive in similar sunlight conditions.

    Ensure the soil is rich and well-draining; a mix of potting soil with some added compost works wonderfully. Water regularly, but be careful not to over-saturate, as both herbs and flowers can suffer from root rot in overly wet soil.

    For beginners, a simple combination could start with lavender and chives, which both enjoy sunny spots and less frequent watering. More advanced gardeners might experiment with companion planting techniques, such as placing mint in a separate container to prevent it from overtaking other plants.

    Conclusion: Growing Success with These Plants

    As we explored the world of container gardening, we discovered five key relationship concepts that can enrich our personal connections. First, the importance of nurturing growth parallels tending to our relationships with care and attention. Second, choosing the right soil reminds us to build our bonds on a strong foundation of trust and understanding. Third, the significance of variety highlights embracing diversity and unique perspectives within our relationships. Fourth, consistent watering exemplifies the need for regular communication and emotional support. Lastly, pruning symbolizes the necessity to let go of negativity to foster a healthier relationship environment.

    Now, take a moment to reflect on one area where you can apply these gardening lessons to your relationships today. Whether it’s reaching out to a friend or planning a date night, small actions can lead to profound growth.

    Bookmark this article as a handy reference to revisit these insights. By integrating these creative gardening principles, you are investing in the lifelong success and flourishing of your relationships. Remember, the seeds of today’s efforts are the blossoms of tomorrow’s thriving connections.

  • Garden Planning Tips for Summer

    Garden Planning Tips for Summer

    Summer is the season when gardens truly come alive, bursting with color and vibrancy that can transform any outdoor space into a personal paradise. Whether you’re just starting your green thumb journey or are a seasoned gardener with years of experience, planning your summer garden can be both thrilling and rewarding, offering endless possibilities for creativity and growth.

    In “Garden Planning Tips for Summer,” you’ll discover a treasure trove of practical insights designed to maximize your garden’s potential, ensuring it flourishes under the warm sun. This guide is your ticket to unlocking the secrets of successful garden design, promising lush, thriving plants and bountiful harvests that will fill you with pride and satisfaction.

    With each tip, you’ll gain not just knowledge but also the confidence to make informed decisions that bring your garden dreams to life. Let this guide be your trusted companion, turning your summer gardening efforts into a delightful and fruitful endeavor that leaves you basking in the joy of nature’s bounty.

    Choose Heat-Tolerant Plant Varieties

    Choose Heat-Tolerant Plant Varieties

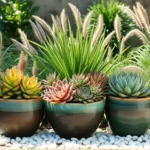
    When planning your summer garden, consider choosing heat-tolerant plant varieties to ensure success during the hottest months. Drought-resistant plants like lavender, rosemary, and succulents thrive in high temperatures and require less water, making them ideal choices for conserving resources.

    Begin with well-draining soil, as this is crucial for the health of heat-tolerant plants. Amend your garden beds with sand or gravel to improve drainage and prevent root rot, which can occur in poorly drained soils.

    Plant care is essential, and watering should be done deeply but infrequently to encourage root growth. During the peak of summer, focus on watering early in the morning or late in the afternoon to minimize evaporation and allow plants to absorb moisture effectively.

    Advanced gardeners might explore using mulch to maintain soil moisture and regulate temperature. Organic mulches like straw or bark chips can be layered around plants to reduce water evaporation and keep roots cool, which is crucial during extreme heat.

    Schedule Early Morning Watering

    Schedule Early Morning Watering

    Watering your garden in the early morning is one of the most effective strategies for summer plant care. This practice ensures that plants absorb moisture before the day’s heat intensifies, reducing water loss through evaporation.

    Morning watering also helps prevent fungal diseases, which can thrive in the damp conditions created by overnight watering. By allowing foliage to dry out during the day, you minimize the risk of mildew and other moisture-related issues.

    For beginners, a simple strategy is to water your plants at the same time each morning, ideally between 6 a.m. and 8 a.m. This routine not only helps establish a habit but also aligns with the natural rhythms of most plants, which are actively absorbing water and nutrients during these cooler morning hours.

    Advanced gardeners might consider using drip irrigation systems or soaker hoses, which deliver water directly to the plant roots with minimal wastage. These systems can be set on timers to ensure consistent watering, even on days when you’re too busy to tend to your garden personally.

    When watering, ensure the soil is thoroughly moistened to a depth of at least 6 inches for most plants. This encourages deep root growth, making plants more resilient to hot, dry conditions typical of summer.

    • Tip for beginners: Use a moisture meter to check soil dampness and avoid overwatering.
    • Advanced tip: Mulch your garden beds to retain moisture and keep roots cool.

    Apply Mulch to Conserve Moisture

    Apply Mulch to Conserve Moisture

    Mulching is a simple yet effective way to conserve moisture in your garden, especially during the hot summer months. By applying a layer of organic material, such as shredded bark or straw, you can significantly reduce evaporation from the soil surface.

    Start by choosing the right type of mulch for your plants and climate. For most gardens, a layer of 2 to 3 inches of organic mulch is ideal, as it helps retain moisture and suppress weeds.

    Before applying mulch, make sure to water your plants thoroughly. Once the soil is moist, spread the mulch evenly around the base of the plants, keeping it a few inches away from the stems to prevent rot.

    Advanced gardeners might consider using composted mulch, which not only conserves moisture but also enriches the soil as it breaks down. This type of mulch is particularly beneficial for heavy feeders like tomatoes and peppers.

    Plan for Shade with Tall Plants

    Plan for Shade with Tall Plants

    One effective way to provide shade in your garden is by planting tall plants strategically. Consider plants like sunflowers, corn, or hollyhocks that can reach impressive heights, offering a natural canopy. These plants are not only functional but also add vertical interest to your garden landscape. Make sure to choose a location that receives enough sunlight in the morning but is somewhat sheltered from harsh afternoon rays.

    When planning for shade, ensure the soil is well-draining and rich in organic matter to support tall plant growth. Amend your soil with compost or well-rotted manure to improve its fertility and structure, encouraging strong root systems. Regular watering is crucial, especially during dry spells, to maintain healthy growth. Most tall plants thrive with about an inch of water per week, either from rainfall or supplemental watering.

    For beginners, sunflowers are a great choice because they are easy to grow and maintain. Start seeds indoors a few weeks before the last frost, or sow directly into the soil once the ground has warmed. Experienced gardeners might experiment with more exotic tall plants like bamboo, which can also provide a fast-growing privacy screen. Remember to monitor for pests and diseases, which can be more prevalent in dense plantings.

    Advanced gardeners may opt to create a multi-layered shade garden by combining tall plants with mid-height and ground-cover species. This approach not only maximizes shade but also enhances biodiversity and visual appeal. Use companion planting techniques to pair species that benefit each other, such as planting corn with beans and squash. By doing so, you create a self-sustaining mini-ecosystem that thrives even in challenging summer conditions.

    Incorporate Drought-Resistant Groundcovers

    Incorporate Drought-Resistant Groundcovers

    Transforming your garden with drought-resistant groundcovers not only conserves water but also minimizes maintenance. Consider using plants like sedums and creeping thyme, which are known for their resilience and aesthetic appeal.

    Groundcovers such as these thrive in various soil types, though they prefer well-drained conditions. Before planting, it’s beneficial to amend your soil with a bit of sand or gravel to improve drainage and support healthy growth.

    Watering is minimal once these plants are established, making them perfect for busy gardeners. Initially, ensure they receive regular water until they root well, then you can reduce the frequency to about once a week during dry spells.

    For beginners, start with a small area to gain confidence. More experienced gardeners might experiment with combining different species for a mosaic-like effect that provides visual interest and biodiversity.

    Conclusion: Growing Success with These Plants

    In exploring the art of garden planning, we unearthed five key relationship concepts that can enrich your personal connections this summer. First, we discovered the importance of nurturing your relationships, much like tending to a garden, ensuring they grow with proper care and attention. Second, we emphasized the value of communication, akin to understanding your soil, to cultivate a thriving environment. Third, we discussed the significance of setting boundaries, paralleling the need for strategic garden planning to avoid overcrowding. Fourth, we highlighted the power of shared goals, similar to planting in harmony, fostering mutual growth. Lastly, we explored the resilience needed to weather challenges together, just as a garden withstands seasonal changes.

    As an actionable next step, take a moment today to engage in a heartfelt conversation with a loved one, setting the stage for a flourishing relationship. Remember, success in relationships is a journey, not a destination, and this article can be your trusty guide. Bookmark it now to revisit these insights whenever you need a gentle reminder.

    By planting seeds of love and understanding, you’re paving the way for a future filled with relationship success. Let this be the summer where your connections blossom.

  • How to Keep Rabbits Out of Garden

    How to Keep Rabbits Out of Garden

    When it comes to creating a garden that thrives, few challenges are as persistently perplexing as keeping those adorable yet ravenous rabbits at bay. For both budding gardeners and seasoned green thumbs, the sight of nibbled leaves and missing sprouts can be disheartening, turning a labor of love into an unexpected frustration. In this article, we’ll delve into practical, effective strategies to protect your precious plants while maintaining a harmonious relationship with nature.

    Understanding the habits and preferences of rabbits is key to crafting a garden defense that is both humane and effective. By the end of this guide, you’ll be equipped with a toolkit of approaches—from natural repellents to strategic garden design—that will empower you to safeguard your green haven without resorting to harsh measures. Whether you’re just starting to till your first plot or have years of experience under your belt, there’s always room to refine your approach and learn new techniques.

    We believe that every gardener deserves the joy of seeing their garden flourish untroubled by uninvited guests. Our goal is to provide you with not just solutions, but also the confidence to implement them seamlessly into your gardening routine. So, let’s embark on this journey together, turning potential obstacles into opportunities for growth and success in your personal paradise.

    Install Rabbit-Proof Fencing

    Install Rabbit-Proof Fencing

    To effectively keep rabbits out of your garden, installing a rabbit-proof fence is a reliable solution. Begin by selecting a sturdy material such as galvanized wire mesh, which should have openings no larger than one inch to prevent rabbits from squeezing through.

    Ensure the fence is at least three feet high to deter rabbits from jumping over it. Additionally, bury the bottom of the fence at least six inches deep to prevent rabbits from burrowing underneath—this is a crucial step for comprehensive protection.

    For added security, consider angling the top of the fence outward at a 45-degree angle. This angle makes it challenging for rabbits to climb, offering an extra layer of defense against persistent intruders.

    Regular maintenance is essential to keep your fence effective. Inspect the fence periodically for any damage or gaps, repairing them promptly to maintain its integrity and ensure your garden remains a rabbit-free zone.

    Apply Natural Deterrents

    Apply Natural Deterrents

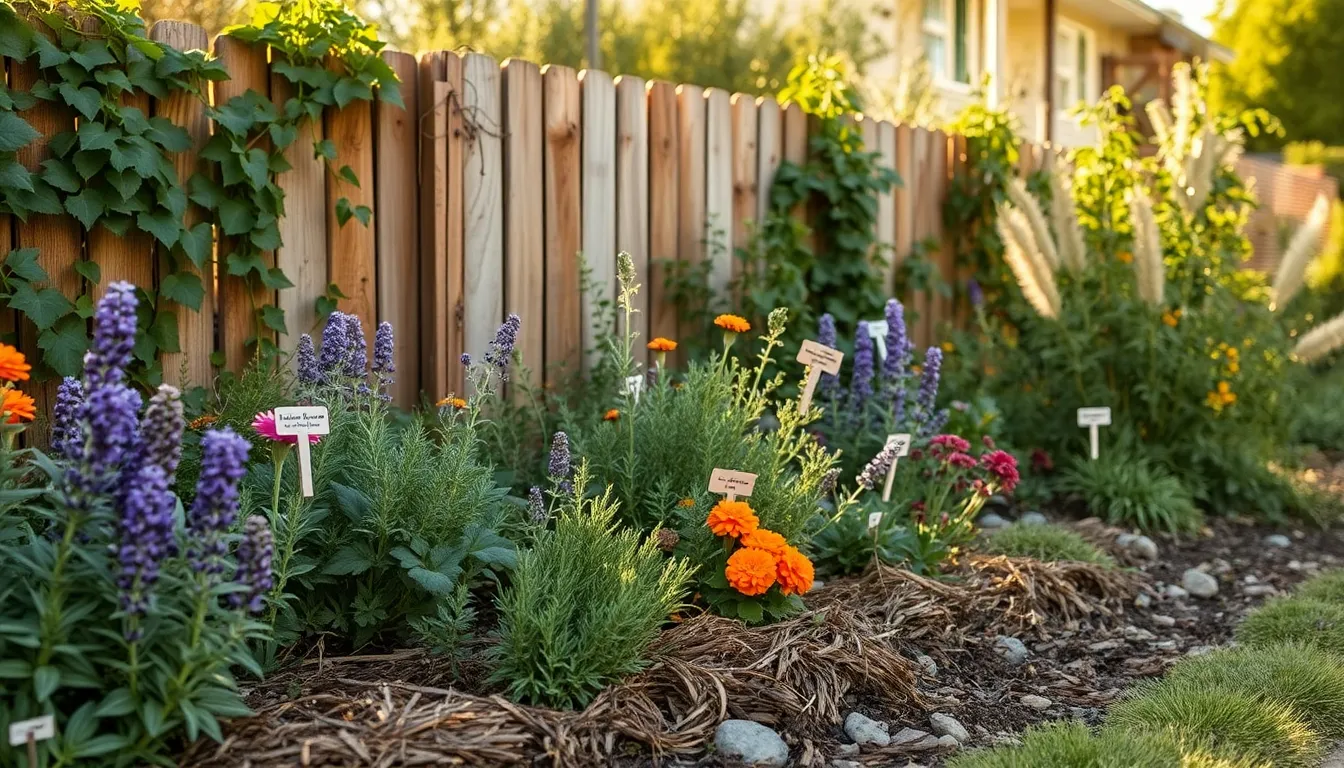
    Applying natural deterrents is an effective way to keep rabbits out of your garden without harming them. One popular method is using strong-smelling plants such as marigolds, lavender, and onions, which can be strategically planted around the garden’s perimeter to repel rabbits.

    Another option is to incorporate homemade sprays or mixtures that utilize common household ingredients. A mixture of water, crushed garlic, and a few drops of dish soap can be sprayed on plants to create a scent that rabbits find unappealing.

    It’s also beneficial to spread certain organic materials around your garden that rabbits dislike. Sprinkling blood meal or bone meal onto the soil not only repels rabbits but also enriches the soil with nutrients, enhancing plant growth.

    For gardeners seeking advanced techniques, consider using predator urine as a deterrent. Products containing coyote or fox urine can be applied around the garden to simulate the presence of natural predators, creating an environment that rabbits tend to avoid.

    Remove Nearby Rabbit Habitats

    Remove Nearby Rabbit Habitats

    Removing nearby rabbit habitats is a crucial step in keeping these furry visitors out of your garden. Rabbits are attracted to areas that offer both food and shelter, so addressing these factors is essential.

    Begin by identifying and removing potential hiding spots like piles of brush, dense shrubs, or low-growing plants. By clearing these areas, you make your garden less inviting for rabbits looking for a cozy home.

    Consider installing physical barriers such as wire mesh fencing around your garden perimeter. A fence at least 2 feet high, with the bottom buried 6 inches deep, can effectively deter rabbits.

    For gardens with existing rabbit issues, regularly inspect and maintain any garden fences or barriers. Ensure that there are no gaps or weak spots where rabbits could squeeze through or burrow under.

    • Remove debris and clutter around your garden to eliminate potential nesting sites.
    • Trim low-hanging branches or dense undergrowth frequently to reduce cover.
    • Use decorative rocks or mulch to cover bare soil areas, making it less appealing for rabbits to dig.

    Incorporating these strategies not only helps in rabbit control but also enhances the overall tidiness and health of your garden. By being proactive, you protect your plants from damage while maintaining a beautiful outdoor space.

    Use Raised Garden Beds

    Use Raised Garden Beds

    Raised garden beds offer an effective way to keep rabbits out of your garden, as these structures naturally create a barrier that is difficult for rabbits to penetrate. By elevating your plants, you make it harder for rabbits to reach them, adding an additional layer of protection to your garden area.

    Consider building your raised bed at least 18 inches high to maximize effectiveness against rabbit intrusion. Use materials such as untreated wood, stone, or metal to construct your beds, ensuring durability and longevity in your garden setup.

    Fill the raised beds with a high-quality soil mix that includes compost to provide your plants with rich nutrients. This setup not only helps in protecting plants from rabbits but also enhances plant growth by improving drainage and preventing soil compaction.

    For added security, cover the sides of your raised bed with a fine-mesh wire or hardware cloth to prevent any persistent rabbits from gnawing their way through. Ensure the mesh extends a few inches into the ground to deter any burrowing attempts from below.

    Incorporate Rabbit-Resistant Plants

    Incorporate Rabbit-Resistant Plants

    One effective way to deter rabbits from your garden is to incorporate plants they generally avoid. Plants with strong scents or fuzzy leaves, like lavender and lamb’s ear, can be natural repellents. These plants not only add beauty to your garden but also require minimal maintenance once established. Lavender thrives in well-drained soil and needs full sun, while lamb’s ear prefers a slightly shaded spot with moderately moist soil.

    Consider mixing ornamental grasses like fountain grass or blue fescue into your plantings. Rabbits tend to leave these alone due to their texture and tougher leaves. Plant these in well-draining soil and ensure they receive adequate sunlight, as most grasses prefer full sun to partial shade. Regularly trim back any dead foliage to keep the plants healthy and looking their best.

    For those seeking a splash of color, marigolds and snapdragons are excellent choices. These plants not only brighten up your garden but are also known for their rabbit-resistant properties due to their taste and fragrance. Marigolds prefer full sun and moderately fertile soil, while snapdragons thrive in cooler conditions with rich, well-draining soil. Water these plants consistently, but be careful not to overwater, especially in areas with clay-heavy soils.

    In addition to these, try planting herbs such as rosemary and sage, which are rarely nibbled on by rabbits. These herbs are easy to maintain and can also be harvested for culinary uses. Rosemary prefers dry, sandy soil and full sun, while sage can tolerate poorer soil conditions but appreciates good drainage and sunny spots. Make sure to prune them regularly to encourage bushy growth and keep them from becoming woody.

    Conclusion: Growing Success with These Plants

    In navigating the intricate dance of relationships, understanding and implementing key concepts can transform challenges into opportunities for growth. In this article, we explored five pivotal concepts: communication, trust, empathy, boundaries, and mutual respect. By fostering open communication, nurturing trust, practicing empathy, establishing clear boundaries, and ensuring mutual respect, you lay a solid foundation for a flourishing relationship.

    As an immediate step, consider having an open, honest conversation with your partner or loved one today. This simple act can pave the way for deeper understanding and stronger connections. To ensure you have this valuable information at your fingertips whenever you need it, don’t forget to bookmark this article. It’s a resource you might want to revisit as you continue to nurture and develop your relationships.

    Remember, every relationship is a journey, and with the right tools and mindset, you can navigate it successfully. By committing to these principles, you are not just preserving relationships; you are creating a future rich with meaningful, resilient connections. Save this guide as your go-to resource, and step confidently toward a future where your relationships thrive.

  • Winter Gardening Tips

    Winter Gardening Tips

    As the chill of winter sets in, many gardeners might tuck away their tools, but the true enthusiast knows this season holds its own unique magic. Whether you’re just starting out or you’ve been tending your garden for years, embracing winter gardening can bring a fresh burst of joy and a sense of accomplishment as you watch your garden thrive against the odds.

    This guide is packed with practical tips that will transform your winter landscape into a flourishing oasis, providing both beauty and bounty. From selecting resilient plant varieties to crafting ingenious frost protection, you’ll discover strategies that nurture your green space while keeping your passion for gardening alive during the colder months.

    With each tip, you’ll gain confidence and inspiration, opening up new possibilities for your garden and enhancing your skills. By the time spring rolls around, you’ll not only have a garden that’s ready to burst into life but also a deeper appreciation for the rewarding cycle of nature’s seasons.

    Protect Plants with Mulch

    Protect Plants with Mulch

    Mulching is a simple yet powerful technique to help your garden survive the winter months. By insulating the soil, mulch helps to maintain a stable temperature and moisture level, which is crucial for plant health during cold weather.

    Begin by choosing the right type of mulch for your garden. Organic options like straw, shredded bark, or compost are excellent choices because they gradually break down, enriching the soil with nutrients.

    For best results, apply a layer of 2 to 4 inches of mulch around your plants, ensuring it doesn’t directly touch the stems or trunks to prevent rot. This thickness provides adequate insulation and suppresses weeds that might compete with your plants for nutrients.

    Advanced gardeners can use mulch to experiment with microclimates in their garden. Varying the depth and type of mulch can create different conditions that some plants may prefer, offering a subtle way to tailor growing environments.

    Prune Dormant Trees Carefully

    Prune Dormant Trees Carefully

    Winter is the ideal time to prune trees while they are dormant, minimizing stress and promoting healthy growth in spring. Ensure your tools are sharp and clean to make precise cuts that heal quickly and reduce the risk of disease.

    Begin by removing any dead, damaged, or diseased branches, as they can harbor pests and diseases. Cut branches at the node where they meet another branch or the trunk to avoid leaving stubs that are prone to decay.

    For those new to pruning, focus on shaping the tree to allow more sunlight and air to penetrate the canopy. This can involve thinning the interior branches and cutting back any that are crossing or rubbing against each other.

    Experienced gardeners might consider advanced pruning techniques such as espalier or pollarding for specific tree shapes. Research the natural growth patterns of your tree species to understand how much can be safely removed without hindering its growth.

    Water Sparingly During Frost

    Water Sparingly During Frost

    During frosty periods, it’s crucial to water your plants sparingly to avoid damaging their root systems. Watering in the morning allows any excess moisture to evaporate before nightfall, reducing the risk of ice formation around the roots.

    Consider the soil type of your garden when planning your watering strategy. Sandy soils drain quickly and may require slightly more frequent watering than clay soils, which retain moisture longer.

    Focus on watering the base of the plant rather than the foliage to prevent frost damage. This technique helps keep the roots hydrated without exposing leaves to water that can freeze and cause injury.

    For advanced gardeners, installing a moisture meter can be a valuable tool in managing watering schedules during frost. This device provides precise measurements, ensuring that your plants receive just the right amount of water needed to thrive.

    Install Row Covers for Insulation

    Install Row Covers for Insulation

    To protect your plants from winter chills, consider installing row covers for insulation. These covers act as a barrier against frost, wind, and pests while allowing light, air, and moisture to penetrate.

    Begin by selecting a row cover material that suits your climate and plant needs. Lightweight covers are ideal for milder regions, while heavier fabrics offer better insulation for colder areas.

    When installing, ensure the covers are securely anchored to prevent them from blowing away in strong winds. Use garden staples or rocks to hold down the edges, creating a snug fit over the plants.

    For added protection, place hoops or frames over your garden beds before draping the covers. This setup provides an air gap between the fabric and the plants, enhancing insulation and minimizing frost damage.

    Regularly check underneath the covers for any signs of condensation, which can lead to mold or mildew. If condensation is present, briefly remove the covers on mild days to allow air circulation and dry out any moisture.

    Plant Cold-Tolerant Vegetables

    Plant Cold-Tolerant Vegetables

    Winter gardening can be rewarding when you choose the right vegetables, especially cold-tolerant ones. Planting vegetables that thrive in cooler temperatures ensures a productive garden even in chilly months.

    Kale is an excellent cold-tolerant vegetable, known for its resilience in frosty conditions. To grow kale successfully, ensure the soil is well-drained and rich in organic matter, and space the seeds about 12 to 18 inches apart to allow for healthy growth.

    Another great option is Brussels sprouts, which actually improve in flavor after a frost. Start these plants indoors 6 to 8 weeks before the first frost, then transplant them to your garden, providing full sun and slightly acidic soil for the best results.

    For a faster-growing option, consider spinach, which thrives in temperatures as low as 20°F (-6°C). Sow spinach seeds directly in the garden, about 1/2 inch deep, and keep the soil consistently moist but not waterlogged to encourage rapid growth.

    Advanced gardeners might experiment with using mulch to regulate soil temperature and retain moisture for these cold-tolerant crops. Apply a layer of straw or shredded leaves around the base of your plants, which can help protect roots from freezing temperatures and reduce weed growth.

    Conclusion: Growing Success with These Plants

    As we wrap up our exploration of ‘Winter Gardening Tips,’ let’s revisit the five key relationship concepts that can nourish your connection even in the colder seasons. Firstly, embrace patience like a gardener waiting for spring, understanding that relationships blossom in their own time. Second, cultivate communication, ensuring that your words act as seeds of understanding and empathy. Third, nurture the growth with consistent care, as small gestures of love can weather any storm. Fourth, adapt to change, recognizing that flexibility is essential for thriving partnerships. Lastly, celebrate the harvest by cherishing the milestones and moments you share together.

    Now, take an actionable step: initiate a heart-to-heart conversation with your partner about a shared goal or dream. This simple act can deepen your bond and set the stage for future growth. Remember to bookmark this article as your go-to resource for nurturing a resilient and flourishing relationship.

    As you venture forward, know that with these tools in hand, your relationship is poised for success, thriving through every season life presents. Empower yourself with this knowledge and cultivate a love that stands the test of time.